Category Archives: Building

Limewashing the Facade

I am using Pozilime from Ingilby which is limewash with a few additives that allow it to stick to masonry paint, and will use normal limewash on the new lime render.  Limewash is weird stuff – it is transparent when applied thinly and then goes white a few hours later as it dries.

limewash-drying

It looks magnificent even after just the first coat. Later after 4 coats it looks much the same but has finally covered the old paint.

It is so nice to rid the front of the magnolia paint.

limewash

Preparing the Facade for Paint

I’ve spent a week on the front of the house getting it ready for paint.  So far I’ve finished stripping the modern gloss paint from the wood and mostly sanded it, applied the final coat of render to the oriel window, and made a small repair to the timber frame just above the middle of the window.  The old timber was chiselled out at an angle so water doesn’t run into the joint.

bay-before-roof

Gaps in the timber have been filled with linseed putty. The frame is far from perfect, but is generally sound. The wood will be finished in Linseed oil paint which doesn’t crack in the sun and is breathable unlike the modern gloss on the downstairs windows which needs stripping and repainting after only 2 years.

linseed-filler

After 4 months boarded up the windows are just about back in place in the oriel window.  I used linseed putty which turns out to be easier than modern stuff when you get the hang of it, but time consuming to apply.  The glass looks very much older than 105 years, but I suppose that was the original intention.

windows-fitted

There used to be a big hole in the sole plate of the timber frame.  I think the pegs rot out, water gets into the peg hole, then after further years of neglect the frame rots.  For that reason I’ve replaced all of the broken pegs.   A piece of Edwardian softwood recovered from the attic made a perfect repair.  Angling the bottom and knocking it into place should provide good support for the post.

The silicone sealant between the frame and the plinth didn’t do the frame any good.   I’ve scraped out the damp loose stuff and filled the gap with lime mortar which should allow it to dry out.

sole-plate-repair

All of the various gaps have been filled with lime on the infill panels and linseed putty on the frame.  The strategy is to use breathable materials to keep the frame dry, and use them to seal gaps to keep water out in the first place.  The first coat of limewash will go on soon.

Rendering the Oriel Window

I had the idea of rendering the exterior and plastering the interior of the oriel window at the same time because I was using the same lime mix for both.  This was a bad idea – making the exterior watertight before messing with the interior would have been more sensible.

The oak window sill (needed to go in before plastering) was made by Cardington Joinery and is marvellous.

oak-sill

The timber above the oriel window was originally in-filled with brick then roughcast rendered (in a very early use of portland cement – yuk).  I wanted to reduce the weight of the window because the lintel over the window below has a pronounced bend.  Woodwool board would have been an ideal infill but it isn’t widely available and delivery would have cost £100 for the £6 sheet I needed, so I went for lath.

In hindsight the span is slightly too long for lath and it bent when the wet lime render was applied.  Then it sprung back as it dried so I might end up with a feature bulge.

lath-oriel-window

It didn’t go well.  The lime failed to set and after a week was soft and crumbly.  I suspect I let it dry too quickly, or it is possible the mix or some component was wrong.  Whichever It needs to come off and be done again and I’ll experiment first to make sure I have sorted the problem,

Plan B is back to the original plan using wood wool board.  I only needed small sections and used offcuts pulled from Anna’s skip.  Thanks Anna.

woodwool-board

The lime failure turned out to be my fault.  The plastering sand is washed so is poorly graded and needed about 1:1.25 lime to sand compared to the 1:2.5 ratio I tend to use for mortar.

The new render was much stickier than the old, and the wood wool board turned out to be very much easier to render than lath to the point where I hardly dropped any plaster when doing the ceiling.   The first coat went on nice and flat and will dry (and be wetted) for a week before the finishing coat.

first-coat-render

Next job will be fitting the windows.  But I can’t do that yet as I need access to tend the lime plaster inside.   Next job might be getting ready for the limewash and paint on the front as that needs to be done in the summer but it is already Autumn.

New Bay Window

The original upstairs bay window was rotten and couldn’t be saved.  (It turns out it is an oriel window as it doesn’t touch the ground.)   The new window frame was made by my cousin John and was installed today.

The profiles were recreated using spindle cutting tools modified to exactly match the original, and further mouldings were guesswork based on old photos of the originals.

new=bay-top-detail

But the frame isn’t an exact copy of the old one.  It looked nice but It would be mad to copy something that only lasted for 100 years.  We’re having another go at it.

The original wood (a slow grown redwood) is resilient and would have been fine but it isn’t easily available these days so we used Douglas Fir.   The window will seal only to the inside face of the frame, and if (when) that seal cracks water will be directed into channels and some holes to a ventilated space below the window cill.  There are no horizontal surfaces – everything sheds water, and there are drip features and overhangs all over the place.

bay-detail

I like old stuff and conservation, but mostly that is because I like quality of workmanship and materials.  I think this is the best bit of the house.

There is still some work to do.  I’ll need to fit the crittall openers and leaded glass, then fill the remaining bits in lime to keep everything breathable.  Then secondary glazing to keep building regs happy.

new-bay

While measuring up for infill panels later I found I couldn’t measure as accurately as the window frame has been made.  It must be to 0.1mm tolerance.

Cavity Stud Wall

On the other side of the rotten timber frame is the main bedroom.   It’s a bit dingy in there as the window has been boarded up for the last few weeks.

To avoid too much more inconvenience I’m building new stud walls on the inside before removing the outside wall.   There will be a 25mm ventilated gap between the stud wall and timber frame on the outside wall which will help keep the timber frame dry.  The studwork is 3 by 2 with 75mm Celotex infill.

stud-wall

Exposed beams in the bedroom were plastered fairly recently, presumably mostly in the 1970s when old looking things weren’t fashionable.  The beam on the outside wall was plastered much earlier in lime, and it was this plaster that was holding the wattle and daub infill in place.

hole-in-wall

I don’t like plasterboard but it seemed cheap and convenient and would be at the back of the wardrobe so hardly mattered.  But It’s messy to cut, fiddly to match to oddly shaped walls, there is huge wastage, and the filler sinks and needs doing twice.   Next time I’m going to splash out on lath and plaster.

plasterboard

Installing the stud wall lost 4 to 5 inches of space from the alcoves.  The pole supporting the curtain that hides the wardrobe now has an industrial looking extension to bring it forward of the chimney.

curtain-rail-hanger

Finally, 6 days into a 3 day job, it’s all finished.   The plastic sheet covering the room was very effective at containing the mess.  The room will be decorated properly at some point when we get around to decorating, but I need to remember to rebuild the outside half of the wall first.

completed-wall

Well that was all very boring.   It’s the other side of the wall where the action is going to happen.

wal-rubble

Waterproof Paint Causes Even More Damage

Most of the stuff I’ve been doing on the house has involved removing waterproof paint.  That’s not for eco or idealogical reasons but because waterproof paint has caused some very expensive damage very quickly.

The problem is it is waterproof.  When it cracks water will get in but can’t get out again (because the paint is waterproof).  This isn’t just an old house problem – it’s also the reason why wooden windows don’t last more than 20 years any more, where previously they were good for hundreds of years.

For some reason I have the ends of oak beams sticking out of the north wall.   The ends were clearly fairly flat before they were gummed up with cement and waterproof paint maybe 20 years ago.  The paint was still flat on the outside until I prodded with a screwdriver and made a hole.

painted-beam-end

Underneath the paint the oak has rotten.   Fortunately it’s only the outer inch that has gone.  Oak is a wonderful material and resistant to abuse.  But even oak can’t stand up to being sodden wet for 20 years.

rotten-beam-end

Let’s just be thankful I don’t also have a 17th century timber frame under the modern paint (which was rendered in 1910 in an early use of cement just for good measure).

Oh wait,  hold on – it turns out I did have one.

rotten-oak-post

I wonder if the people who peddle waterproof paint as the solve all for preserving your building will offer to pay for the repairs.   Of course they won’t – the guarantee on the most posh ones is only for 6 years, and that only covers the paint not what it damages underneath.

The building did perfectly well for the previous 400 years using breathable materials like lime and linseed oil.  Modern paints and cement have turned the original wood to dust.

Crittall Windows

All of the windows in the front of the house are leaded and the slightly different angles of the glass reflect light in a wonderfully faceted way outside.  They all match, and they are all 105 years old.  How mad is that in this day and age for a window to last for over 100 years?

I’ve mentioned some issues with the upstairs bay window.  Due mostly to ill treatment and lack of maintenance the rot is only held together with paint and there isn’t enough wood left to save.  But I’m not going to be the one to get rid of the windows.

upstairs-bay-inside

Some maintenance is necessary though. The opening windows at either side were made by Crittall and are steel framed.  They were screwed to the wood frame by 2 screws through each edge of the frame plus several more screws all around holding a spacer bar.  We’ll need to add secondary glazing for building regs as they aren’t great thermally.

All of the glass needs to come out of the frames for maintenance.   I have been advised to stick some ply to the glass with silicone sealant to support the leaded light when it is removed from it’s frame.   However the leaded glass repair guy has suggested next time I want to get windows out I should get him to do it.  Presumably there is a better way.

ply-glued

Only the bottom of one of the opening windows has any real damage to the metal frame.   Condensation running down the inside of the glass has rotted the frame and caused the glass to push outwards and upwards.  The lead will need a little repair but I think the metal frame might be OK.  Condensation won’t be a problem again with secondary glazing.

I think there were once similar opening Crittall windows on each side of the big bays.  Those have since been replaced with plain glass with stick-on lead.

window-corrosion

More later!   My cousin John will be making a new wooden window frame to match the original profile together with a new bay to put it in.  My job is to fix the Crittall windows and send him some dimensions. More likely I’ll sub out the fixing of windows and get back to pointing.

With the windows removed and some of the frame fallen off the window is not at it’s best.

boarded-window

I’ve taken a section from the bit that fell out to send to John who will try to make the new frame look similar,

section

Next – restoring the metal frames and leaded glass.

Re-building a Window Arch

I’ve not posted much for a week as I’ve been doing boring stuff, mostly pointing.  I want to get most of the scaffolding down soon and it’s mostly pointing holding that up.  I can manage about two square metres a day of pointing when it’s just wall, but tidying up 20th century bodging (cement or carnage from the boiler installing muppet) slows progress,

Today I was sorting out Georgian bodging and a loose arch above the north window. It is a very shallow arch and the pointing had eroded badly on the vertical joins causing it to come loose.

failing-arch

The wood board is a former for the new arch supported from the window sill by 2×2.   It’s set at a lower level to catch any bricks that might fall when I remove the arch.  After raising I screwed it to the window frame to hold it in place.

I did a trial fit of the bricks to figure out the spacing, then marked the joint positions on the board to make sure I had enough room for a brick when I got to the middle.

starting-arch

The arch only really holds itself up.  There is a wooden lintel holding up the inner wall, then a course of header bricks bridging over the arch to help support the outer wall.

The joints are tight at the bottom of the arch.  I built the arch with a finer sharp sand and have recessed the joints a little to allow pointing with sand that matches the rest of the gable.

first-course-arch

The arch is finished bar pointing.  Another photo soon unless the wall falls down or I get distracted and start doing something else.

Several weeks later it looks like it has always been there.   I’ve also replaced the silicone sealant around the window with lime mortar, though I will also need to replace the window with a sash for building regs fire egress.

finished-arch

Timber Frame Stripping

The front of the house is half timbered with a timber frame on the first floor.  1930s semi detached house builders adopted this feature along with many other Edwardian features, however this frame is structural and holds the roof up.

The timber frame has been poorly maintained and repairs like replacement lead on the snug bay window have caused issues.  I’ve been removing the paint to assess the condition of the wood.  The layers of modern gloss paint had cracked and were allowing water in.   Of course the paint was waterproof so the water couldn’t get out again.

puddle-on-bay

The wood appears to be a slow grown softwood similar to Scandinavian redwood.  The finish is generally very well preserved without UV damage which suggests it was painted from new.

The first 3 coats of paint were linseed which has preserved the wood perfectly under the later coats of horrid cracking modern paints.

wood-1

Photos of the original paint finish are only available in black and white.  Most of the original paint has been stripped previously, but there is some left higher up the building. The white was the original finish to the windows.  It was a linseed oil paint with a lead pigment.  The next coat was green.

original-front

The rest of the timber was also re-painted green but below that is a very thin mid brown coating with the grain of the wood visible through the pigment.  Below that (and visible through the brown) are brush marks and I wonder if they aren’t a faux wood grain.  It is possible the original finish was linseed paint with a brown pigment and a wood grain effect to make the softwood look like hardwood.

original-paint

The timber frame isn’t as bad as I feared.   In many places what looked like rot turned out only to be cracking and peeling gloss paint.

Figuring out how to re-finish the wood will be a challenge.   The Edwardians left the lime render (which turned out to be cement) unpainted which would have aided drying of the wood.  I can’t remove the modern waterproof paint from the render without also removing the rough cast pebble finish.  I’m guessing a linseed oil based finish to the wood, maybe with some pigment to keep the UV out will be the answer.

stripping-front

Front Roof

The front roof appears to have last been re-covered in 1910 using tiles reclaimed from an earlier roof.   The tiles were mounted on steel nails which had corroded causing the tiles to slip.  The roof leaked but local repairs weren’t sensible because of the risk of disturbing surrounding tiles.

old-front-roof

The tiles and batons were removed in a day, and the roof covered with a tarpaulin to keep the rain out.  The tarpaulin made a lot of noise in the wind but was quickly replaced with felt and new batons.

front-roof-tarp

The roof structure was good.  Part of the facia board was replaced but the main timbers were fine. The roof was very well ventilated and the leaks must have dried quickly.

From the street the house looks as sorry as it is likely to get.  Later with the roof and chimneys fixed the house has started to look finished above the plastic sheeting.

roofing-in-progress

The original tiles have been retained where possible, but around 10% were replaced with reclaimed tiles mixed in with the existing.   There were already three different types of tile mixed together on the roof from where people had done much the same thing in the past.

front-roof-tiling

People will be wondering what we did as the roof looks like it did before.  Hopefully it won’t leak and shed tiles any more.

new-roof

We have breathable felt below the tiles, and the tiles are secured with aluminium pegs with the slates at the rear secured with copper nails.

Rot in the Bay Window

I’ve had countless calls (well, none is countless) saying we’re bored of the brickwork, roof, and random history.  Can we see a bit of timber for a change, and in particular was it a good idea for someone to tidy up the beautiful timber on the first floor bay window by nailing planks of wood to it in such a way that water was directed in but couldn’t get out again?  Then for good measure mess up the leadwork to make sure any water travelled behind the gutter.

planked-over-timber

It wasn’t an especially good idea to nail the planks of wood to the bottom of the bay either.  The main timbers behind the bay look good, but the window will need to come out to be rebuilt, and the bay window timber frame will need to be rebuilt.    I want to keep the window as it matches the grand bay windows on the ground floor, but I’m not sure I’ll be able to keep very much of it.

rot-bottom-of-bay

The joinery on the bay window looks fairly straightforward.  There don’t seem to be any fancy joints, just bits of wood cut and nailed together.  The timber frame holding up the roof behind is fine but the bay will need to be re-made.

render-panel-removed

Some time later we removed the windows for restoration and installed a new bay window frame.

Chimneys

Another lovely sunny day.  The roof has been felted and battened and tiles stacked ready to go back on.  But the roofers are not here.

village-from-roof

We noticed some problems with the chimneys which will be much easier to sort out while we can still climb on the roof.

The top of the north chimney had been rebuilt in cement at some point and I guess the bricks became too wet and spalled when the flaunching failed. I’m replacing them with modern bricks and cement.

spalled-bricks-north-chimney

I didn’t have any bricks that matched so the barbecue is now a course of bricks lower. The Jackdaw who lives in the chimney was very tolerant and her chicks are still getting on well.  I had to be very careful to prevent debris from falling into the nest.

flaunching-north-chimney

I am not entirely sure what was holding up the south chimney, but amazingly none of the bricks were loose.  One had spalled hence the hole.  I probably ought to have completely rebuilt this chimney in hindsight as it also leans by around an inch.  Instead I replaced most of the mortar with the bricks in place.

south-chinmey

The top of the south chimney had been repaired in cement but the bricks were loose rather than spalled and I can put them back in. We had a hold up due to a reclamation yard sending a chimney pot far different from their photos, and this caused a great deal of annoyance and last minute searching for chimney pots.

south-chimney-pots-removed

I had a bright idea and cut the top off the poorly matching chimney pot.  It’s a good match now.  Just some fiddling to get the cowl to fit properly and the chimneys will be finished.

south-chimney-top

The roofers had lead specialists came in for a morning to weld the fiddly bits of leading above the chimneys with appropriate falls, then the roofers neatly cut and fitted the leading and pointed it in lime.  Though if you are doing the same thing look up soakers on the internet – they might have been a better way to do this leading.

chimney-leading

We’ve not had enough historical chimney interest in this post.   In photos taken from the church you can see the chimney in the previous couple of photos had been removed and rebuilt on the other side of the attic window in 1910.   I turns out the bricks from the original building were re-used.  I found a very sooty brick behind a facing brick that had spalled in the gable.  The size and colour of the brick match the opposite chimney.

sooty-brick

Rebuilding the Parapet Wall

I asked the roofers if there was anything I needed to be doing over the May bank holiday weekend and they asked me to rebuild the parapet wall.  Roofers only like to tuck their lead into walls with a clear connection to the ground, so my magic levitating bricks were no good.

roof-wall-front

The pointing had eroded so badly that the bricks had become loose.  The top few courses could be lifted off with no resistance.   So could the next few courses.  By the time I got down to bricks that stuck a bit to the course below  I was down about 6 or 7 courses.

The timber that became exposed had started to rot where it had been embedded in mortar between the loose leaky bricks, but it was still sound enough to work as a roof.  I have treated the timber and I’m rebuilding the wall as a cavity wall around the timber with ventilation from the roof space.

roof-wall-taken-down

I’ll update this post later.  I’m a very slow bricklayer and haven’t finished yet.

Here we go.  The top courses had been rebuilt previously in cement and the bricks couldn’t be saved.   Rather than use new bricks I’ve gone for a slight design change.  The  parapet wall will be slightly lower and capped with tiles making it secondary to the main ridge line.  Hopefully that will also help keep water off the brickwork.

parapet-wall-bricks

Much later the roofers put a little hat on the top of the wall.   We didn’t really think it through and there is a lot of lead on there from various evolutions of the design.  The timbers underneath should at least be well protected.

tiles-on-parapet

Pointing

I’m starting to get the hang of re-pointing with lime mortar.   The pointing on the south gable was eroded to a depth of around 10-15mm and needs to be raked out and replaced.

I’ve found a local sharp sand which appears to match the original sand very well.  It is a plastering sharp sand from nearby Leighton Buzzard and contains aggregate up to 2mm.    The sharp sand I was using last year was concreting sand with a max aggregate size of 5mm which is much too big for bricks.

So far I haven’t found anyone to re-point the house but the job is taking me too long to be sensible.

pointing

Roofing

The roofers arrived on Monday and have already stripped the rear of the roof.  The tiles are generally in good condition and have been stacked ready to go back on.

stripping-roof

There was nothing much wrong with the rear of the roof other than a few rusty tile fixings.  The structure is good.  The top couple of courses of brick on the gable were loose so I’ve rebuilt them in lime to match the pointing.

roof-stripped

For a couple of days the roof will be covered by a tarpaulin while insulation is fitted.

temporary-sheeting

Then the roof was felted and battened, and the tiles stacked ready to be reattached. We’ve retained the old gutter which is still out of shape but should now be functional.

felt-battoned

By the middle of May the rear roof is going back on.  That’s Milton in the photo hammering in copper nails.  Most slates are original but we are adding tile and a half slates at the gables which are new and won’t match exactly.  The conservation officer commented on them, but they did allow a more sensible overhang than half tiles.

rear-roof-going-back

Paint Stripping – The South Wall

The paint stripping has been completed apart from the tidying up.   The South gable is very prominent when turning the corner into the High Street at the bottom of The Hill.  There is a very odd stepped gable which doesn’t work in Magnolia paint.

Driving home from work one day I saw the magnolia had disappeared from the top of the south gable.  For me it transformed the building into something nice instead of the eyesore I am used to.  Though the flat roof toilet block still needs a bit of work.

south-gable

The south elevation was painted quite recently –  at some point after 1987.  The bricks haven’t suffered any damage and the whole wall has a consistent colour.   Apart from the north gable I think most of the building was rebuilt in 1910.

south-wall-top

The pointing is in a poor state.   Being a tenanted building the place has been neglected since it was built.  That’s a wonderful thing.  Nobody has filled the gaps with difficult to remove cement to trap water and damage the bricks.   My mission over the next few months is to re-point in lime mortar and sharp sand (and rebuild the top of the wall in the photo which is made from levitating bricks).

south-wall-pointing

Finally another picture of some bath stone, this time below the curved bay window in the snug.  The building work from 1910 was carried out to a very high standard.

bay-window-stone

More Paint Stripping

The paint stripping is progressing quickly.   The east and north walls have been completed.

east-and-north-stripped

The north wall didn’t strip as well as the east wall.   There is a diagonal line up the building where the wall was raised in 1910.  The lower bricks should be sooty but are soft like the barn, and like the barn they have been damaged by the effects of waterproof paint and it’s removal.

brick-difference

It is fashionable these days to be able to ‘read’ old buildings and the north wall does not disappoint as it also shows the outline of the earlier 1646 building.  At least we thought it was the outline but it’s looking like there might be some of the original building hiding under lime render on lath applied in the late 19th century.  We can’t remove the paint without damaging the render, but don’t want to leave waterproof paint on there.   We’ve left it for now pending research and advice.

north-wall-render

The front door surround looks like bath stone.  It stripped well.  I don’t know why someone thought magnolia would look nicer.   We originally thought the stone had been salvaged from another building, but there is also bath stone above and below the bay windows so it looks like it was cut for the property.

door-stripped

There is evidence of writing over the front door.  It is possible to make out the words licensed, spirits, and tobacco.   The top line is the name of the landlord at the time, William T Davey.   He was  the landlord from 1910 to 1933.   We think the facade was constructed in 1910.    Edit – more likely 1921.

writing-above-door

The stonework above the door and the stonework on the window sills has some surface damage.  It looks like it was rough before but the paint stripping has caused more damage.

stonework-damage-painted

Paint Stripping

The paint stripping started before the scaffolding was finished which was useful as the paint stripper needed to increase the coverage of the sheeting.

The problem with the magnolia (apart from how horrible it looked) was that it was waterproof.  The wall was sodden wet behind the paint causing damp and freezing damage,

1-failing-paint

I’ve had a go at paint stripping before.  This time I got some professionals in – Craig Ginn from Dartford who uses stripper and a DOFF steam system to remove paint.

Most of the paint came off in sheets with a steam jet wash and paint stripper.  It needed a couple of applications of stripper to get rid of all the paint.

paint-stripping-large

Behind the paint we’ve mostly found good bricks.  There is a bit of mix and match from different building phases and alterations, but it already looks a lot nicer than the magnolia.

stripping-north-wall

Scaffolding

It’s Easter and the winter break is over.  The scaffolding started going up yesterday.  The intention is to complete any exterior work that needs doing before it comes down again at the end of June.

The paint strippers arrive next week to remove the magnolia paint from the brickwork.   Then the roofer will remove and re-fit the tiles and replace the lead work.  Some of the wood looks to be in a poor state so that will need dealing with.  Finally I’ll re-point in lime and paint anything that needs painting.

scaffolding-large

The scaffold has been covered with sheeting, partly because paint stripping is a messy business, but mostly for the effect.

scaffolding-sheeted

The scaffolding was put up by Trueform Scaffolding of Willington, Bedfordshire.

Lime Plaster and New Doors

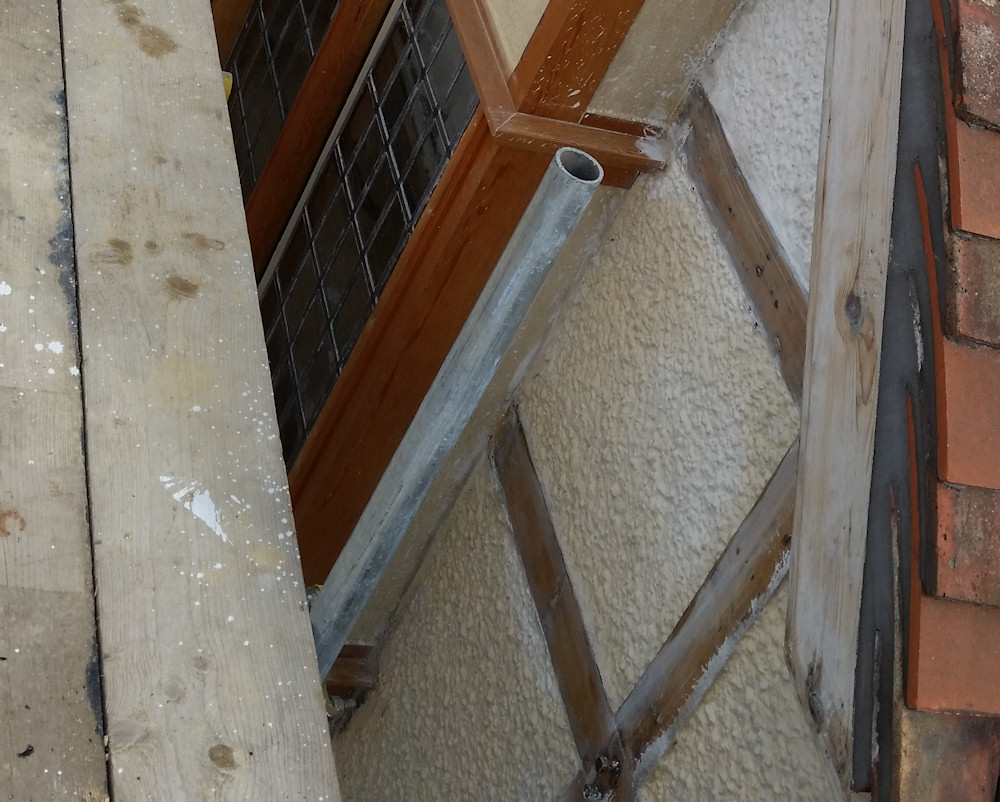
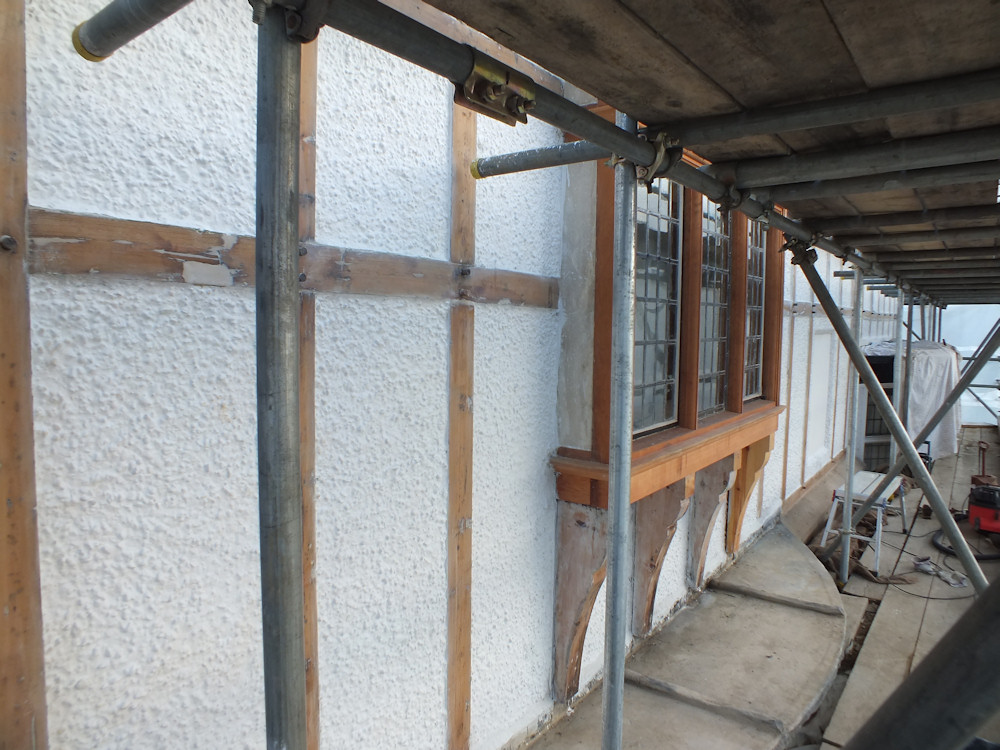
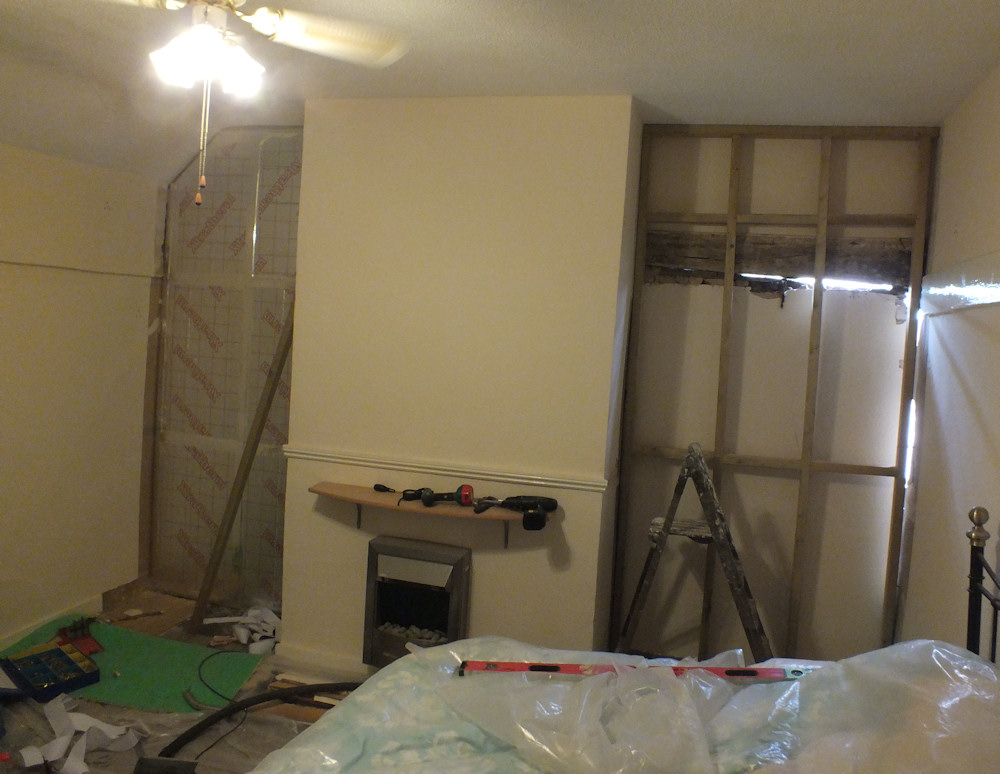
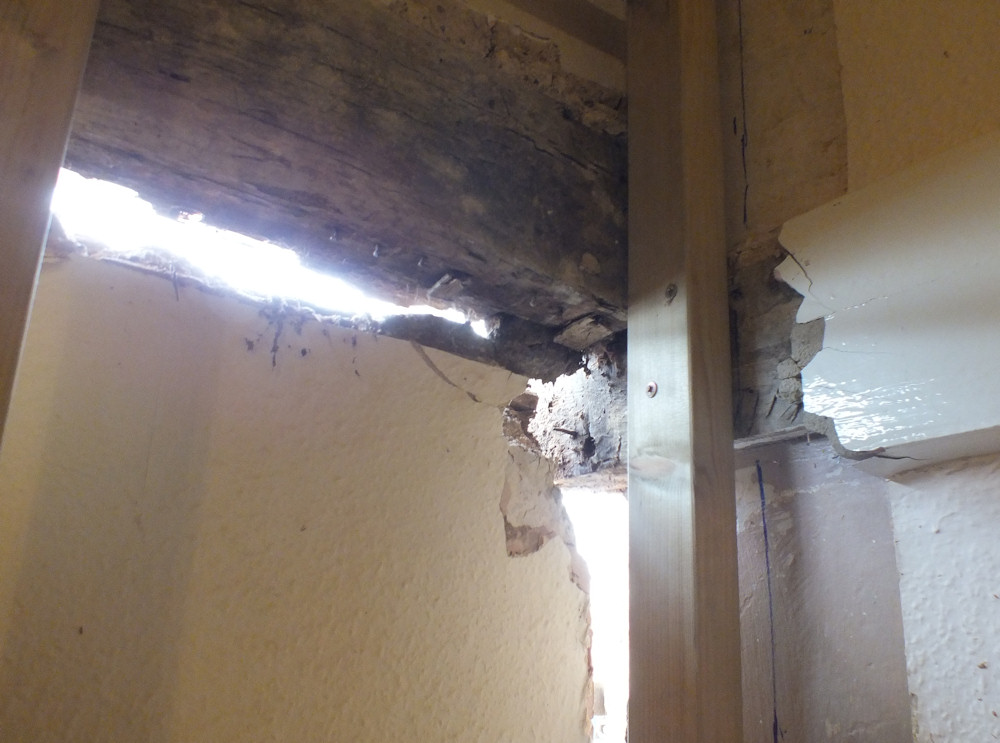
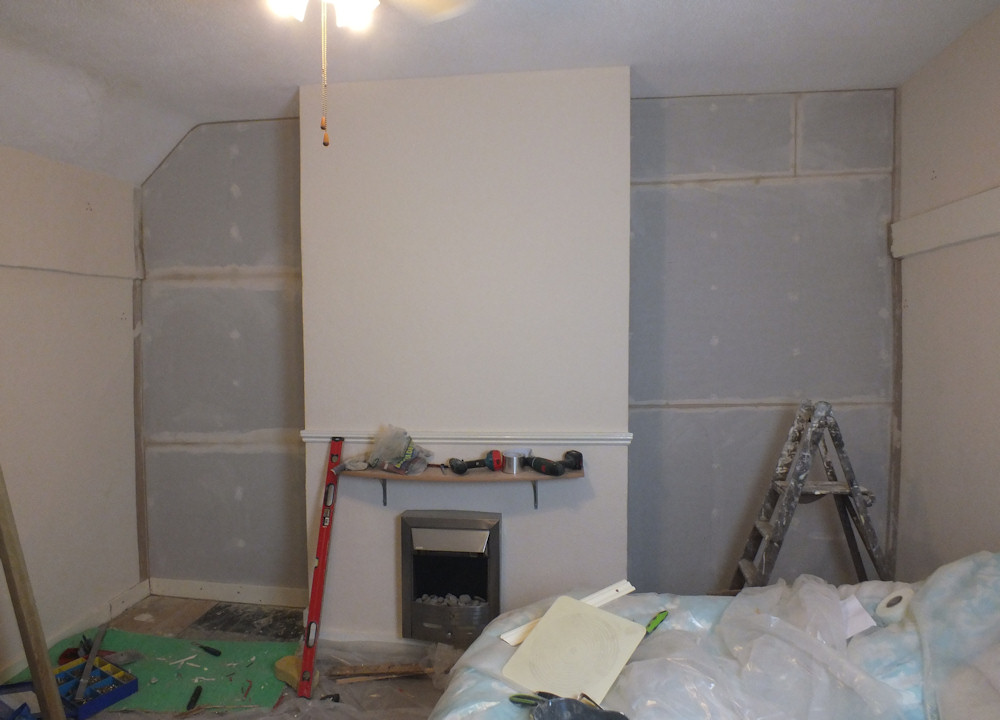
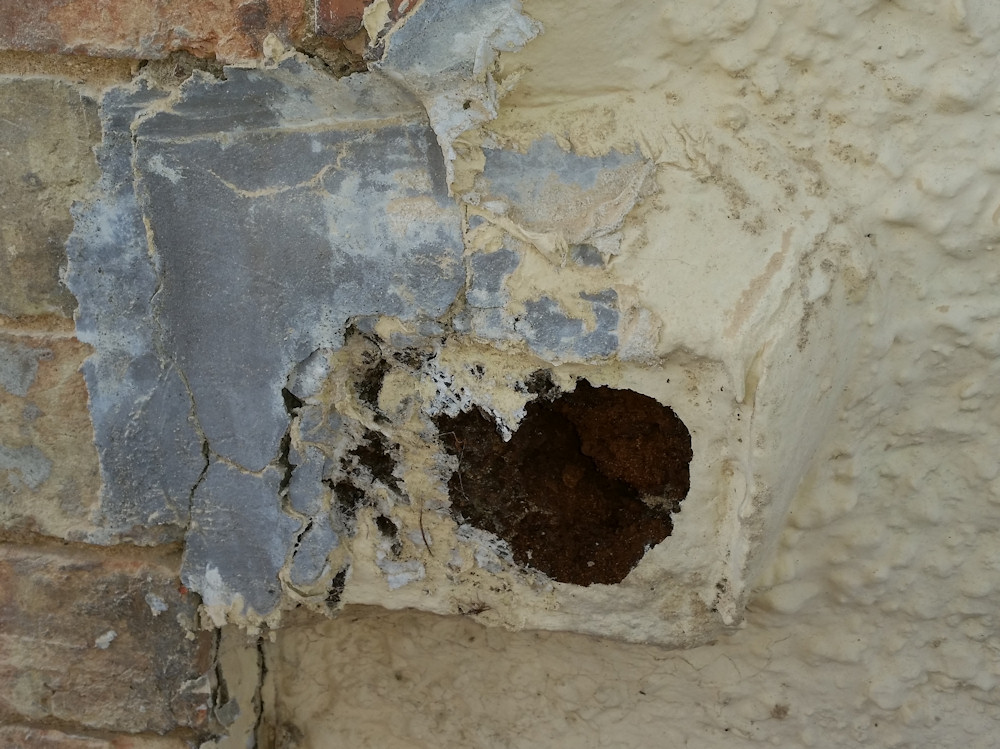
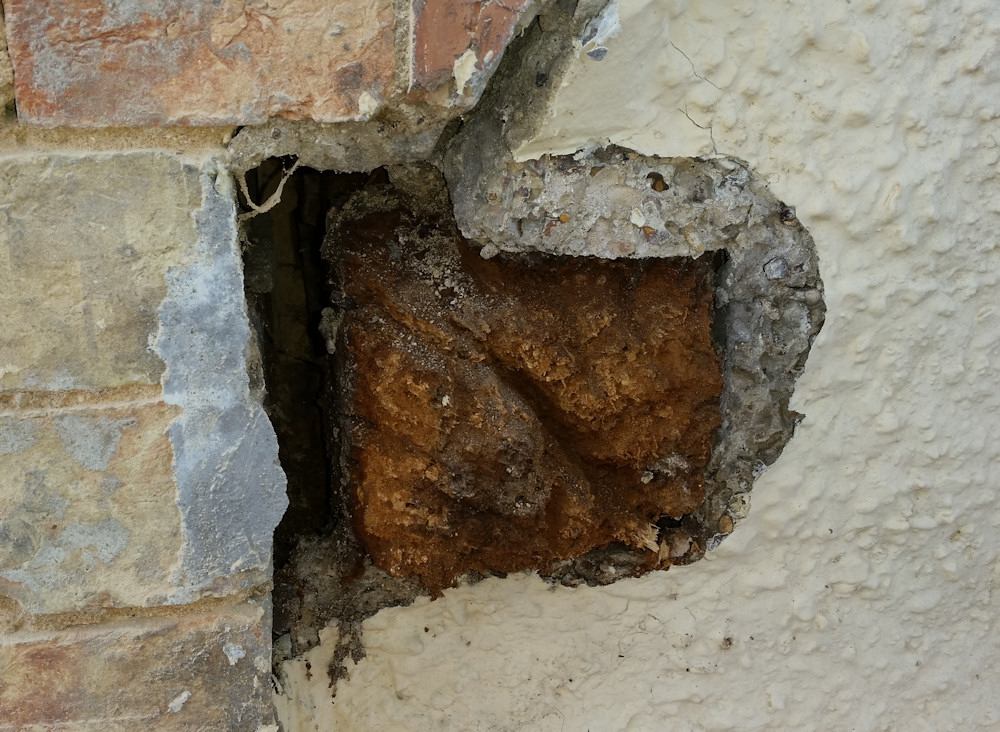
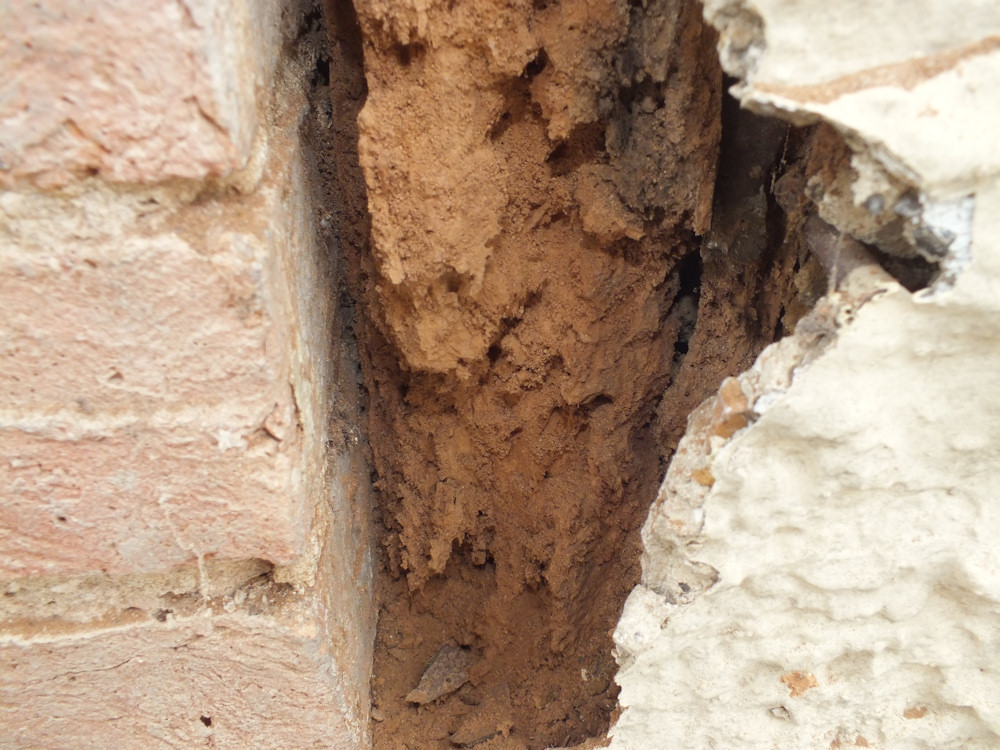
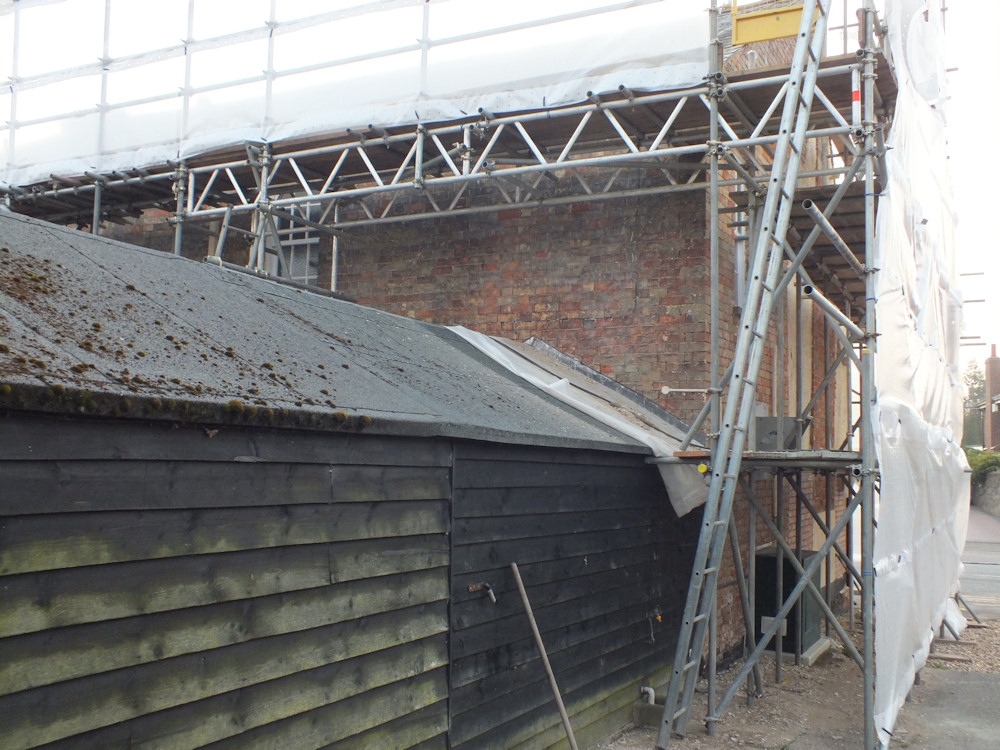
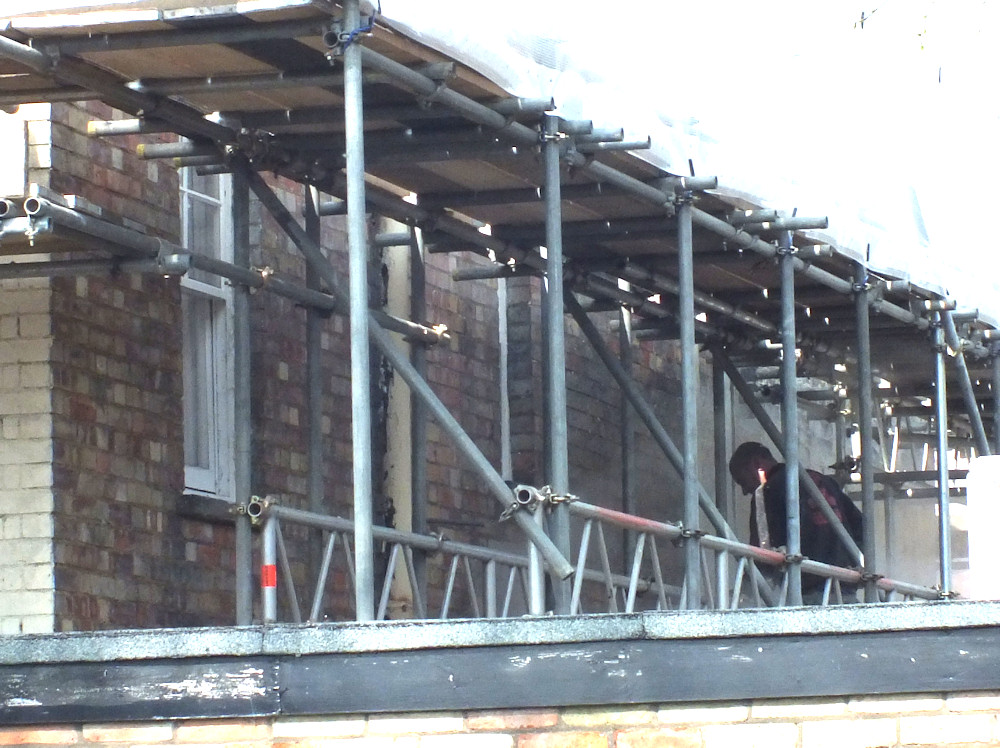
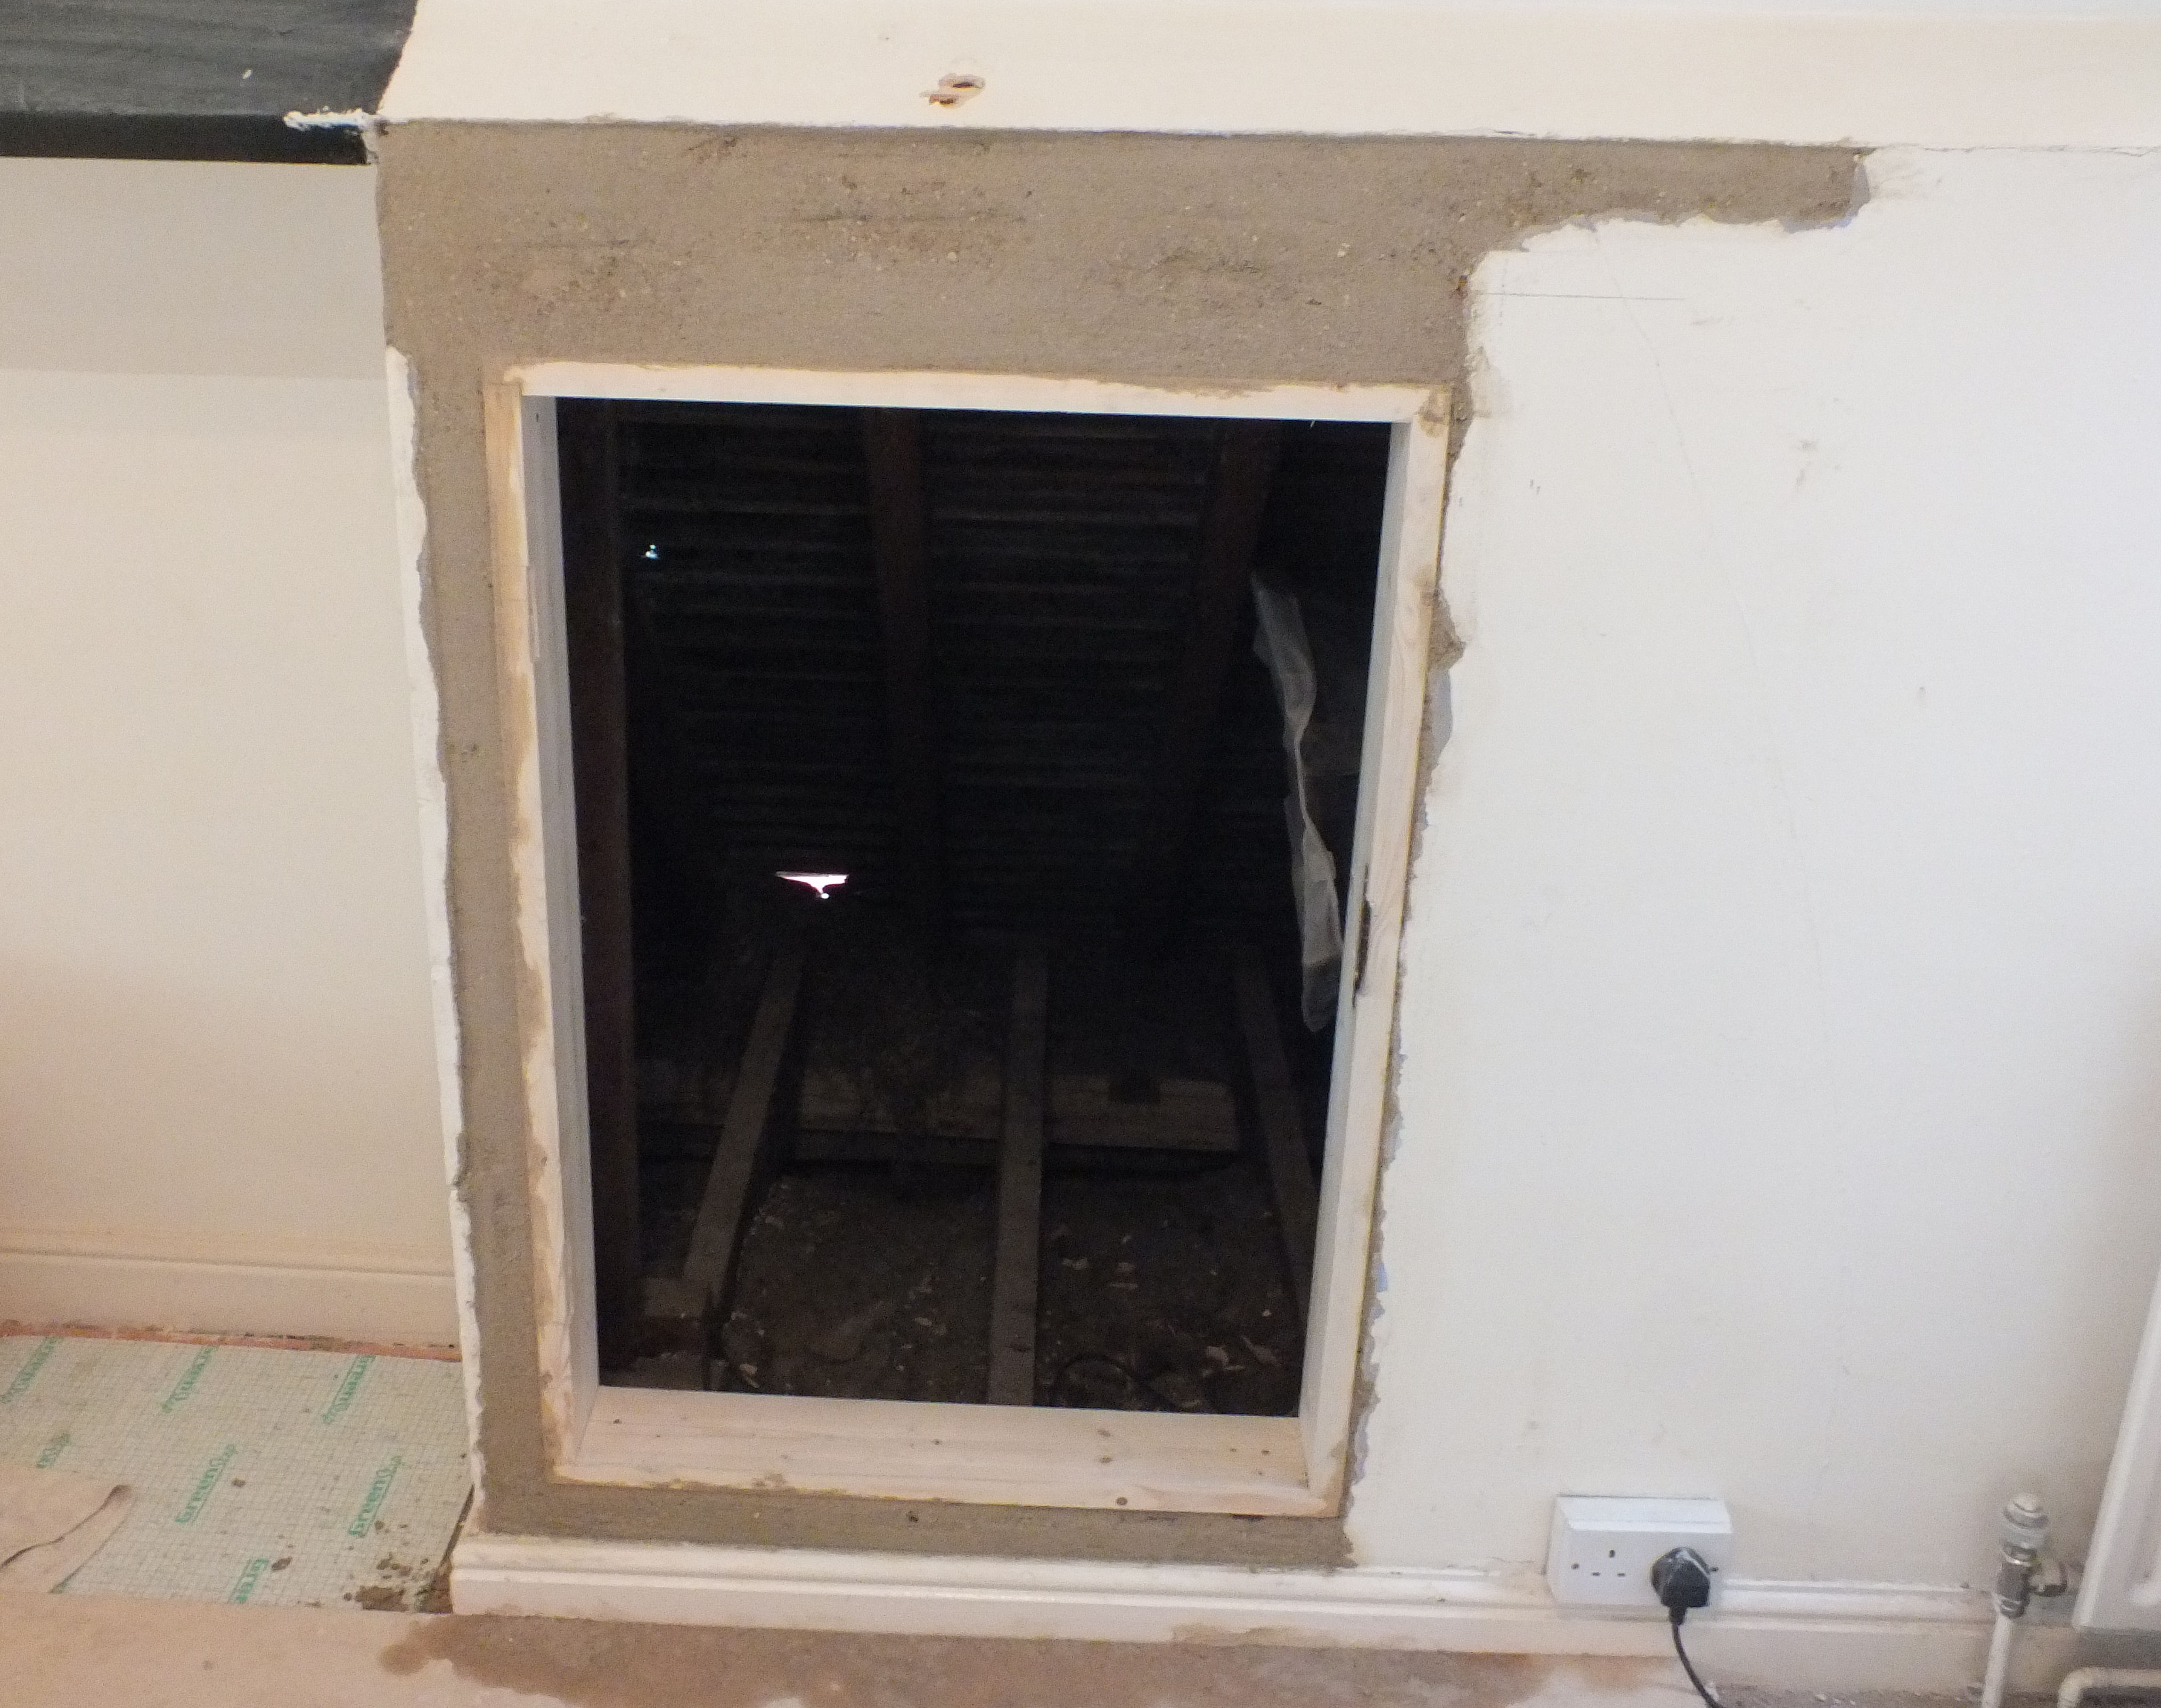
I made some holes in the attic walls to access the roof space, but it would be handy if the attic is habitable in about 3 weeks when some guests come to stay.

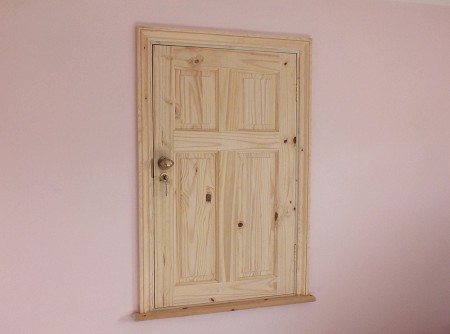
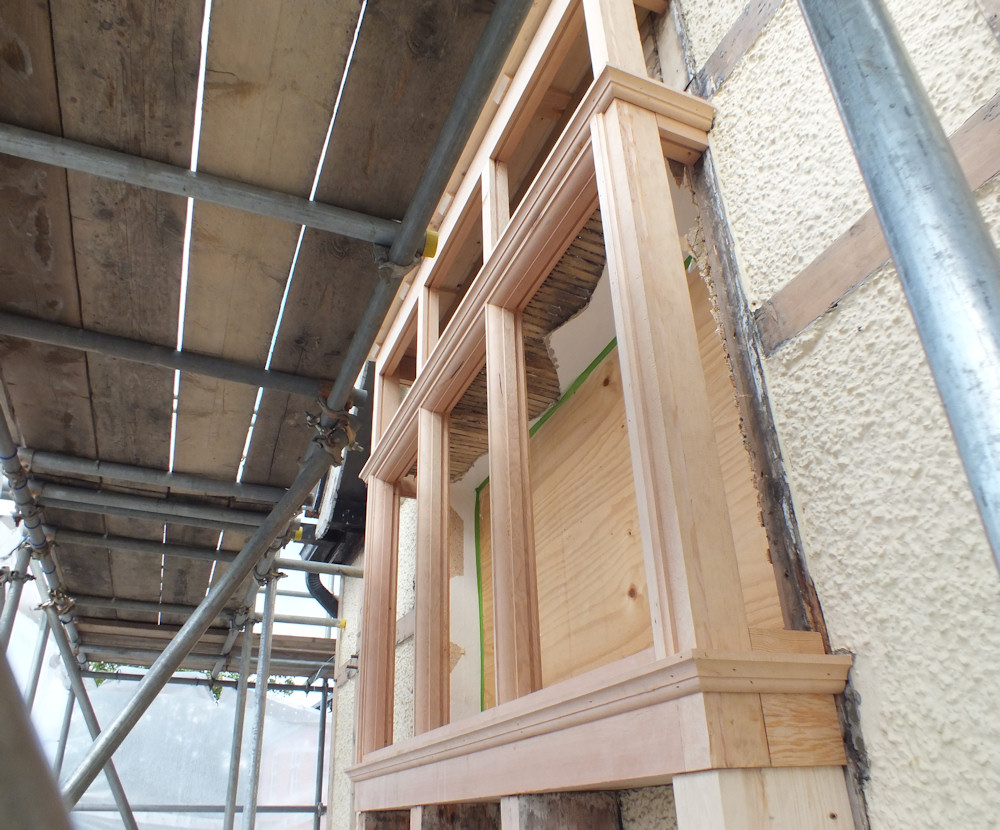
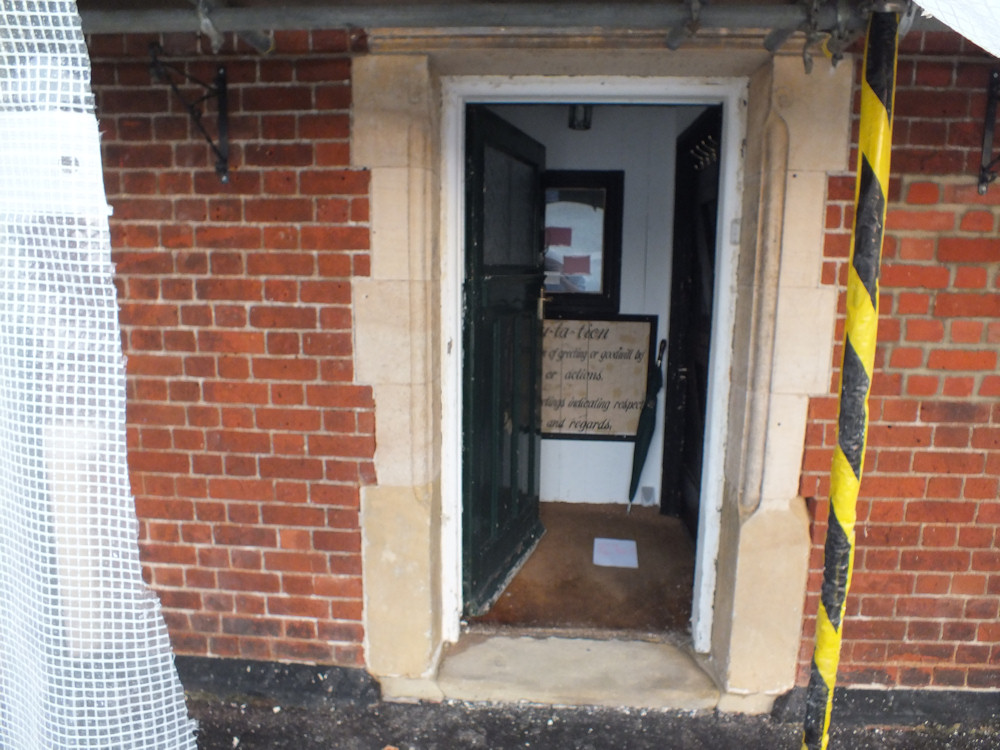
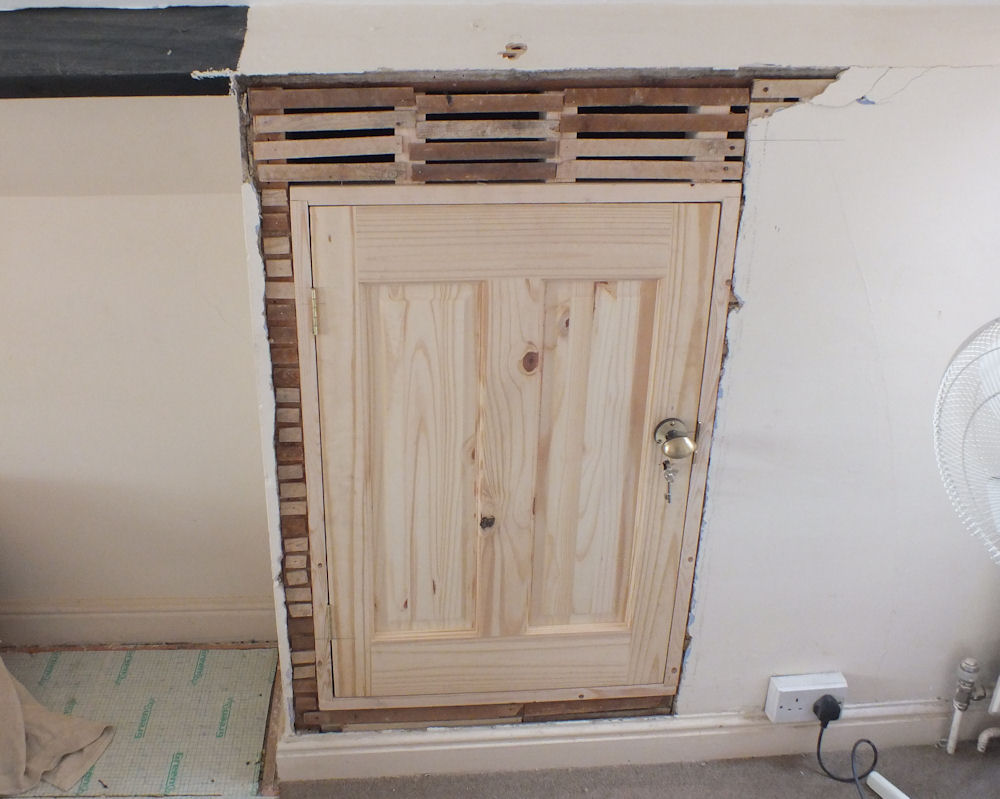
I ended up fitting normal doors and frames cut down to suit the openings.  The cost was slightly higher than the average eaves access door, but a normal looking door halfway up a wall is an interesting feature and it was a good opportunity to learn how to install door frames and doors.

door-high-in-wall

The trick with door frames is to cut them exactly square and size them about 2mm smaller than the hole in the wall.  Plastic spacers are available in bags of various sizes which are used to pack the frame at the corners and near the frame fixings.

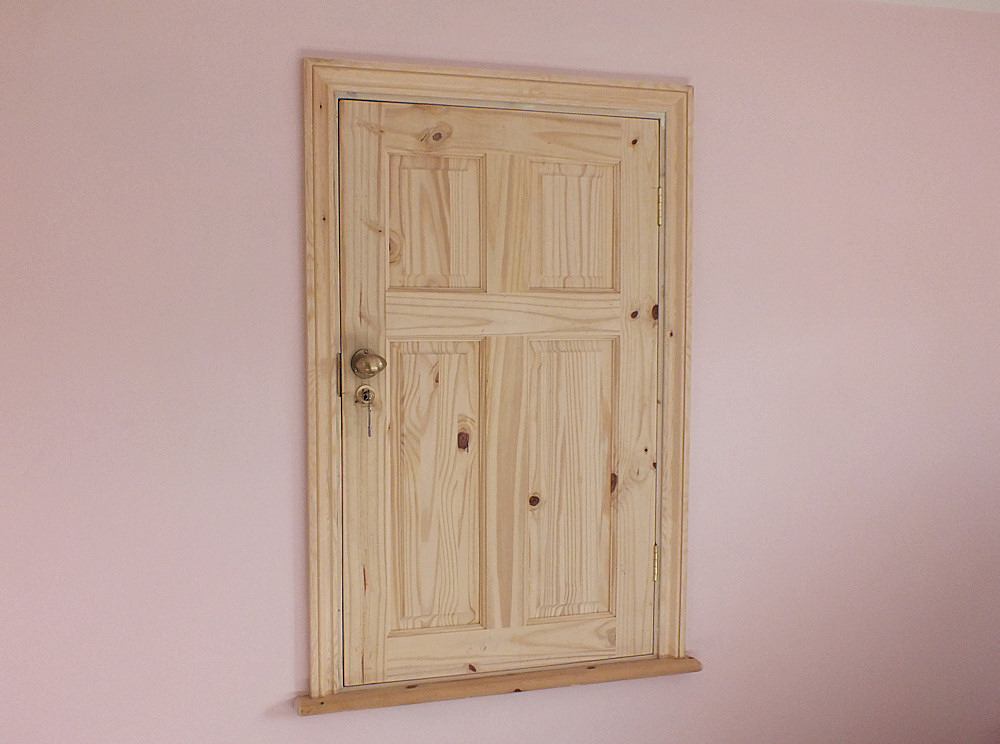
The trick with doors is to buy an electric planer. I’m not planning to fit many doors so bought a really cheap planer at £34. Fitting the lock and hinges needs a very sharp chisel and wood drill bits.

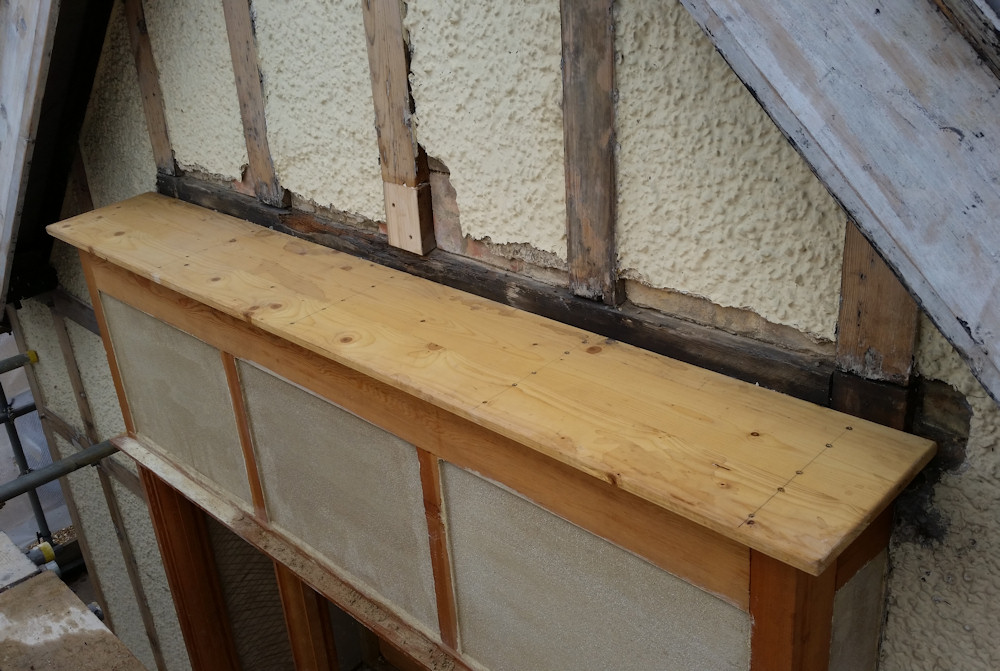
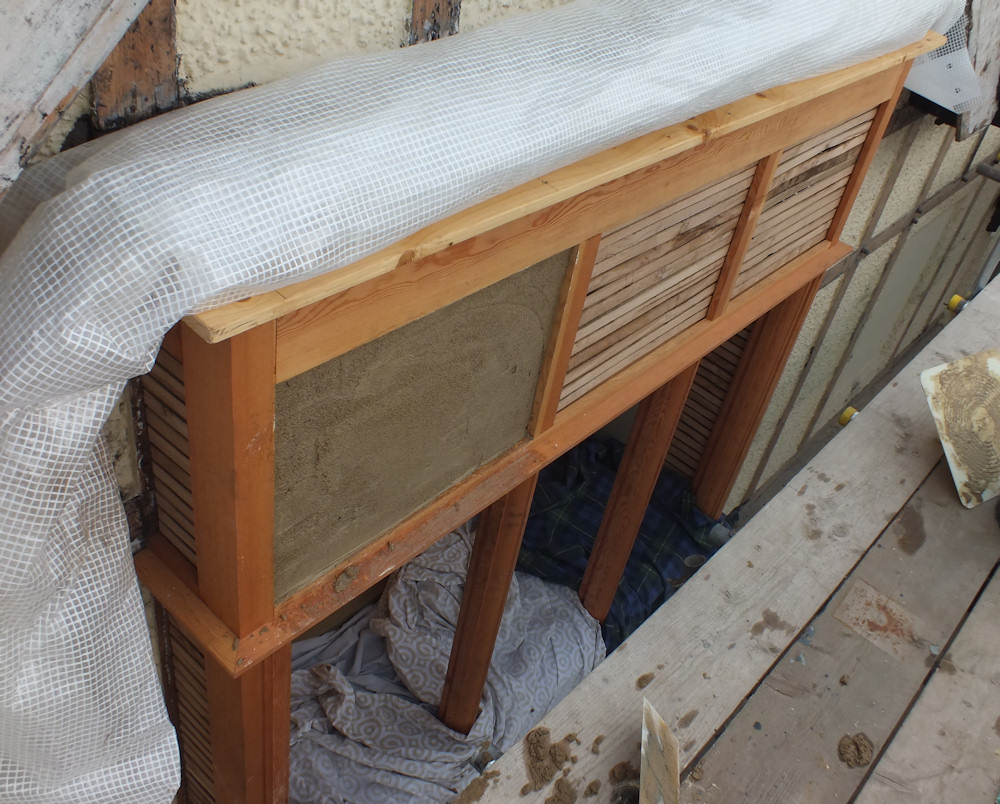
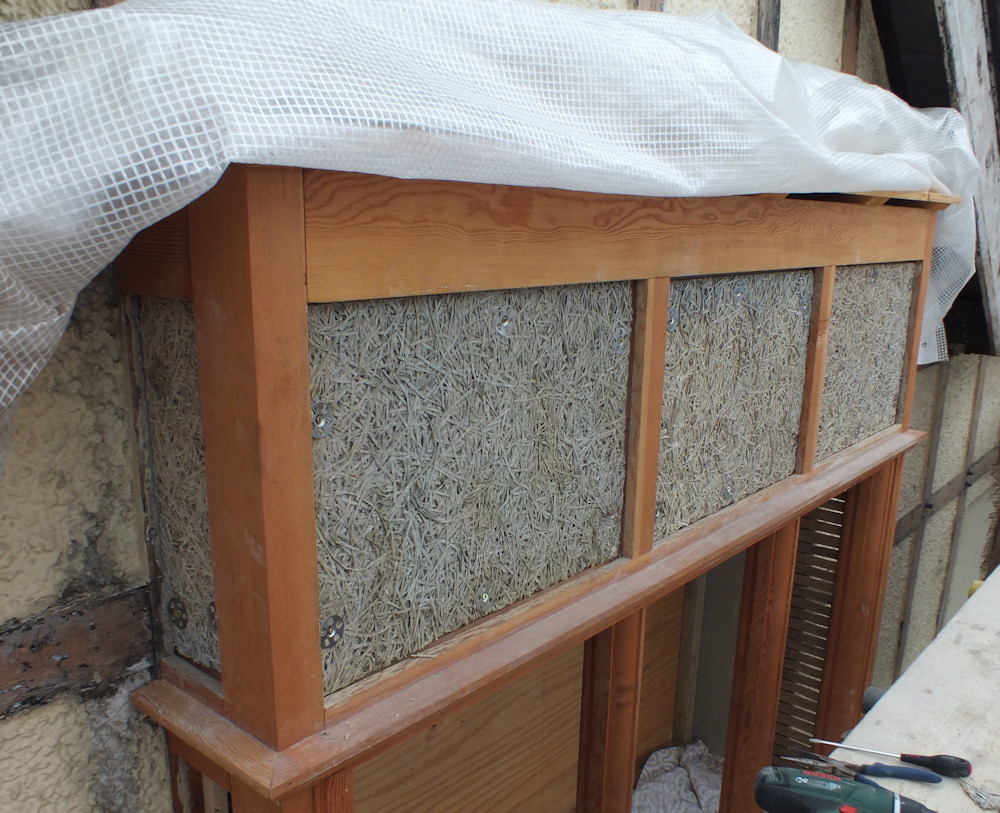
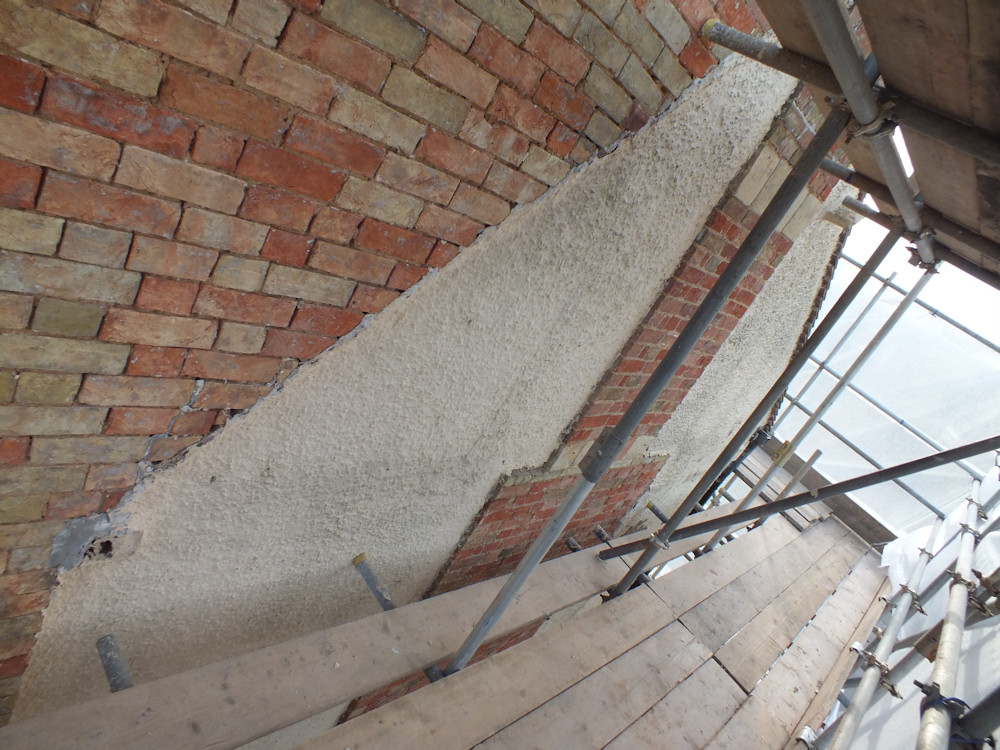
The second door is in a stud wall.  I went for lath and plaster rather than plasterboard to match the existing construction.   It’s quite therapeutic and much less dusty than cutting plasterboard.

lathe

The spacing between the laths is important.  I spaced them a bit too widely in places and it was difficult to smooth the plaster.  I’ve used lime plaster to match the original.  This is the base coat and I’ve allowed 2mm or 3mm for the skim coat.

first-coat-plaster

The finish coat started fairly badly, then I found out what a plastic float is for.  Once the plaster starts to dry the plastic float can be used to sand off the high spots and spread the plaster into the low spots.  Then a spray of water allows the plaster to be towelled flat.  Once the plaster has dried further a sponge float hides the imperfections and leaves a smooth finish.

You can take liberties with lime, to the point of working it the next day.  For DIY this is helpful as it reduces the need for any actual skill.

finished-plaster

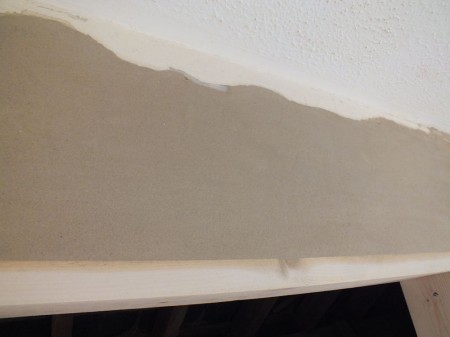
I’m quite pleased with my first attempt at plastering, but don’t fancy tackling a whole room yet.

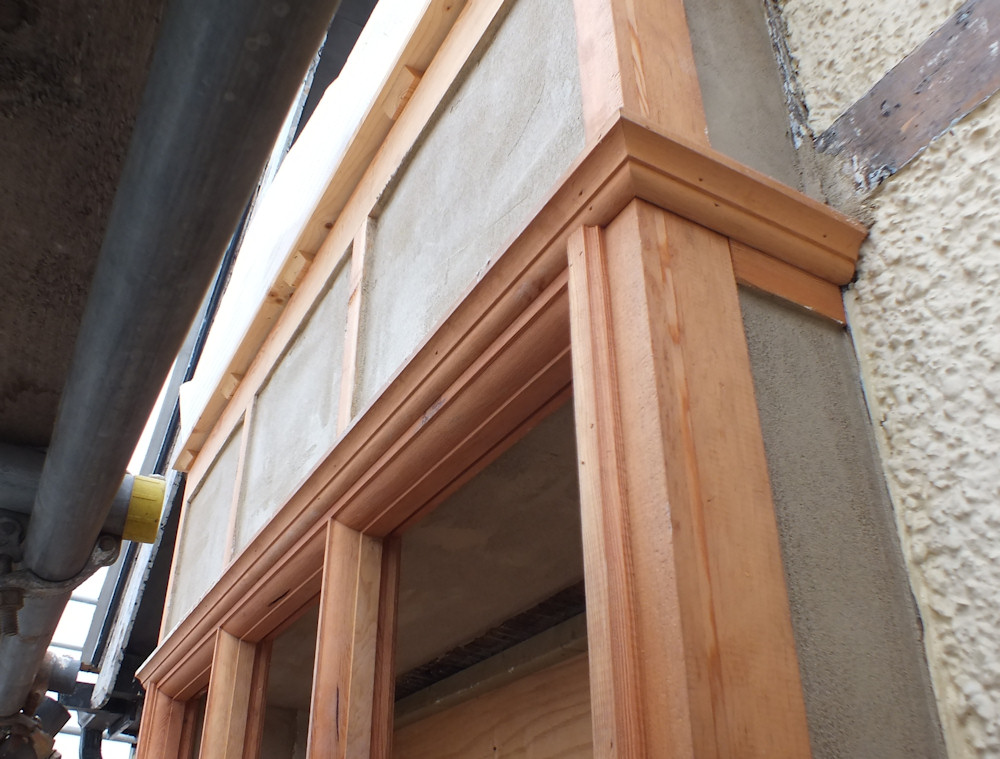
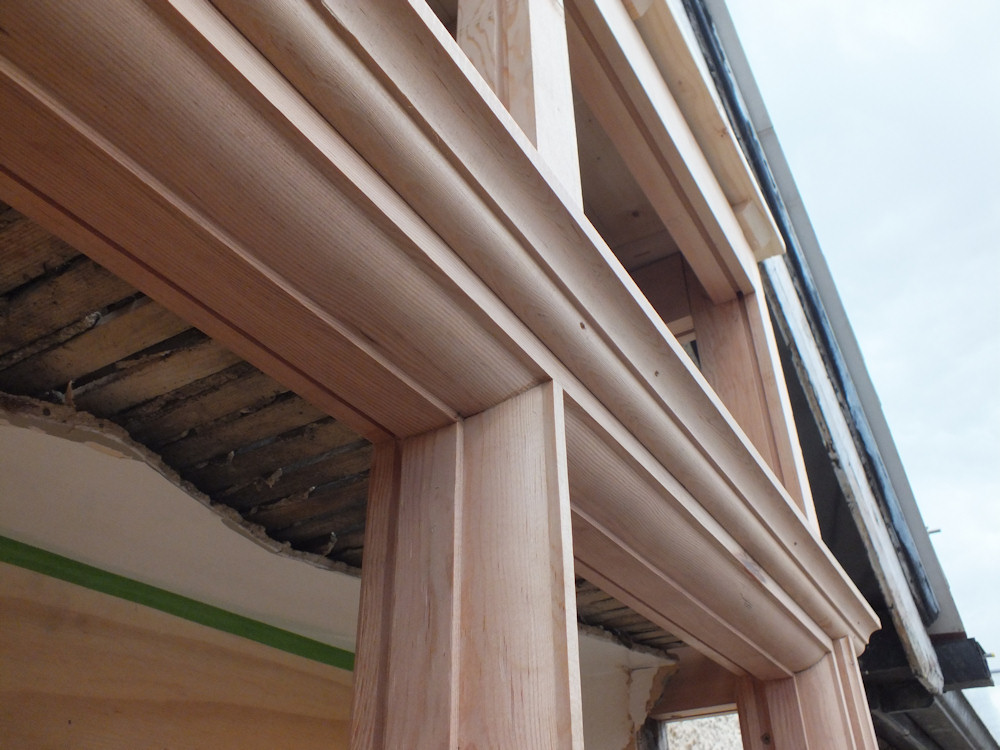
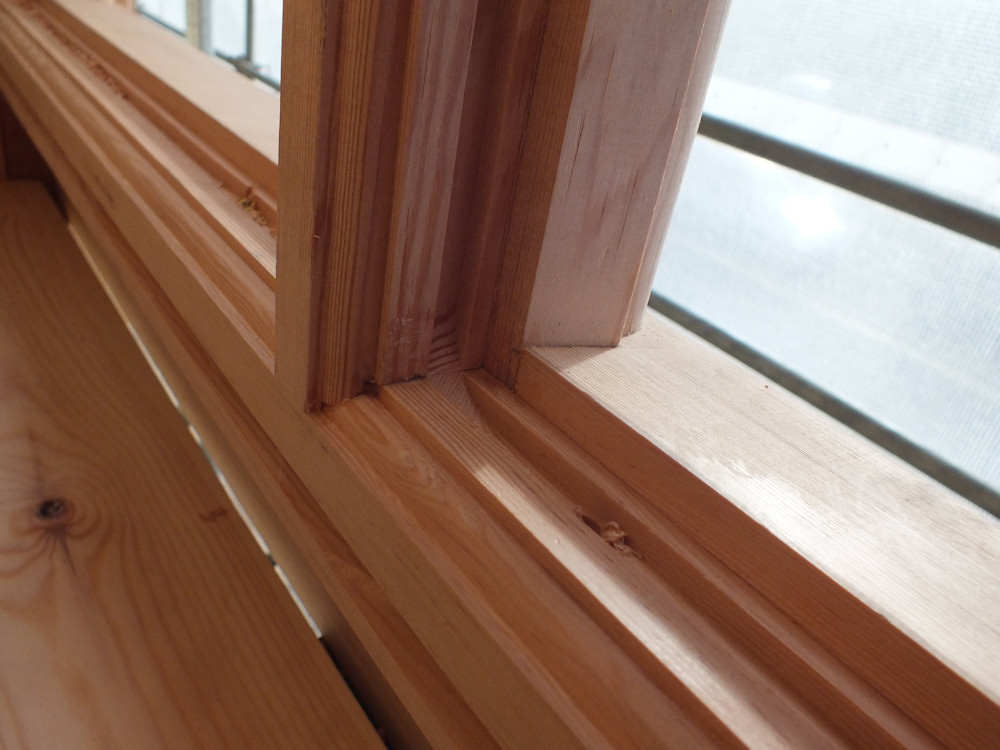
I fitted architrave around the doors and nosing at the bottom like a window.  The space behind will be useful for storage so I might fit some cupboards.   I wish I’d thought of that earlier as I’ve allowed 300mm for insulation below the door opening.  Still, I’ve figured out how to install doors now so the next one will be easier.

door-finished