Category Archives: General

Partial Electrical Rewire – First Fix

I’ve been struggling to find an electrician to complete the rewire post apocalypse. The electrician who did the first half is far too busy and others want over £10K to finish the job. Fortunately it’s just a case of extending the new circuits and I can do that myself within the rules. I’ll be much slower than an electrician but I can’t see it taking me more than 3 weeks and £10K is a good rate for me.

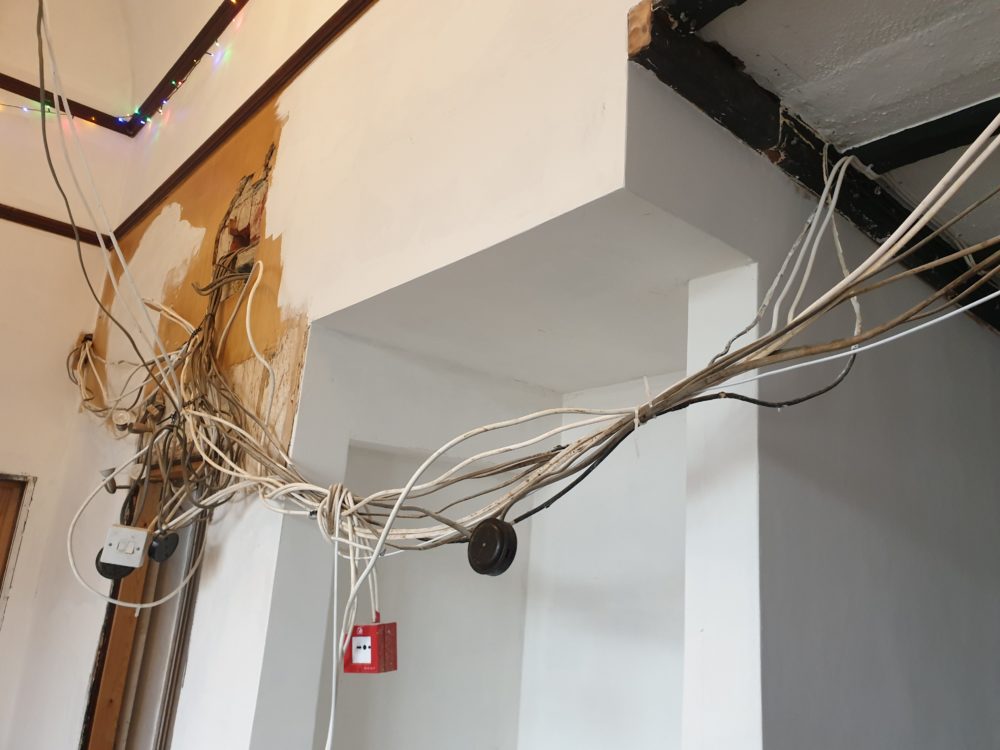
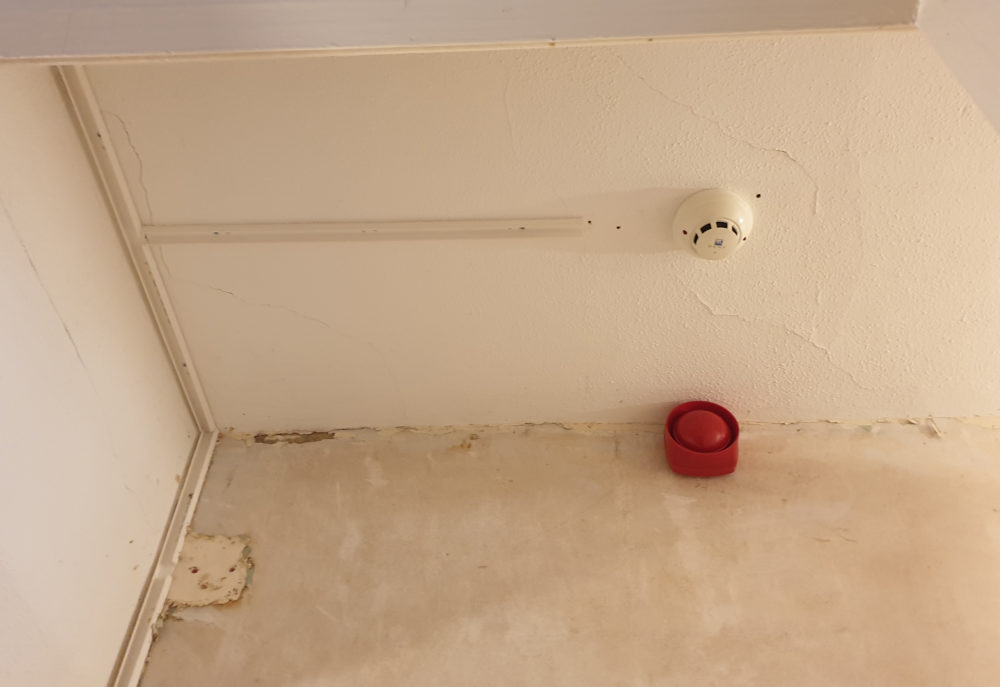
Pubs have funny electrics. Aside from all the surface mounted wiring there was an 18 gang switch panel that controlled many of the lights. It was really annoying if you wanted to go to the loo but forgot to turn the light on first. Removing the switch panel and attendant wires got rid of the rest of the dangling wires in an instant.

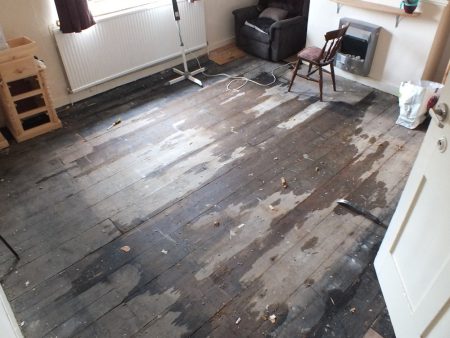
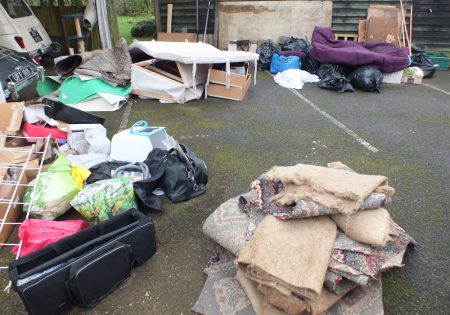
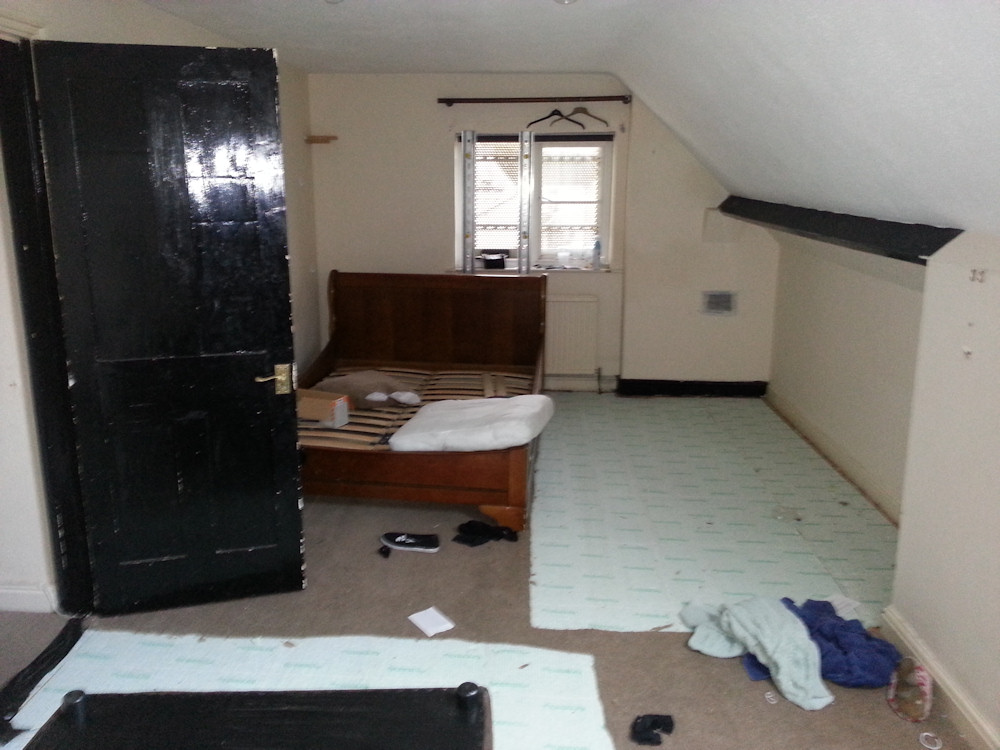
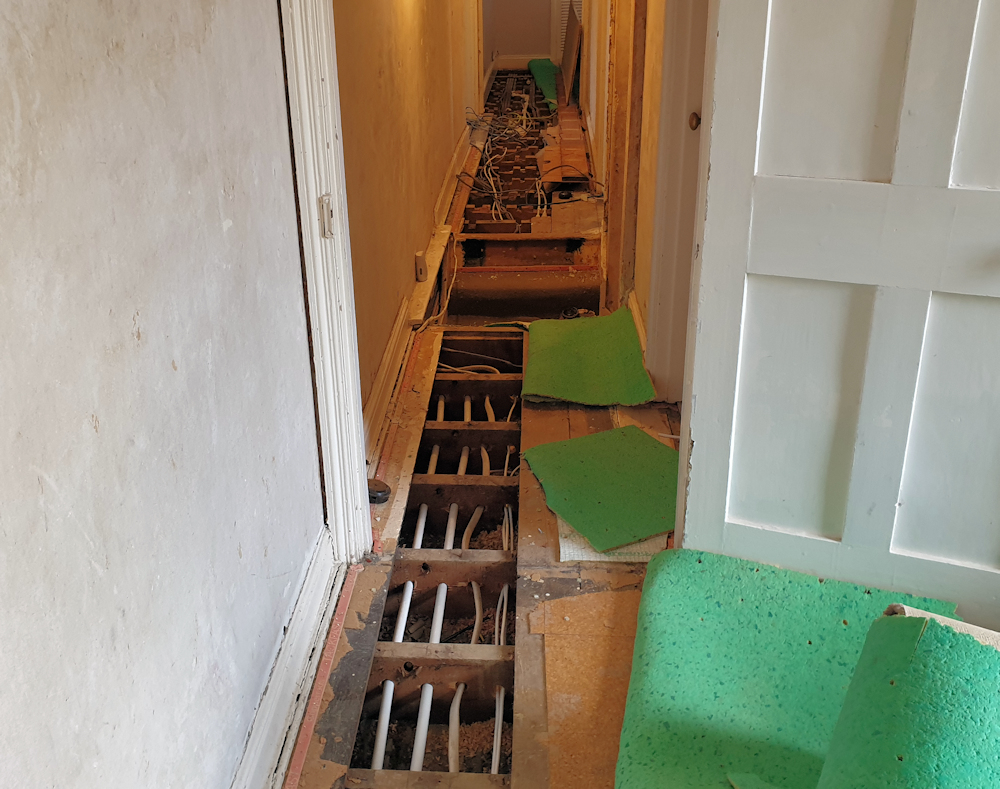
I’ve lifted the floorboards upstairs where the wiring runs apart from in my bedroom in the attic which is full of junk removed from the eaves cupboards to allow access to the loft space.

I’m starting by removing all the old wires. All of the wires have been disconnected from the old consumer unit and pulled out apart from the upstairs lighting circuit which is useful for now. I’ve run a couple of extension leads where I missed having some electricity.

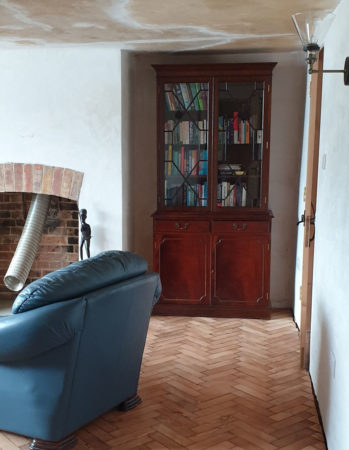
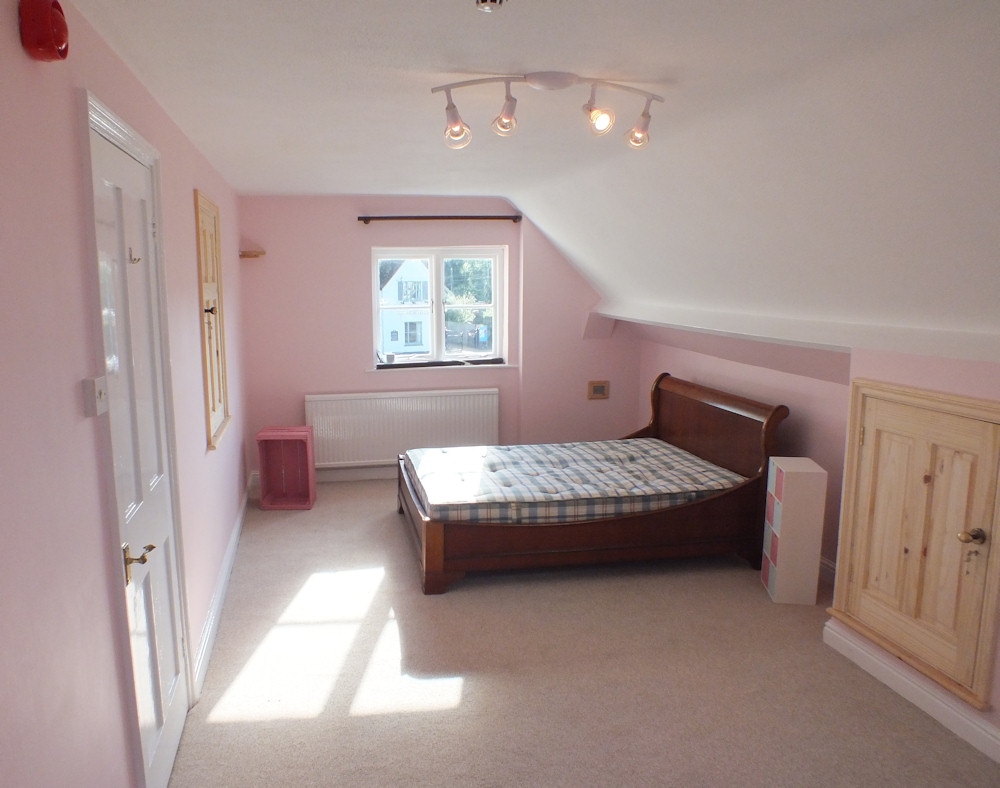
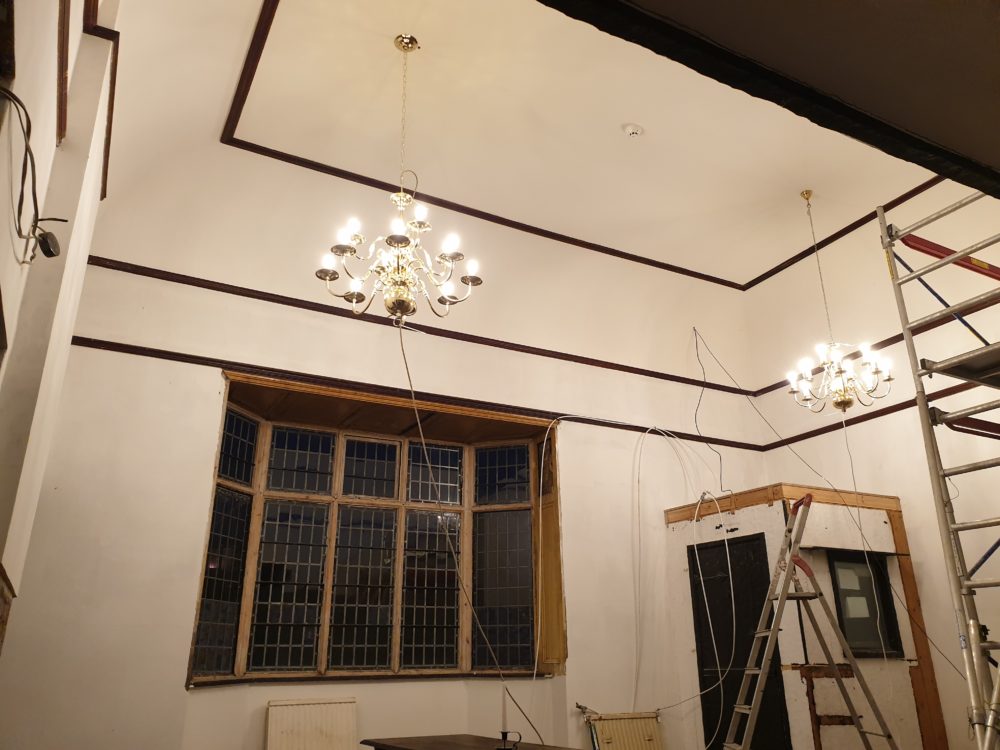
I put the second coat of paint on the ceiling and trial fitted the chandeliers in order to figure out where the wires should go. It took more than a day to figure out the position and I set them at 1/4 and 3/4 of the room length. Now I think they are too far apart.

I bought some bulbs and connected the lights up to an extension lead and the spacing seems much better.

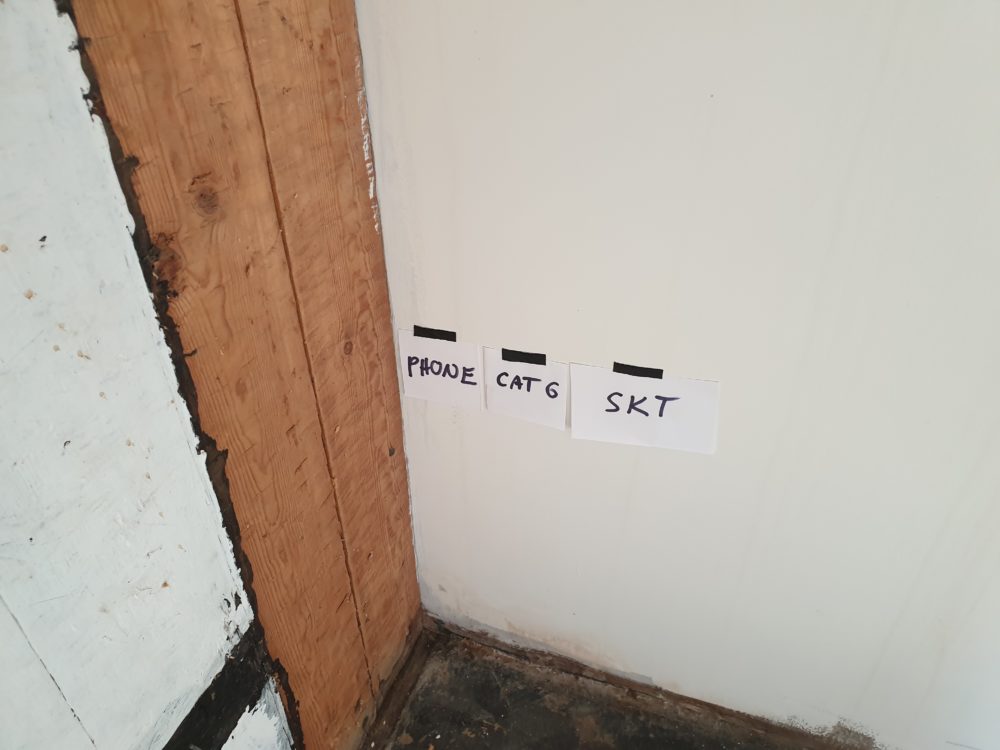
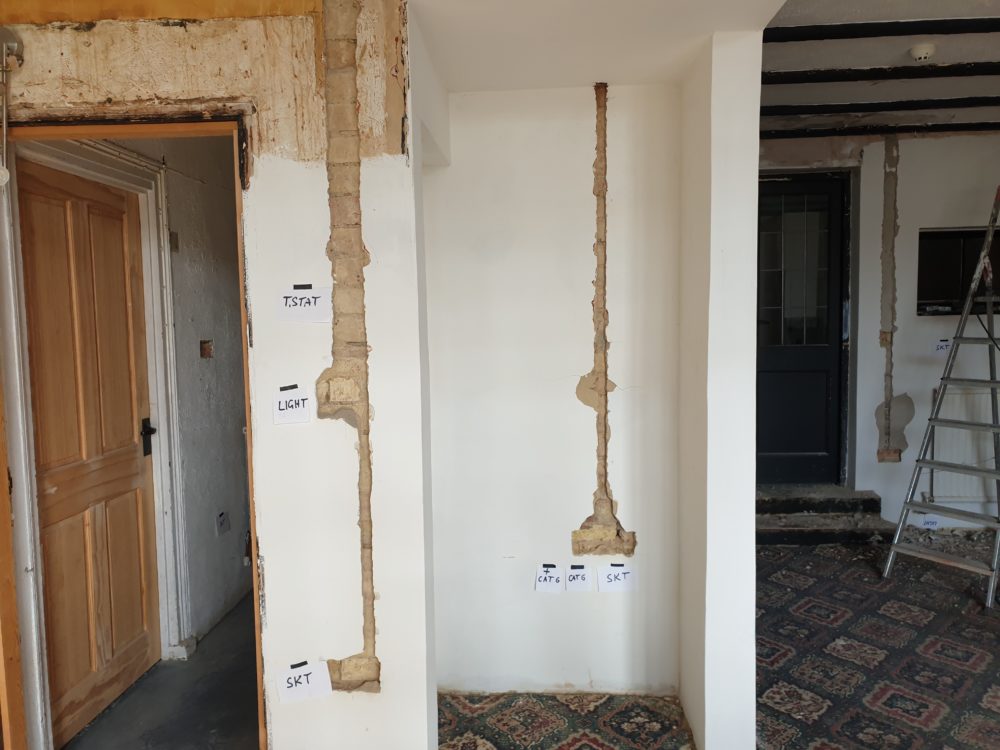
I slowed down a bit and realised it was because I didn’t have a plan. Now the house is covered with bits of paper taped to the walls representing the position of light switches and sockets.

It’s been a really useful exercise to visualise the positions of sockets and switches. I can count them up and order them and have a chance to move them around if the position isn’t quite right before I install them.

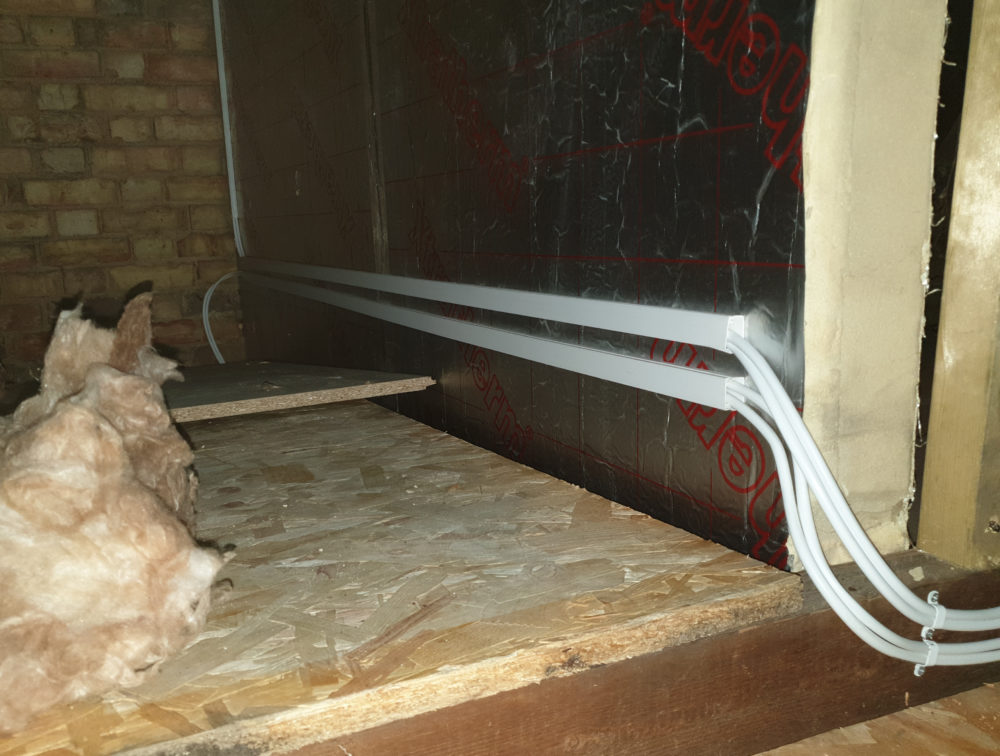
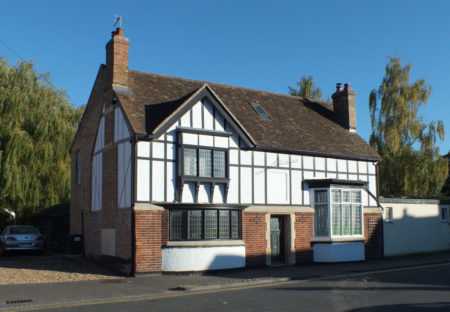
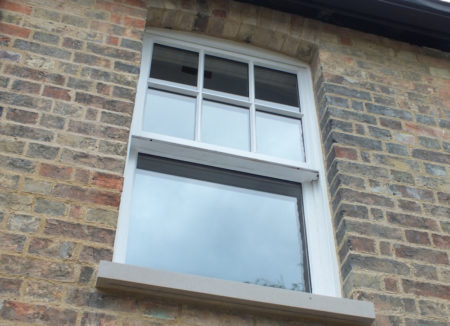
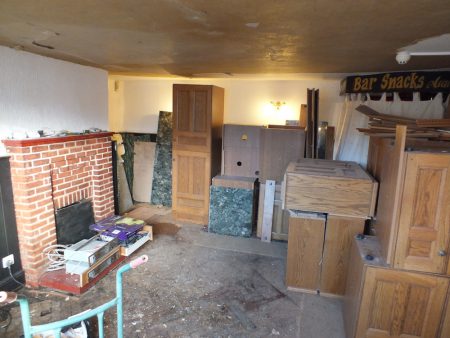
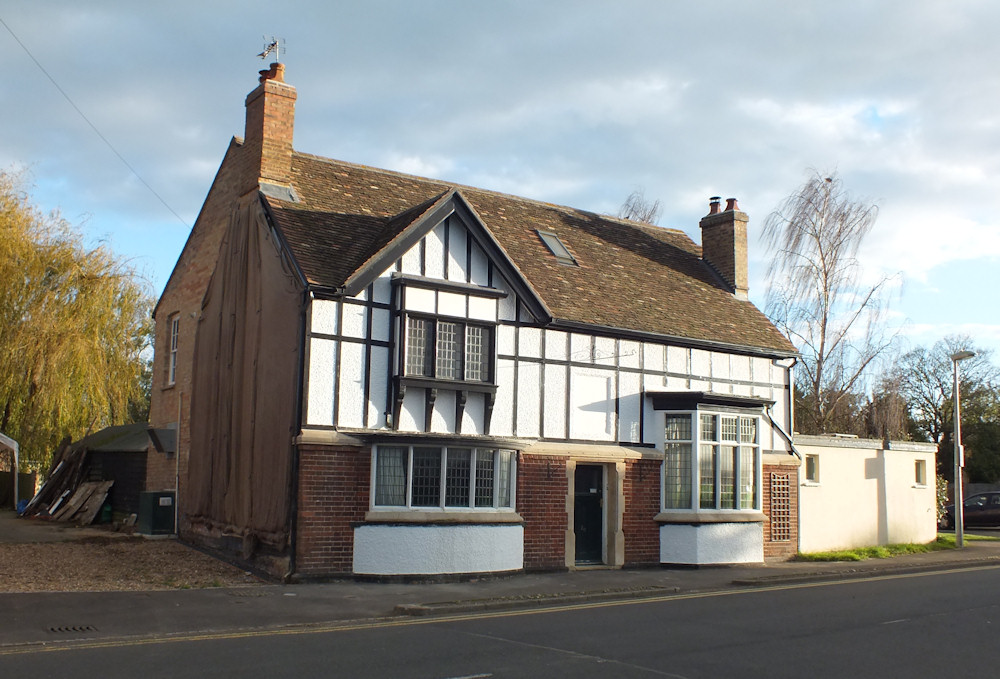
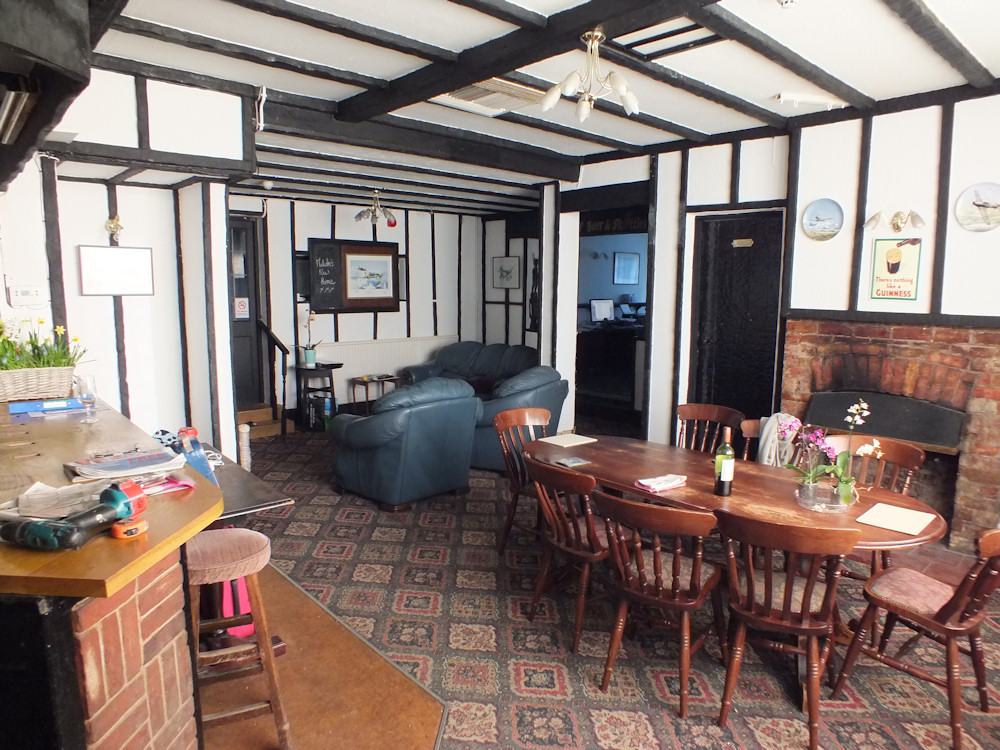
Now I understand why the electricians didn’t want to do the job. I’ve got non-standard construction. I’ve been chasing out the walls for the wiring and sockets. The walls in the photo are brick and easy enough.

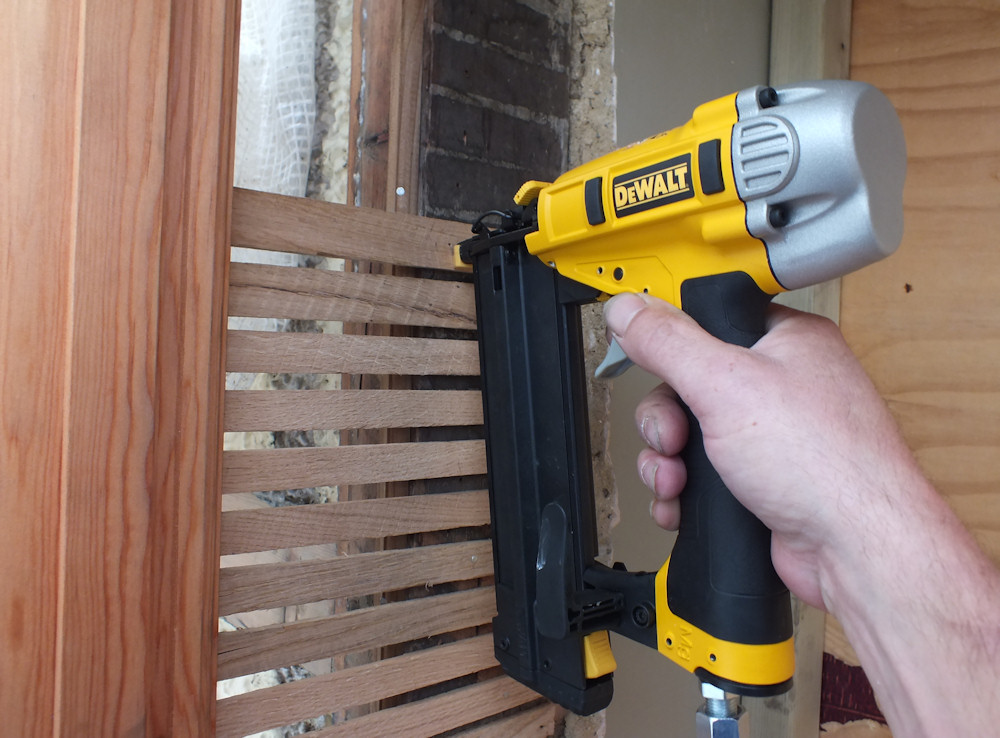
Other walls are being a pain. Two sides of the main room are timber framed with wattle and daub and were plastered in the 1970s with cement on a wire mesh mounted on batons. I’ll need to get creative with those walls.

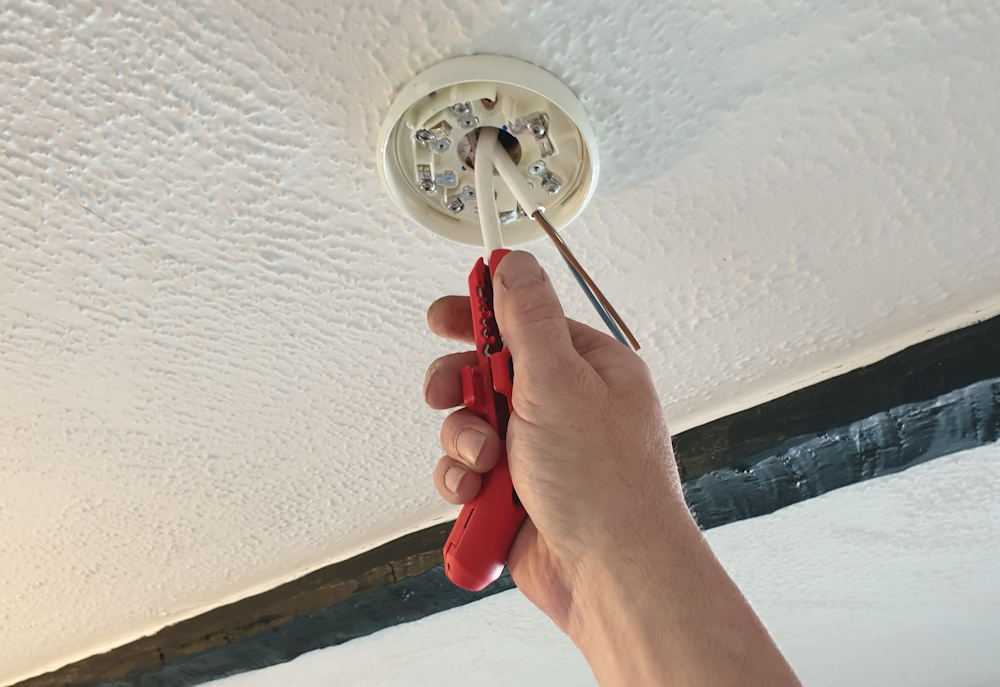
It took a long time to do the first fix. I kept making mistakes like not counting the number of wires I would need and having to chase the walls a little more. A lot of time was spent learning how to do the job.

Now the first fix is finished I’ll plaster up the chasing and finish off the rest of the wall that has become accessible after removing the old wires. I want to finish the painting before installing the new sockets and switches.

Fire alarm system rewire

View Post

Being an old pub a lot of the wires were surface mounted making decoration difficult. Many of the wires ran above the false ceiling that was removed and now dangle in a rats nest of electrical wires and fire alarm cables.

I’m planning to start with the fire alarm system as that comprises half of my dangly wires and I’ve mostly figured out the routing. It’s a good system that was very neatly surface mounted. I want to hide the wires in the floor voids.

The fire alarm cables are fire resistant. That makes a lot of sense as the only time a fire alarm needs to work is when the house is on fire.

Fire resistant cable is expensive but I saved money on the cable dispenser. It worked really well. I rejected replacing the mains powered system with a wireless alarm because it’s only 10 years old and there is nothing more annoying than having sensors beep at you when the batteries run out.

I might struggle to say anything interesting about moving wires from one place to another. With the house divided in two by the double height room and staircase the cables for both upstairs and downstairs alarm zones will have to go over the attic ceiling. That might be an angle.

I have lifted the insulation and put some temporary boarding in the loft space to make crawling around more comfortable. I’m using trunking in the loft to keep the wires tidy and away from the rockwool insulation. (This turns out to be bad – the cables should be clipped with metal clips throughout. It’s all in a secret British Standard I don’t want to pay for.) Where I can’t do that the wires are screwed to a support above the joists to avoid being completely surrounded by insulation.

I’ve made it to first fix. The dangling wires in the first photo are much reduced and I’m tidying up the plaster before re-fitting the sounders and detectors.

The outer sheathing on fire alarm cable is very tough and I damaged the inner wire sheathing the first time I tried to strip it off. I’ve bought a Knipex Ergostrip stripper which was expensive for a bit of plastic but it works brilliantly on round cables and has more than paid for itself.

The detectors and sirens are mostly fitted. I haven’t removed the ugly old surface mounted trunking from the upstairs corridor yet. I moved the sensor in the photo a little because symmetry is important as is joist location. Fire alarms are a bit ugly but surface mounted wiring is worse.

Once everything was finished I checked the wiring for faults then switched the system on and then tested it some more. It works!

Winter Jobs and 2022 Plans

I’ve realised I never get anything done on the house over winter – there is always a 3 month gap in the blog. I keep planning to do work over the winter like the electrics, the kitchen, the floor in the ballroom but it never happens. Nothing ever happens over winter especially now I have Netflix.

This year I’m planning to out-smart the house by spending the summer getting on with all the winter jobs that have been building up. Apart from maybe when the weather is nice and I can be outside doing things…

(Photo 2017 when it snowed).

Lime season is Late April to late October apart from the middle of the summer when it’s too hot. Shrinkage in the new green oak gable timber frame needs some oakum to fill the gaps.

Linseed paint season is late July to early August and the front timbers need a coat of boiled linseed as they are dusting and shedding black pigment onto my limewash. And the front door needs another coat of yellow.

The flat roof toilet block extension needs to be painted in terracotta limewash. A bit bold but probably better than Magnolia. My strategy is to paint it in a different colour from the house so I can pretend it belongs to someone else.

It’s the indoors stuff that is really holding me up. It’s been a real pain finding trades. Trades are all very busy and quotes these days are 4 times higher than usual. This year I’m planning to do all the stuff I would have preferred to outsource. I can get on with everything else next year.

Also I’m thinking about buying an E-Type project to keep me busy over the winter. I’ll need a garage for that…

Tidy up in the yard

Once the gates were fitted I realised that there wasn’t enough space to drive a car in and then close the gates behind it. More space was created with the help of a grab lorry removing a big pile of unusable bricks from the garden wall.

3.5m seems like a good width for the gates. The lorry had no trouble getting through and had space to manoeuvrer to avoid the Renault 5 and the drain cover.

Spurred on by the extra space generated by removing the rubble I cut the pallets into firewood and ordered a skip for the big pile of rubbish that started building up last year.

I’m surprised it all fitted into the skip. I thought it was going to take 2 skips.

Making things more posh

Some re-organisation this week.  The spare overhead cupboards are now in the temporary kitchen and I’ve decided I like them.   I had planned not to have any overhead cupboards in the real kitchen but the end wall above the kitchen table is still up for grabs and it might be fun to do something there.   I’m having thoughts about putting the kitchen back together after 4 years.

wall-cabinets

The snug now has a posh bookcase so I can pretend I’m intellectual.   I want to see how posh and fancy I can get it before I actually decorate.   Maybe if I get a woodburner  it’ll look better than the dangly flue in the fireplace.

bookcase

The cat has settled in very quickly.   🙂

cat

New roof on the car tent

The car tent roof was destroyed by the three weekends of winds in February.   The marquee was from Gala Tent and it had done brilliantly well having been erected as a temporary measure in 2014 – the willow has grown a bit since then.

Helen came over to help.   It was really hard work putting the new roof covering on and I’m still aching.   Normally you would lower the frame to ground level but the legs were siezed so we had to lift the heavy covering over the roof at full height using ropes and a scaffold tower.

car-tent2

Pretty Picture

I wanted to post a photo of the front of the house as I haven’t done that in a while and all the scrolling is a pain when I want to show it to someone.   The house is starting to look tidy in places.

front-new-bay

Not a lot of progress to report.   I’ve finished the windows – they took a long time!   I’ve mortared in the new windows for air tightness and painted another coat on some of the windows so they are finished now on the outside.

Also booked a skip and had a good tidy, removed some ivy, put a bed and a radiator back into the bedroom I decorated.  All bitty things but worth doing while the weather was still good.

. bathroom-sash

I’ve finished outside for the rest of the year and hopefully will get the snug and kitchen closer to finished over the winter.

It’s winter now! So, err, progress…..

I’ve ignored the house completely since the last update (apart from a 3 month spring clean).   I have been having lots of fun instead. I’ve also been busy earning money and hopefully have enough to finish the work on the house.

I’m off to Finland for 3 months now, but I’m planning to take the summer off again so I can get the house closer to being finished.   Hold your breath – I’ll post again in April or May with news of progress…..

winter

It’s July now. So, erm, progress….

I’m still alive but not much has happened on the house since the last blog entry.   I’ve been busy – I came back from Sweden at the end of May then went to Finland for a few weeks.

Since the last post I have been on a ‘diet’ and have lost 5kg (the remaining 7kg is sticking out in the photo below).  My cunning plan is to burn off more energy than I eat so I’ve taken up cycling.   40 miles of cycling burns a whole day of calories.

I’ve been working on getting a social life too. Someone allegedly once said “it’s summer – go out and have some fun as you’ll be spending half the winter back in Finland.  And don’t worry about the kitchen or the plastering in the snug – they will probably sort themselves out”.  Wise words….

grafham-water

The Great Flood of 2016

The muppet who installed the cold water tank in the loft neglected to include a pipe from the overflow to outside.   Unfortunately I was in Sweden when the ball cock failed and had to travel home early.

In the loft I have removed the wet insulation to allow the ceiling to dry.   It was only installed last year.

wet-loft

The water flowed into Kae’s bedroom soaking everything. The carpet and bed have gone to the tip.  I don’t know how the floor stayed so dry – the carpet was soaking.

wet-bedroom

From there it poured into the snug, mostly avoiding the kitchen that was stored there, but soaking most of Kae’s things.    It did a good job of removing the wood chip wallpaper from the ceiling.

wet-snug

Rocco came over to help remove the carpets and clear out water damaged things.

junk

The one good thing is this is an old house and the breathable construction hasn’t suffered much damage and should dry out OK.   Wouldn’t have fancied having a flood like this in a modern house.

I have purchased an overflow pipe for the water tank.   It cost £15 and will take about half an hour to fit.

Scaffolding Removed

The scaffolding was removed today.   It’s odd being able to see the whole thing (apart from the new bright white oak frame in the gable which will remain covered for the winter to protect the lime).  The ground floor isn’t finished as the scaffolding was in the way.

scaffolding-removed

I definitely need to do something about that flat roof extension.  It doesn’t look quite so bad with the magnolia paint removed from the gable.   Maybe I could clobber the render off and pretend it is a garden wall.

east

Though a bit more mock tudor wouldn’t go amiss.  (Photoshoping pictures is much easier than actually doing stuff.)  It would need good overhangs to work, and the gable would need to be angled in the middle as the wall below isn’t straight.

photoshop-flat-roof

The advantage in doing things very slowly is it gives time to think up better ideas.   This doesn’t work – too big and ugly.

Wood Store

We have about 10m3 of wood from the Willow trimming and Cypress felling last year.  It has been knocking about in log form to allow it to dry sufficiently for splitting.  The Willow (trimmed outside growing season) is already dry enough to burn but the Cypress will need to season for another year.

I bought an electric log splitter (Forest Master FM10) and it is brilliant.  It got through all the logs in a day and a half over the weekend.

wood-pile

The log store will need to be enormous to hold all of the wood.   This one is going to be 7m long.  The ends borrow some features from the house timber framed gable, and I’m aiming for exposed rafter ends.  The wood is the same price no matter how nutty you get with the design, the dimension are intended to result in near zero wastage.

frames-in-progress

It has been raining all day, otherwise the log store would have been up by now.  It was only supposed to be a weekend project.

It only rained for half the next day but I decided I like rain and got on with putting up the frame.   It didn’t end up quite zero wastage as I cut some of the rafters the wrong way around. Later on the middle parts of the frame got uprights to match the ends as they make it easier to stack the wood.

wood-store-frame

It took another day to nail the roof on and cut some pallets down to stand the wood on. It rained heavily before I finished the roof and the timber frame stayed dry with all of the overhangs and drip edges working as they should apart from a cock up where the feather edge board is joined which ought to have had a little gutter rather than a frame underneath.

Now I just need to finish off the trim at the bottom to prevent willow leaves from blowing in, then fill the store with wood.  It occurred to me it wouldn’t take much longer to make a car port when the tent needs to be replaced.

wood-store-2

It took a further couple of days (between rain storms) to stack the wood store with wood and tidy up.   The size turned out to be quite a good guess with space remaining for only a few more logs.  It is a much more efficient use of space than the pile of wood that originally sat there.

wood-stacked

I made a mistake and put some wood stain on the lighter wood to help it match the darker wood.    Turned out to be a varnish of some sort which flakes of in an untidy manner.   I would have been better waiting a few years for all of the wood to go to grey.

Wood Burner and Lath

I’ve been a bit quiet over the last couple of weeks.  I ran out of things to do so spent a whole week getting organised and ordering things.

One of those things was a bit of a luxury – a Clearview 500 wood burning stove.  The installer did a neat job and the stove is fabulous.

stove-1000

Other things included oak lath for the oriel window and, after half a day trying to nail it in place, a nailer.  The nailer is fantastic and the rest of the lath went on in less than an hour.

nailer

More on the window later – A new oak window sill is on it’s way from a local carpenter.  Once that is in place I can finish the plastering, then after the linseed oil paint arrives I can install the windows and finally remove the boarding.   The lime paint should arrive at the same time so I can finish off the front of the house in a colour other than magnolia.

Aerial Photographs

Kae bought me a quadcopter drone for Christmas and it has a camera fitted.   It’s good fun.  After some aerial shots of the cat running away I’ve taken possibly the first ever photo of the rear of the house which has always been hidden by the earlier barn in the foreground.

rear-house

I’ve found that if I fly too high the drone goes out of range and then promptly plummets to earth (safety feature).    Here’s a blurry shot of the south of the High Street with the pretty thatched cottages.

top-high-street

Here is the High Street north as seen from slightly too high above my back garden.

high-street-north

No actual work to report.  It’s cold and wet outside.   We have scaffolding lined up for April and a hectic schedule to sort out everything that needs doing to the outside before July.

Dropped Kerb

The road and pavement are being resurfaced and all of the alterations in the village are being done first which seems very organised.   Our kerb has been removed and the service covers raised ready for the new tarmac.

kerb-dropped

The road re-surfacing machine was fed with tarmac by a lorry running in front.

road-machine

The process was very quick.  The whole road was surfaced in a day.

surfaced

A couple of weeks later we’re getting a new pavement too!   Scraping off the old pavement revealed an old concrete pavement with an edging set maybe 18 inches back from the current kerb.  The concrete is a reasonable distance below the slate damp proof course at the front of the house and I guess it was put in when the facade was constructed in 1910.

Of course later resurfacing was plonked right on top bringing the pavement level up to the damp proof course.  It isn’t causing any problems but another layer on top would probably have done.

old-pavement

The contractors doing the new pavement were excellent.  They understood the problem of bridging the damp course and have laid the new replacement pavement slightly below the damp proofing roughly where it was before.

No More Magnolia!

The attic is becoming a bit more cheery with some new pink paint.   We’ve decided to rid the house of the drab magnolia that dominates inside and out.   Here are before and after shots.

attic-before

attic-finished

Marquee

I had originally hoped to build a garage this year, but that’s looking like it will be a couple of years away while roof troubles in the house are fixed.  The MG and Rodeo leak and their floors are sodden.

A marquee from Gala Tent will hopefully serve as a temporary garage for this winter.   It is held down by 12 ratchet straps attached to rebar fixed with resin into the tarmac.  Hopefully it won’t blow away and will withstand the willow for a few months.

Edit 6 years later – it did brilliantly!    Would recommend Gala Tent who supplied a replacement roof covering in 2020.

marquee

Tonnelle

It turns out that the ugly smoking shelter in the car park was once a fine looking covered area at the rear of the barn.

Here it is in the car park:

smoking-shelter

And here is the same shelter behind the barn a couple of years earlier courtesy of Google street view.  The mounting holes for the frame were still there, and the original location explains the non symmetrical shape.

back-garden-google-maps

We had to move the shelter from the car park so that the new build next door could connect with our sewer.  We’ve put it back where it was originally and it works brilliantly.   In France a covered outdoor area would be called a Tonnelle (not a smoking shelter).

The first really low point

Kae is in France again this week.   Normally I would take the opportunity to do some devastation, perhaps knock out the kitchen or something, but nothing has happened.  I’m completely out of energy.  Kae normally does the food, but it’s mental energy I am lacking.  I get too stressed after an hour to work on the organisation side of things any more.

I fully support the planners, conservation officers, archaeological officers, tree officers, building regs inspectors and all the other consultants you need for planning.  I don’t support structural engineers as ours was shit for brains.  It’s just when you try to combine them that things go pear shaped.

You get into some crazy situations with a change of use. Despite the building being 400 years old Building Regs treat it as a new build (they say it is a new house as there wasn’t a house there before, it was a pub).   New build insulation and water usage rules apply.

There are some exceptions – you don’t need to insulate if there is more than 30 years payback for example, but insulated plasterboard dry lining is cheap they think so they require that for all internal walls.  You don’t need to insulate if it will destroy the building, but try proving that one.

I have to insulate my kitchen.  I wanted to insulate my kitchen anyway so that’s no trouble.  Although ground levels outside are nearly half a metre higher than inside and I have damp I’ll need to get rid of first.  I can’t lower ground levels because the tree officer would rightly complain about tree roots.

But that’s still fine.  I can pay a man £1000 to dig a trench around the house to locally lower ground levels.  But the trench needs to drain somewhere.  It needs a soakaway (another £1000).  Which is subject to building regs (only £200) so the council need to know about it.  So I need an archaeologist standing beside the hole if I want to dig a suitable soakaway which looks like another £2000.  Goodness knows what that will turn in to if any archaeology is actually found in the hole.

I have solid brick walls in the kitchen and they are painted with waterproof paint outside.  I can’t dry line inside.  I’ll need to remove the waterproof paint which will cost another £1000.  Then I need an insulation system that will keep the walls dry.  Dry lining is out.  That’s another £2000.

I reckon it will cost over £7,000 to insulate my kitchen. And it’s not just the kitchen that causes trouble like this.  I need to do the same to the rest of the house.  How the heck does anyone get anything done these days without hiding it from the council?

Silly thing is the kitchen isn’t actually heated at the moment so adding insulation in there is unlikely to save the environment.  Even if we did heat the kitchen the payback from savings on heating bills would be around 500 years.  How can that be environmentally friendly when the insulation will likely be replaced in 50 years time?

I’ve got a building regs application in for change of use only. I can bodge and do it their way with insulated plasterboard and tick the boxes.   After the paperwork is completed I hopefully won’t actually HAVE to do anything more.  Of course the building has been neglected for a long time and if I don’t do anything more the place will fall down.  A problem for the next fool?

Update 2 years on:  The builders next door dug our trench and happened to find an existing soakaway which just needed clearing out…  The paint did need to come off the exterior walls, but the walls look much nicer for it.  Insulation is a topic in itself but does need to be breathable and I haven’t done it yet.

New Build Next Door

The new build has finally started in the car park.  I gather it was delayed a few months while details were agreed with the council, but it looks like it’s full speed ahead now,  Here is a view of the build from our upstairs window.

October 22nd 2013
new-build-starts

November 3rd 2013
DSCF7585

December 7th 2013
new-build-first-floor

December 15th 2013
new-build-second-floor

February 5th 2014
new-build-roof

March 19th 2014
new-build-tarmac-scraping

26 April 2014 – Some finishing toucheschimney-crane

02 June 2014 – Finished and on the market
14-june-finished