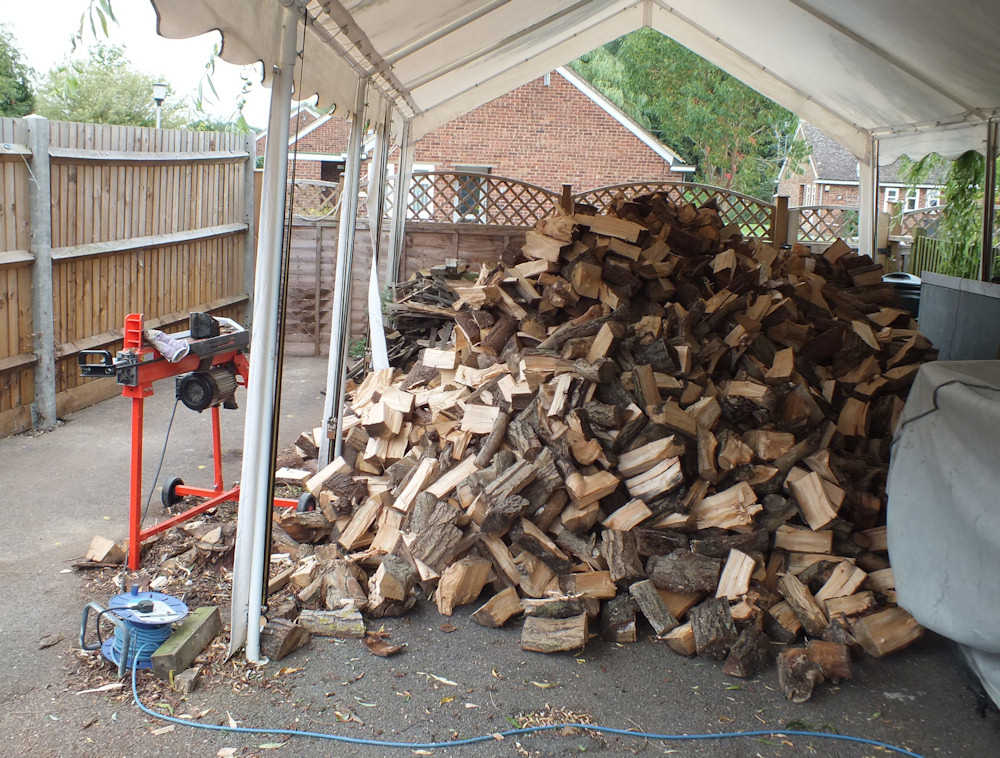
My yard has become untidy. I’ve been tidying for a few days and it’s better than it was. There are some building materials on there that will come in handy later on and the skip is for everything else.
Most of the building materials are on pallets so I’ve bought a pallet truck. My plan is to extend the wood store another 8m, call it a brick store, then tuck all the pallets underneath.

As usual I’ll update when something happens, but it’s been such a long time since the last post I feel I should bung something up here to show I’m still alive.
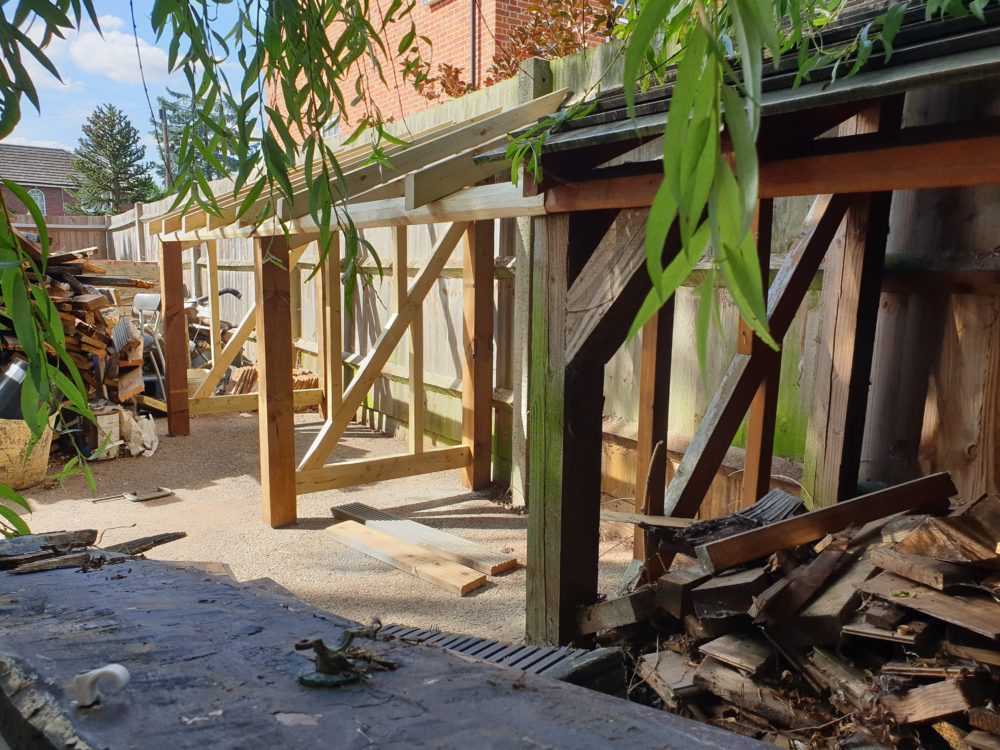
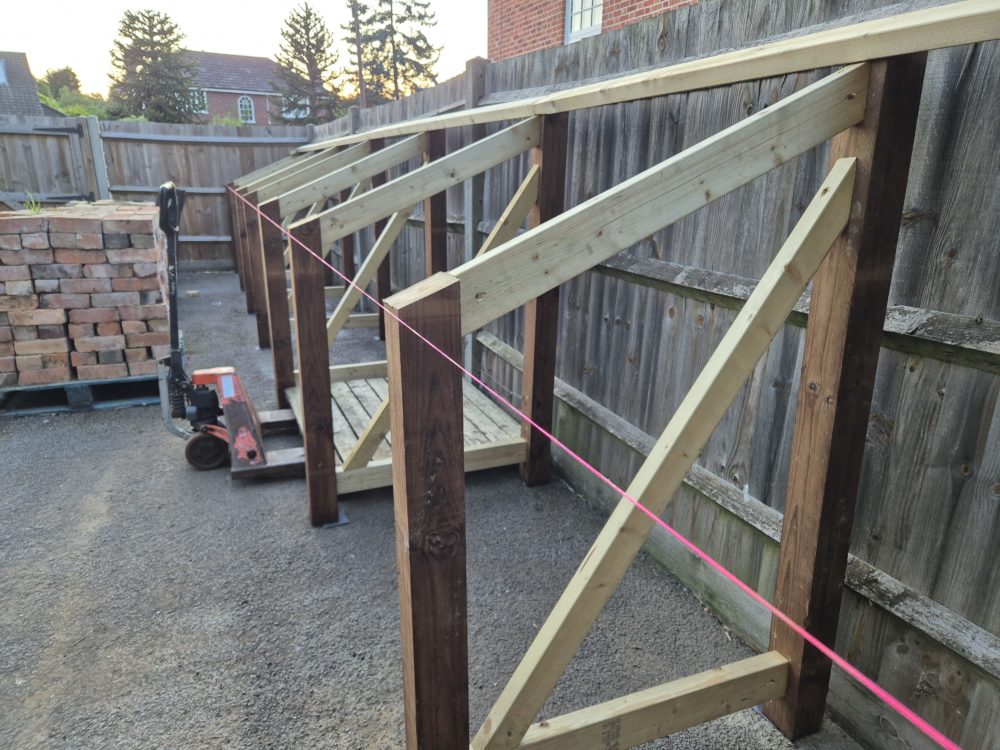
Here we go. I’ve started making the uprights and have come to the conclusion I don’t always plan things very well. It would only be another £150 of wood to go all the way to the gate and not have an odd empty space at the end.
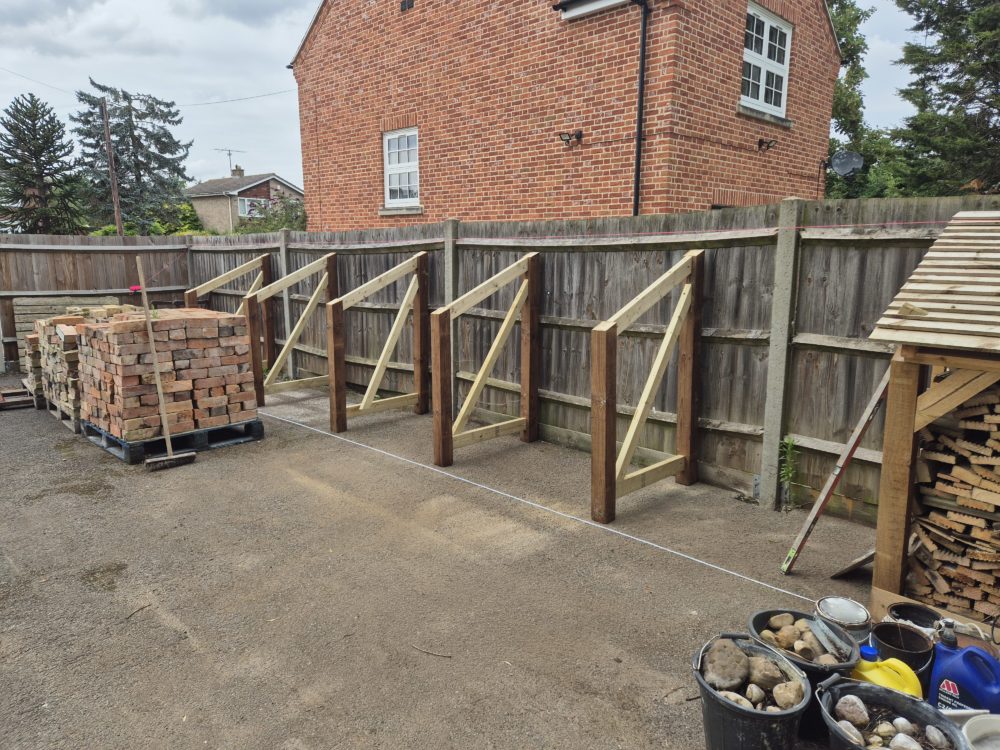
The additional wood has been delivered and I’ve made two more uprights. With the uprights levelled and roughly positioned I can check levels with a string line to make sure it’s not going to look too wobbly. The driveway does curve but surprisingly by less than an inch.
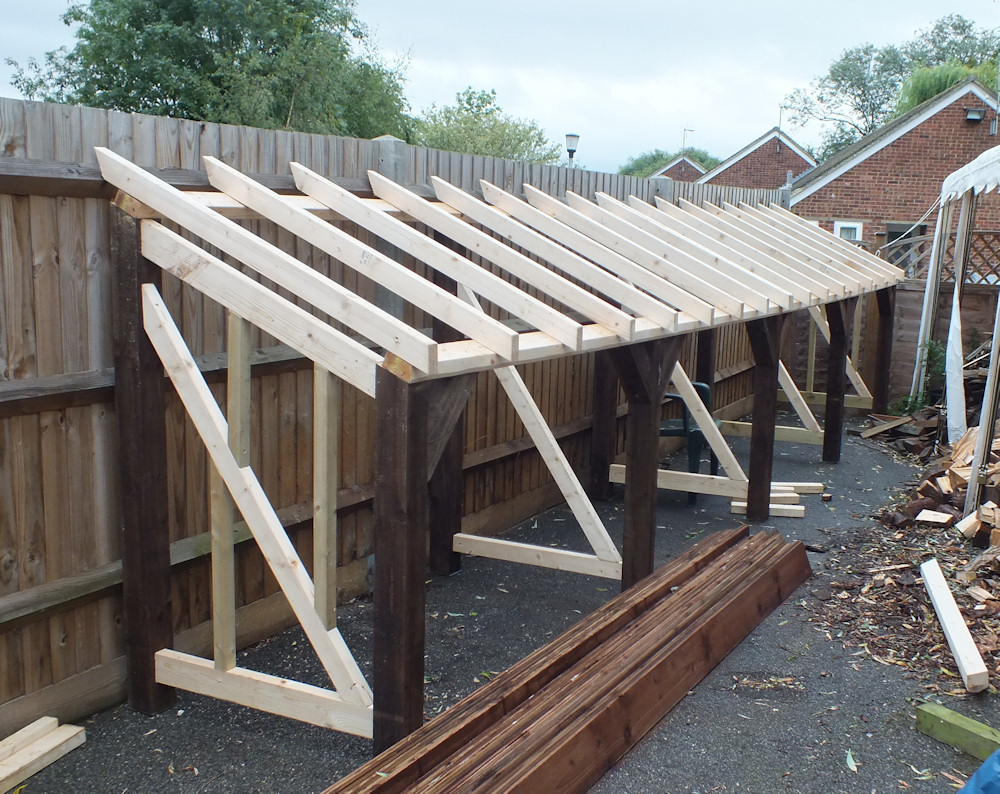
I thought about posting plans but all the dimensions are set to the space I have. The roof slope is 22.5 degrees. The height is set so once the rafters are added the feather edge boards will sit just above the top arris rail of the fence. The length of the extension is 9.77m which gives me a bay width of 1.29m. Just enough for a euro pallet.
The depth is 1m (same as a euro pallet) and that’s going to be tight as the fence posts stick out and I need 50mm for the doors so I might need to shuffle it slightly away from the fence.
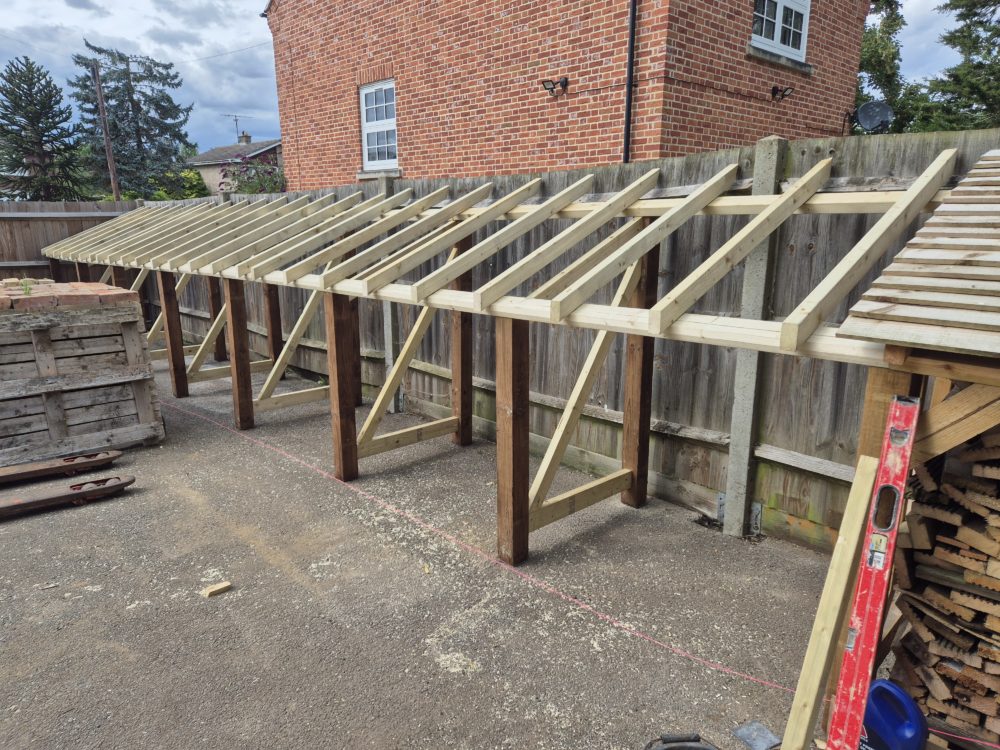
The next day the rafters went on. They sit slightly higher on the fence than expected because I shuffled the brick store away from the fence without thinking about the angle of the roof, but fortunately the roof will still be lower than the fence.
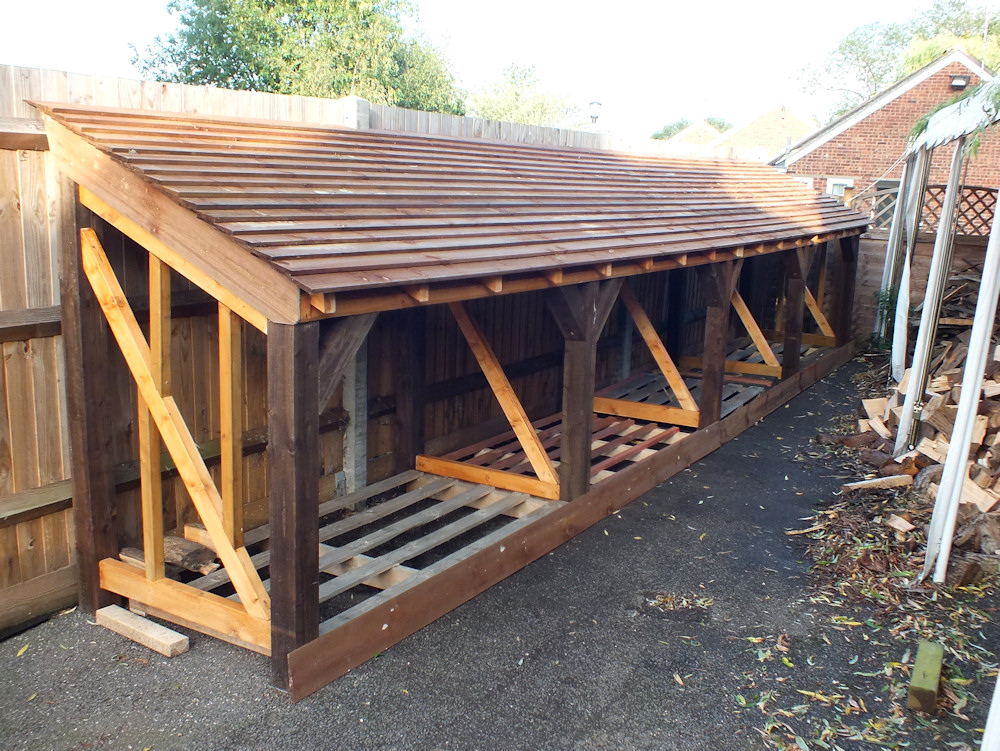
And finished (apart from 4 bits of feather edge).
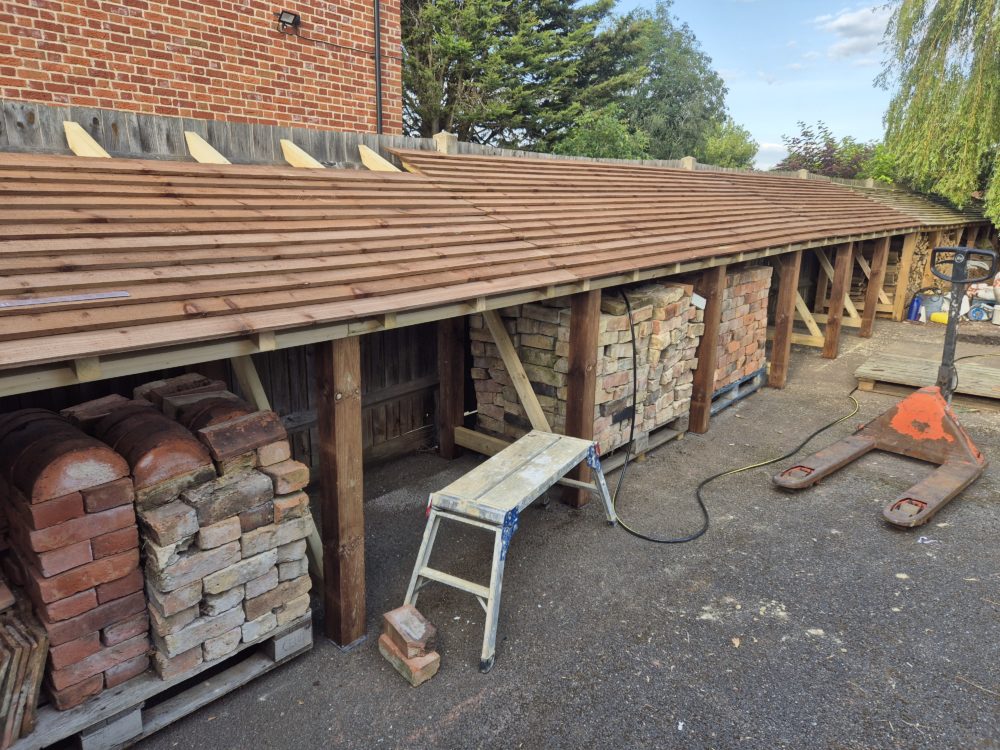
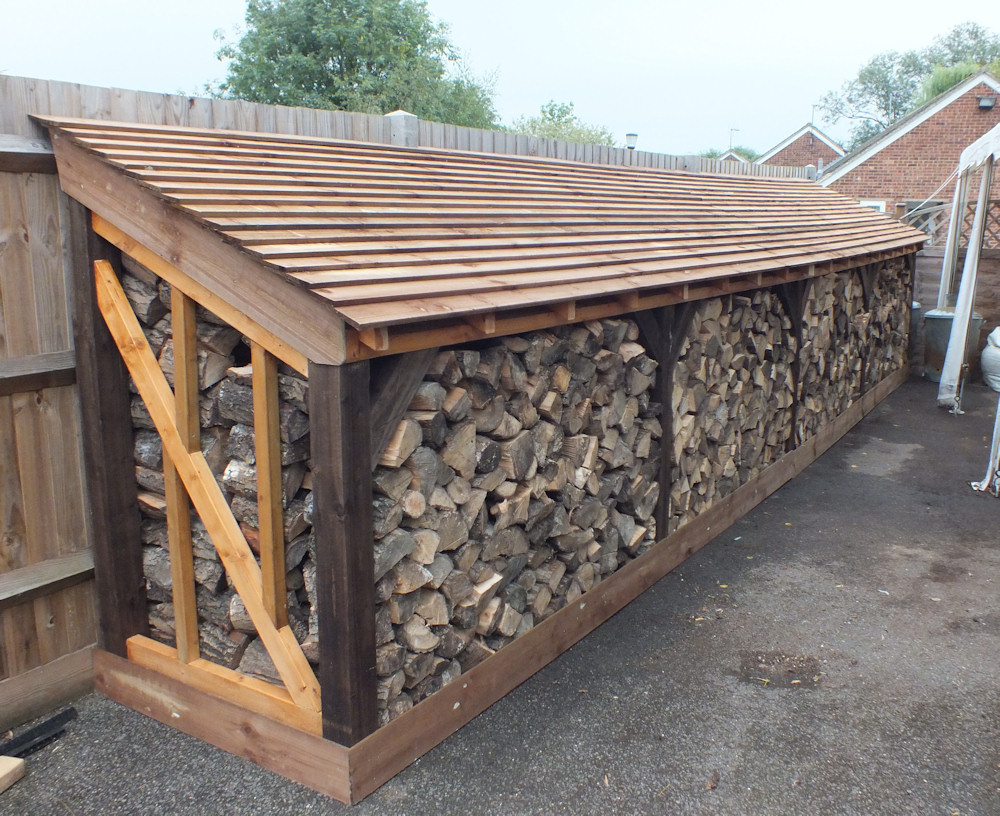
The bricks look a lot more tidy than they did in the first photo. I had been considering adding doors but the posts aren’t fixed at the bottom and are sitting on slippery bits of slate so they won’t be able to support doors. That’s going to be something to think about later.