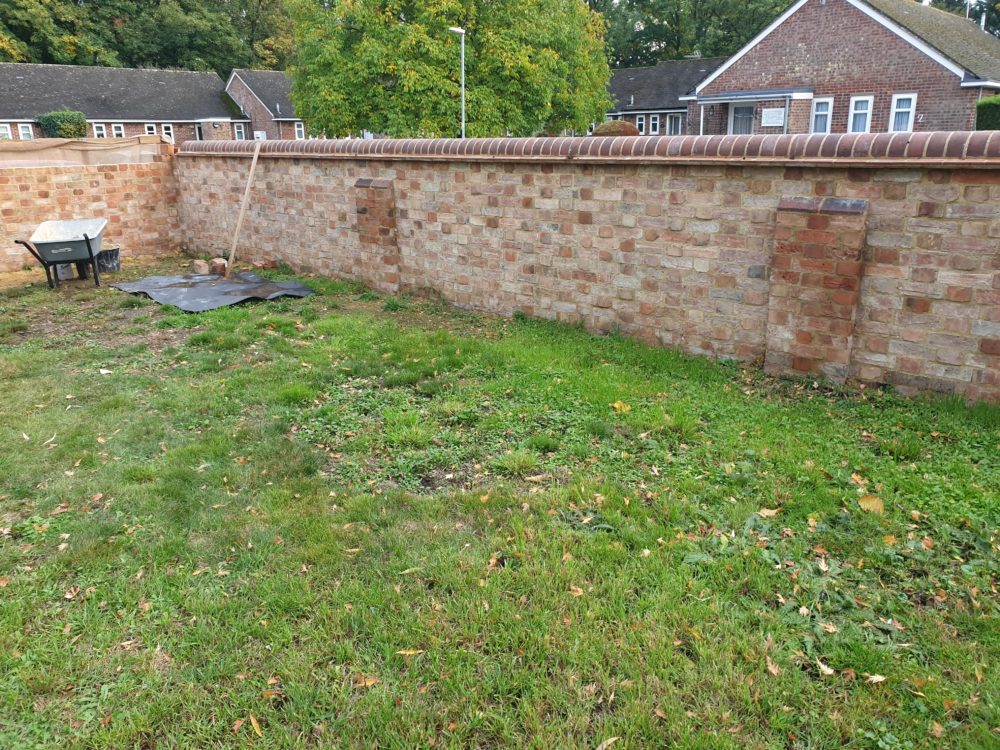
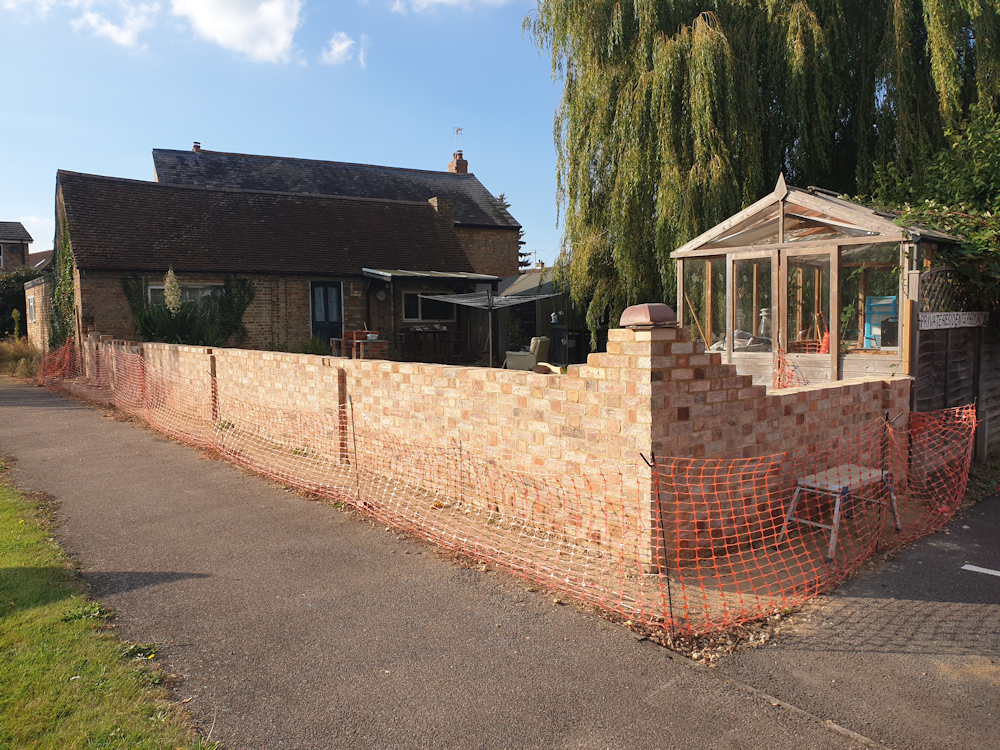
Last year the garden wall looked finished when viewed from the main road but it was still 6 courses short at the back. The weather got cold, wet and windy. I decided it would be nice to sit inside in front of the fire and worry about the rear bit of the wall next year.
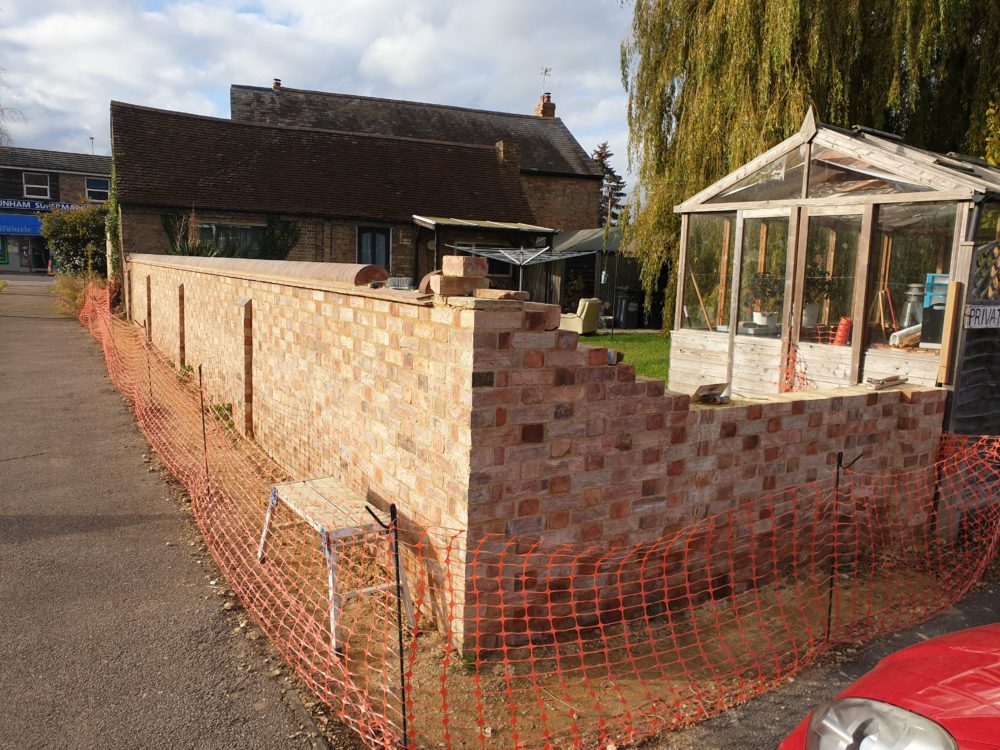
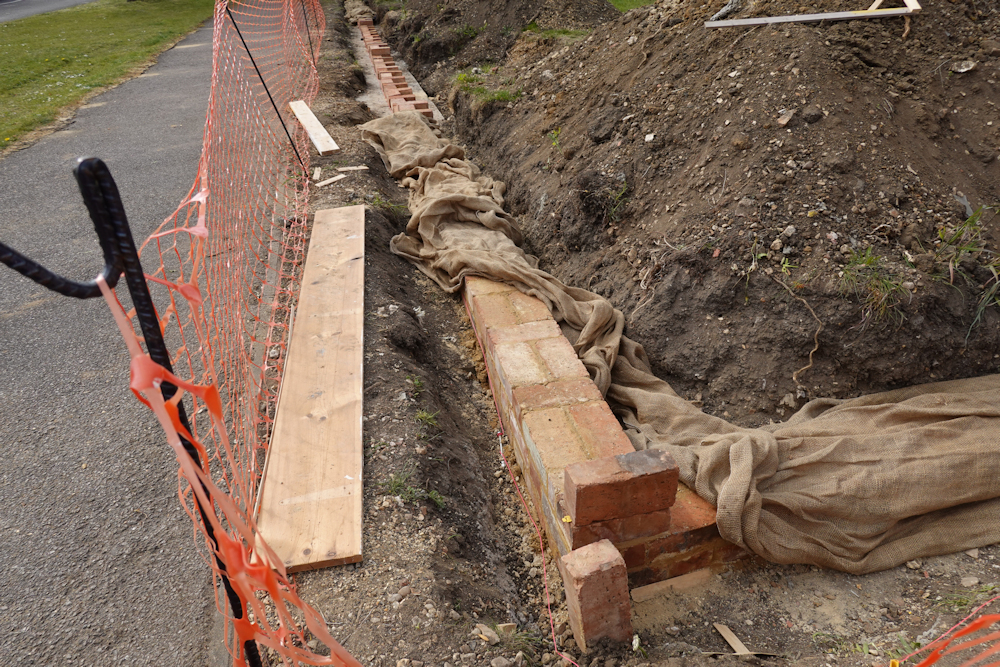
I’m a very messy wall builder. The cars that park behind the unfinished part of the wall would have been splattered with lime mortar. I spent a couple of hours making a screen from bits of an old crate and some hessian to protect the cars.
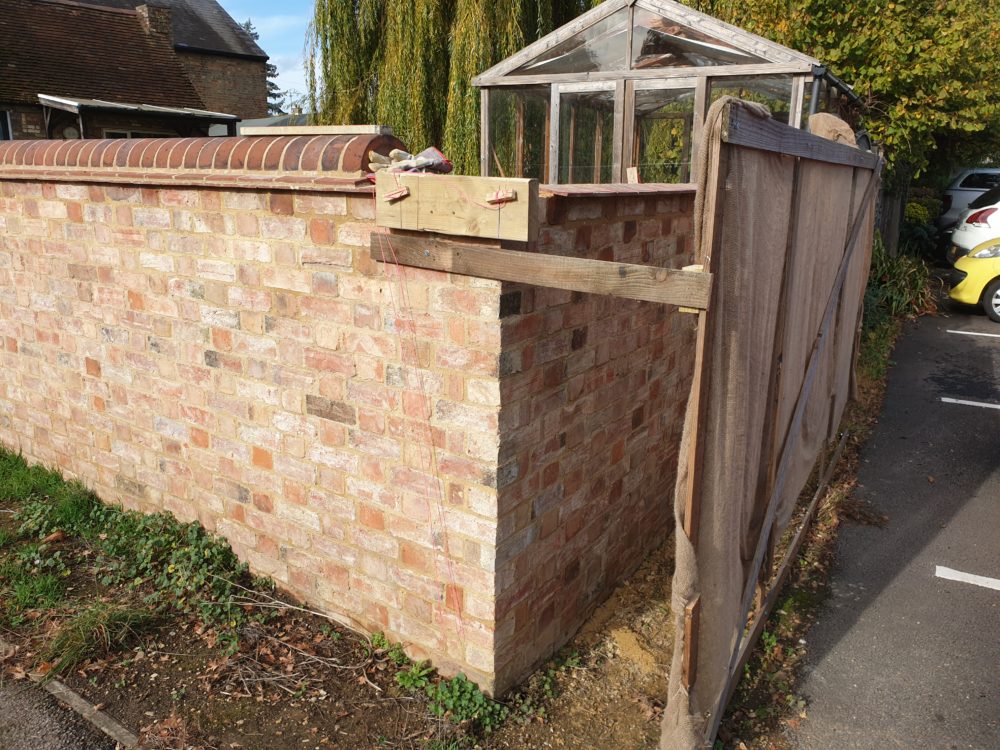
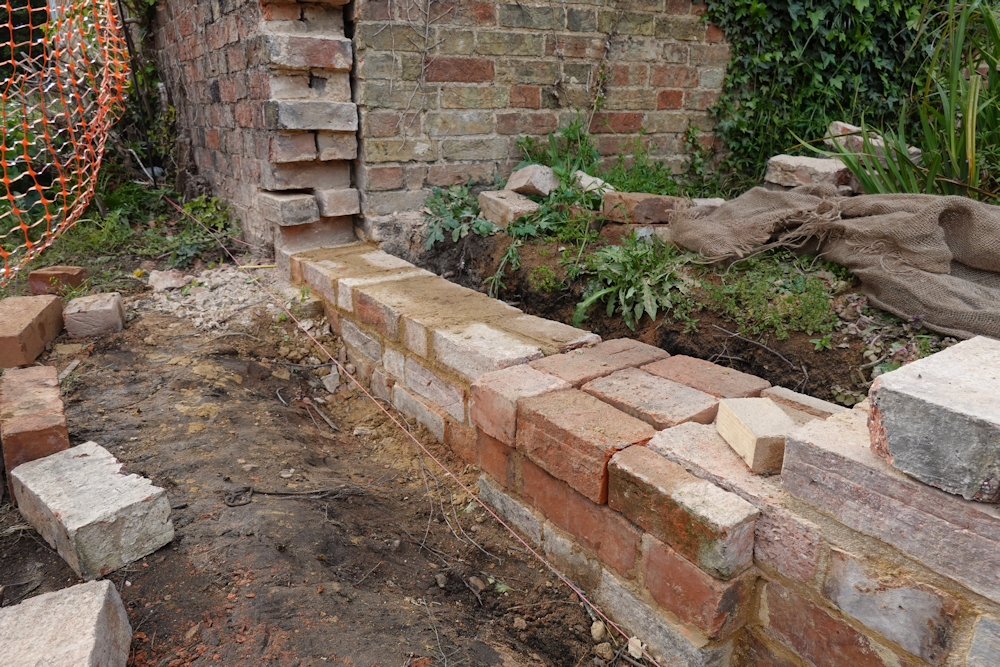
Behind the screen I’ve started the coping courses. The piece of 6×2 screwed to the top of the wall is cunningly set up to position the string lines for all 3 coping courses.
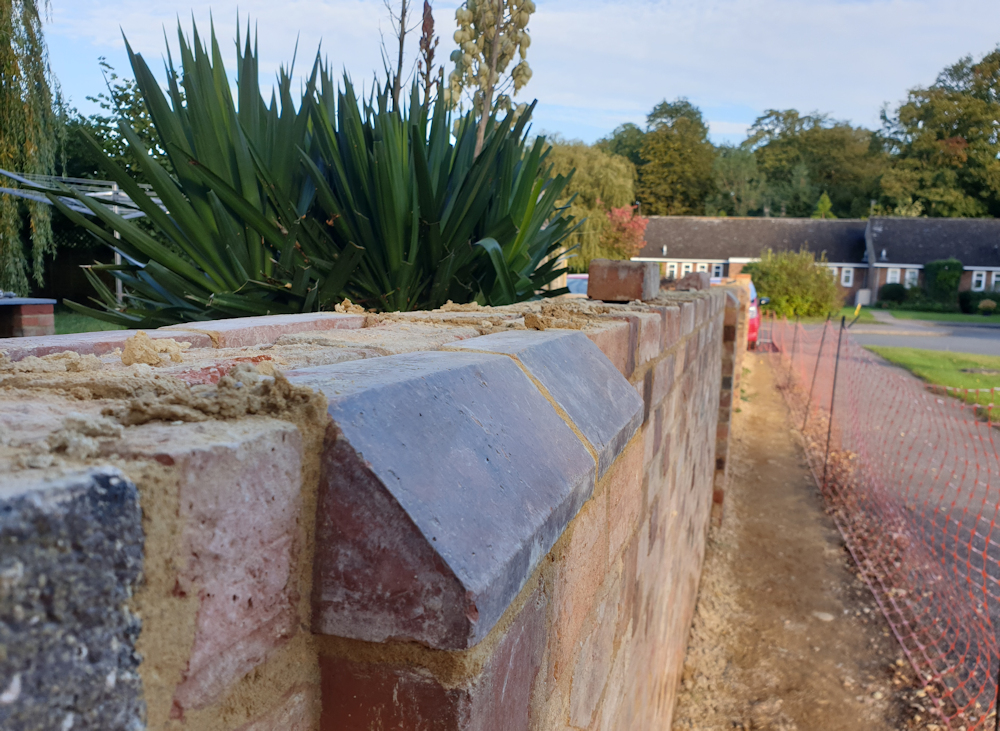
Work was slowed a little by heavy rain every other day. Once the coping had made it most of the way along the wall the wood holding the string line was removed and the creasing tiles were continued to the corner using a straight edge for positioning.
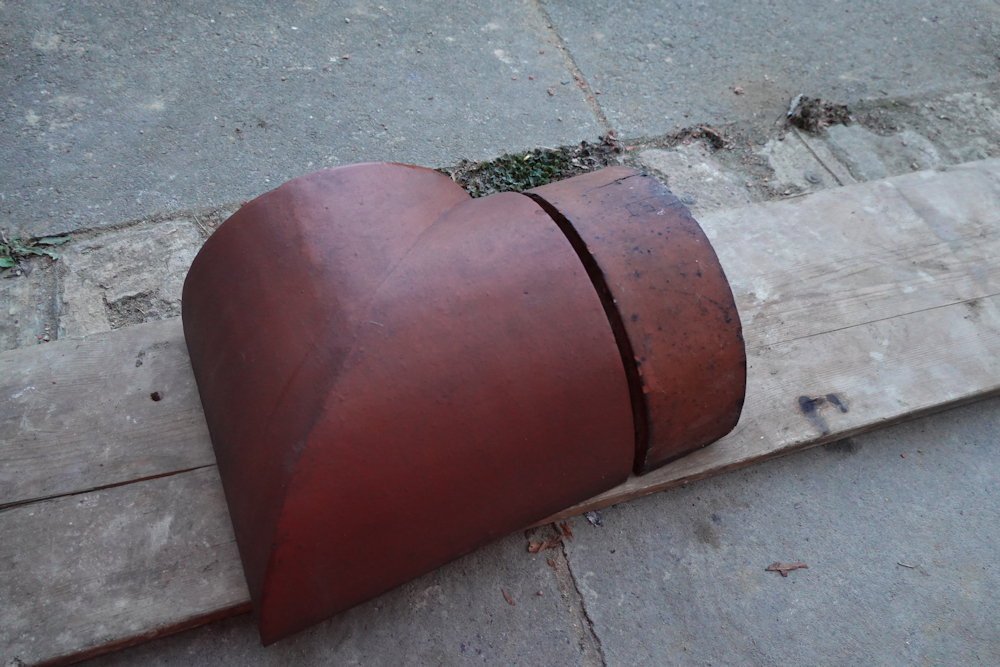
On the final day of the build the most expensive brick in the world could be set in position and used as a reference for the remaining coping bricks. It looks a lot smaller than the coping bricks in the photo. That’s weird perspective and it’s actually slightly bigger.
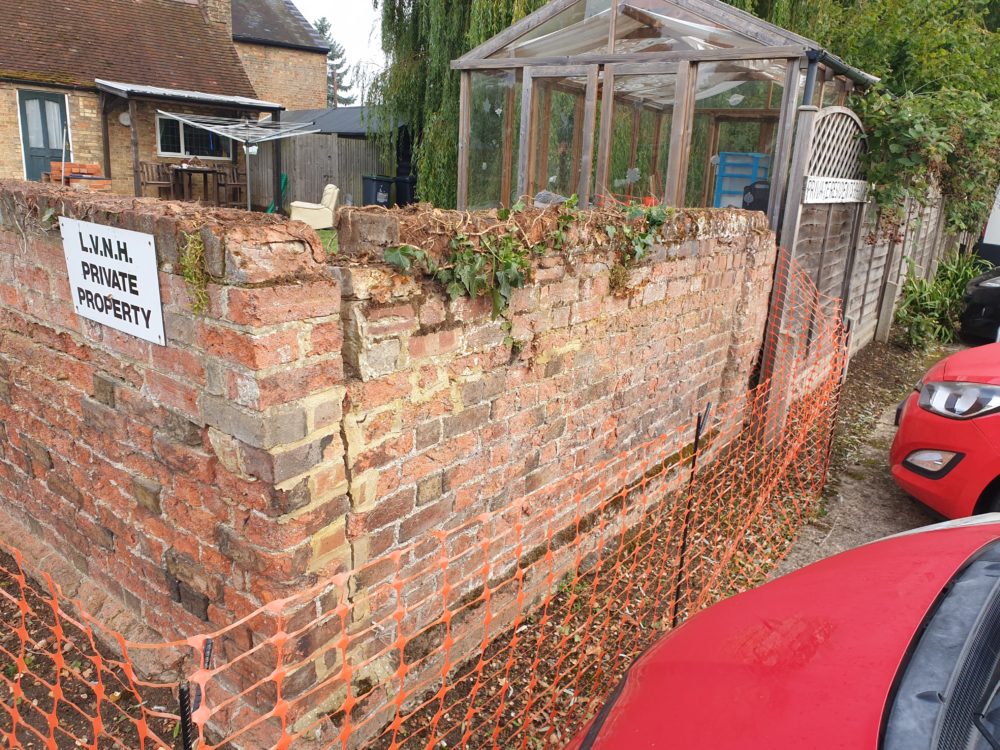
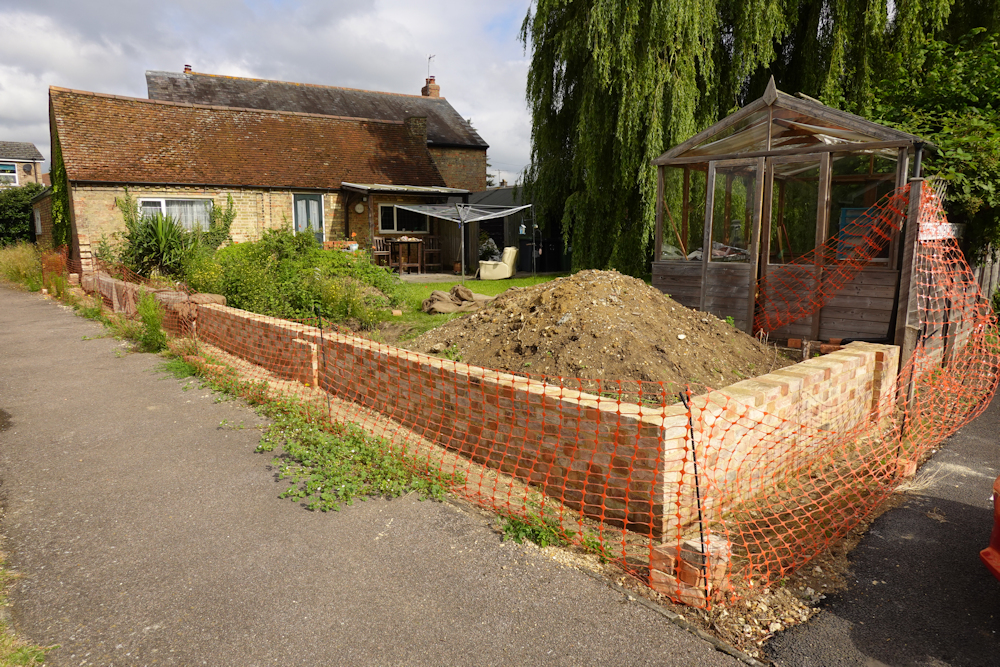
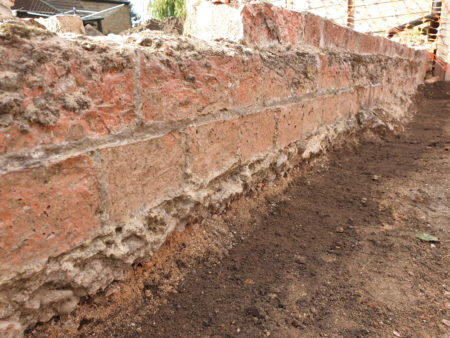
I forgot to add a before photo. The wall was quite unstable – in the back part the bottom of the foundations were above ground level.
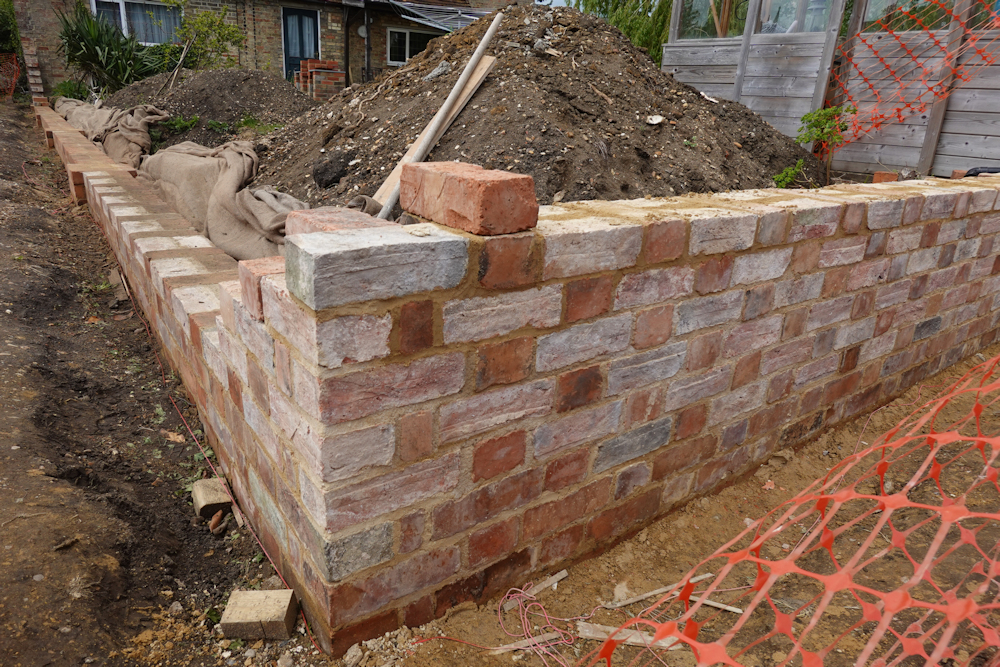
I’ve got to the top of the piers and have finished them off with plinth bricks to match the existing pier that is still built into the barn wall. The plinth bricks are red but are a little sooty and look blue in the photo.
There are 2 courses to go before the coping and I still have no idea what the original coping might have looked like. But there is spalling in the top few bricks of the existing wall incorporated into the barn gable so there was probably never an effective drip overhang.
I’m using really rubbish early 19th century bricks that are very prone to spalling. I want an effective drip overhang and did some experiments with different methods before deciding on creasing tiles. It wasn’t until after I bought them I realised creasing tiles are a 20th century invention and have no place on this wall. Oops.
Creasing tiles only seem to be available for metric walls and are too short. I’ve cut them to give me a 40mm overhang. I did some testing with a garden sprayer and found they only dripped effectively when I got to a 1 in 8 slope.
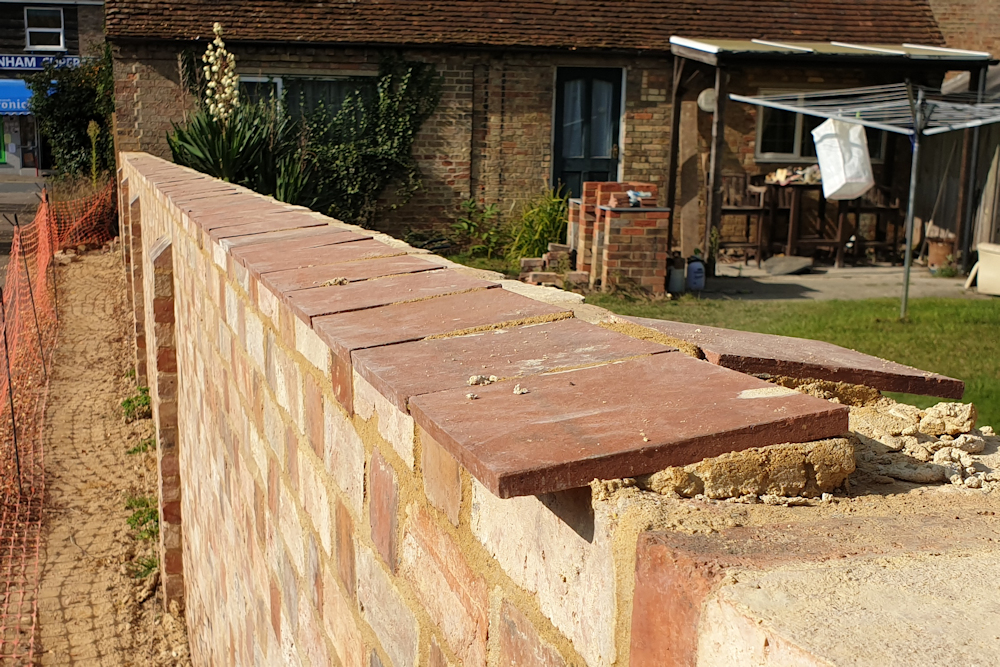
I’ve made a start on the creasing tiles. I glued a bit of tapered wood to the bottom of my spirit level to set the angles and positioned the edge to a string line.
I want to do the whole course without cutting tiles but 1mm short on the mortar gaps will leave a 10cm gap at the end. And I’m doing them by eye. I’ve placed every eighth tile along the wall so when I get to each one I can see where I need to adjust the gaps a little.
I cut the second course of creasing tiles a little shorter. They are angled more than 1 in 8 by accident but too much overlap with the coping bricks would have resulted in an excessively large mortar gap under the coping anyway.
The idea is to bed the half round coping on mortar in the cavity inside the creasing tiles to avoid too much mortar oozing out and staining the tiles. The gap between the coping and tiles can be filled during pointing.
A picture sent back from the future shows how the drip overhangs work in heavy rain. The wall is dry but the piers (that have only capping but no overhang for traditional reasons) are wet and remained wet for the next couple of days.
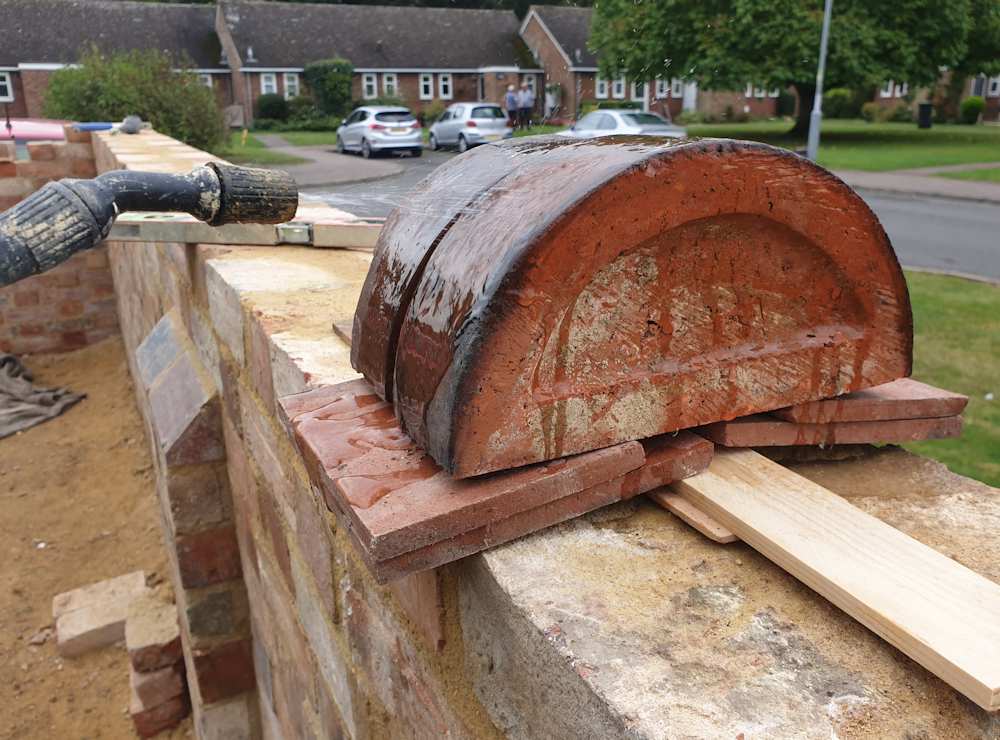
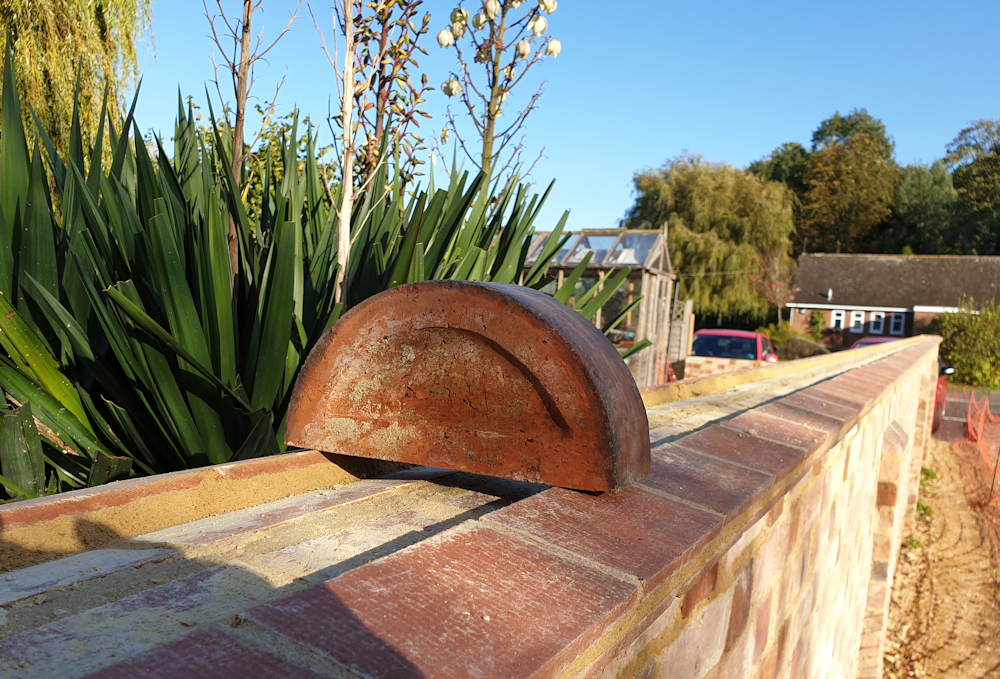
I’ve started on the half round coping. I’ve found them really tricky and am only managing 35 a day. I’ve laid 60 so far. I found it helps to have the frog orientated to accept the next brick as in the next photo. The height of the coping varies so the string line is only a long term guide and the heights are set to the previous bricks.
The coping bricks are on edge so the first joint to get right is the vertical one, after that the horizontal joint can be adjusted. None of this was in my bricklaying book. I’ve got sloping creasing tiles to shed water so don’t need the ugly sloping mortar fillet that normally fails after a while.
At about halfway through I measured the brick plus mortar gap averaged over the last 50 coping bricks and used that to mark out the position of the next 95 bricks. Using the mortar gaps I was managing naturally made it easy to maintain the brick spacing to the end.
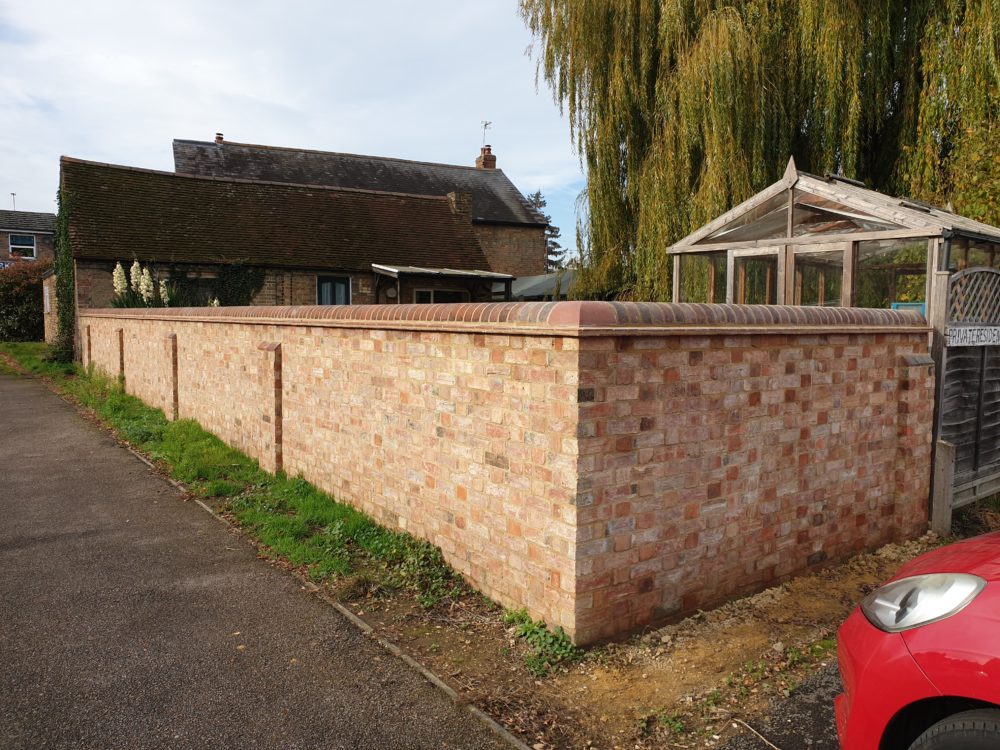
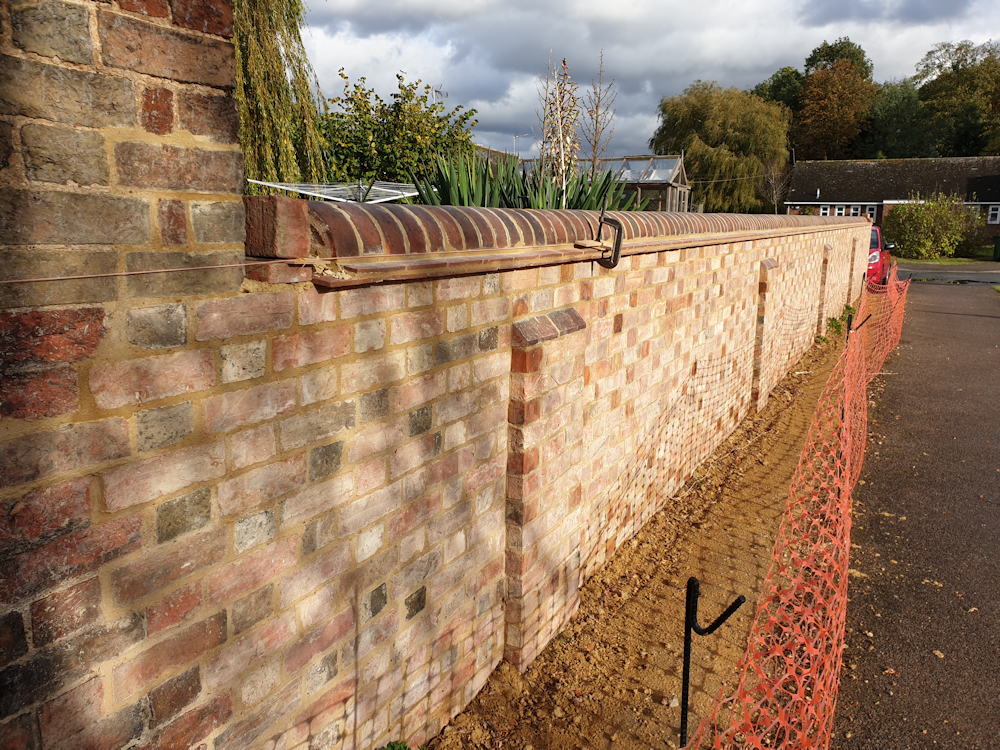
At the end of October the long stretch of wall is almost finished and it’s looking really good.
Got to post a before photo after this. It had been cement pointed so the bricks had spalled. Also a tree had pushed it over. And no nice coping to keep the rain off. It was worse than it looks in the photo. 6 inch lean increasing every year and quite wobbly at the far end.
The bricks are the same. I just turned them around. Still some spalled bricks to turn around under the barn wall but I thought it best to do the bricks under the corner first.
I left a short section at the back 6 courses low so I could climb over it rather than walk the long way around and that still needs building to full height.
But we’re into frosts now and lime doesn’t like frost. I’m going to down tools and finish off the short section at the back next year. The wall has taken all my time and there are other things to catch up on. Also plenty stuff to do inside where it is much warmer.
I’m still working on the garden wall and hope to get it finished this year. I took a week off work when the weather was suitably dreary and managed 3 courses on the 17m stretch. I’m averaging around 65 bricks a day. The bricks themselves go down fairly quickly – it’s the pointing, cleaning and setting out bricks, and cutting bricks for the piers that seems to take the time.
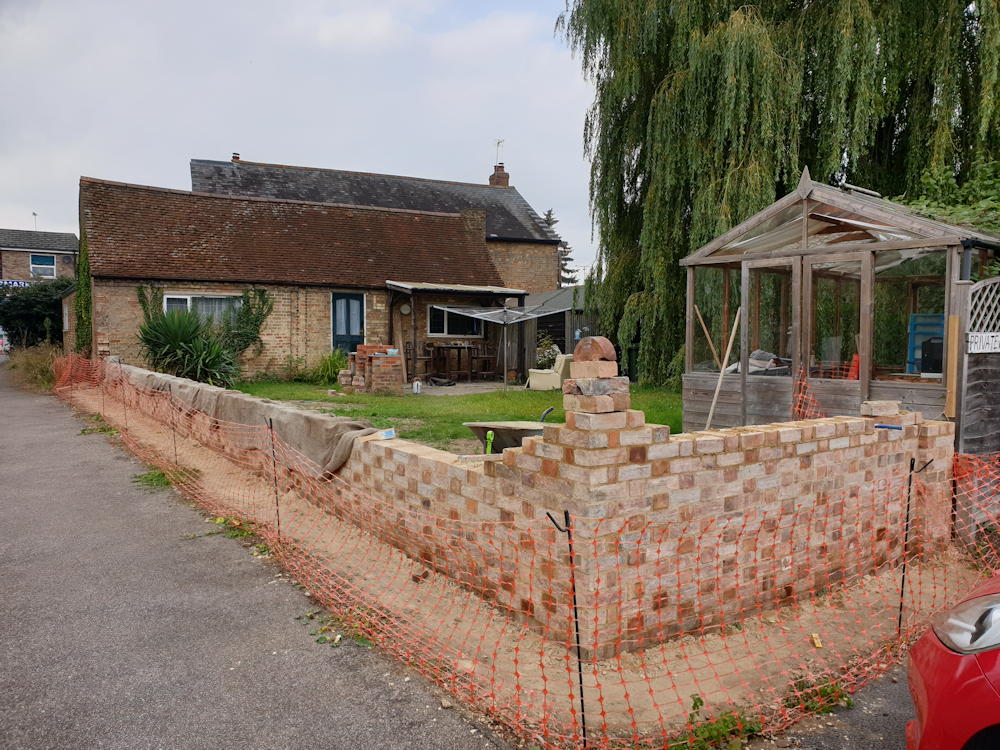
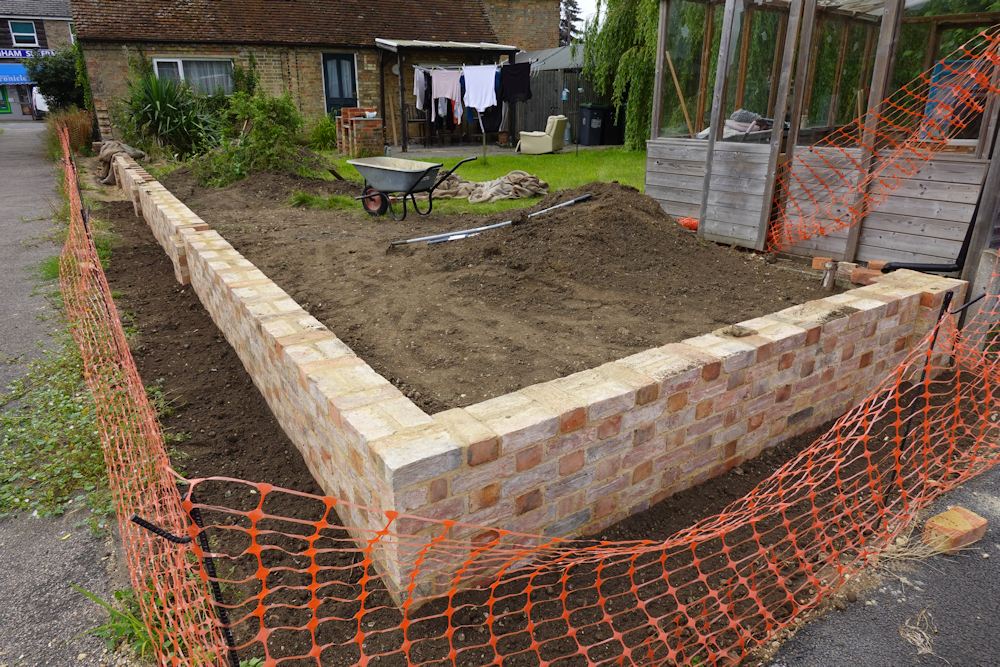
This weekend I built up the corner and I’m working on the 3m stretch at the back. I like the back. I can go up 4 courses over a weekend.
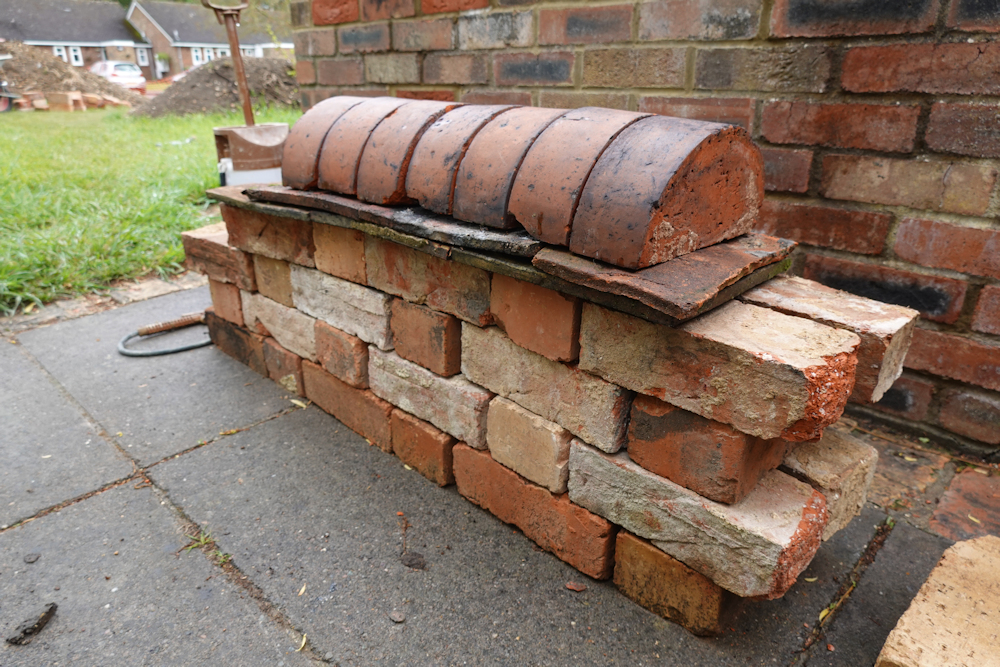
I’ve balanced some bricks and coping on top of the corner to figure out the height I’m aiming for. I’m aiming 2 bricks higher than the wall I took down but a brick short of the original wall height. I think I will have enough bricks but it is going to be really close.
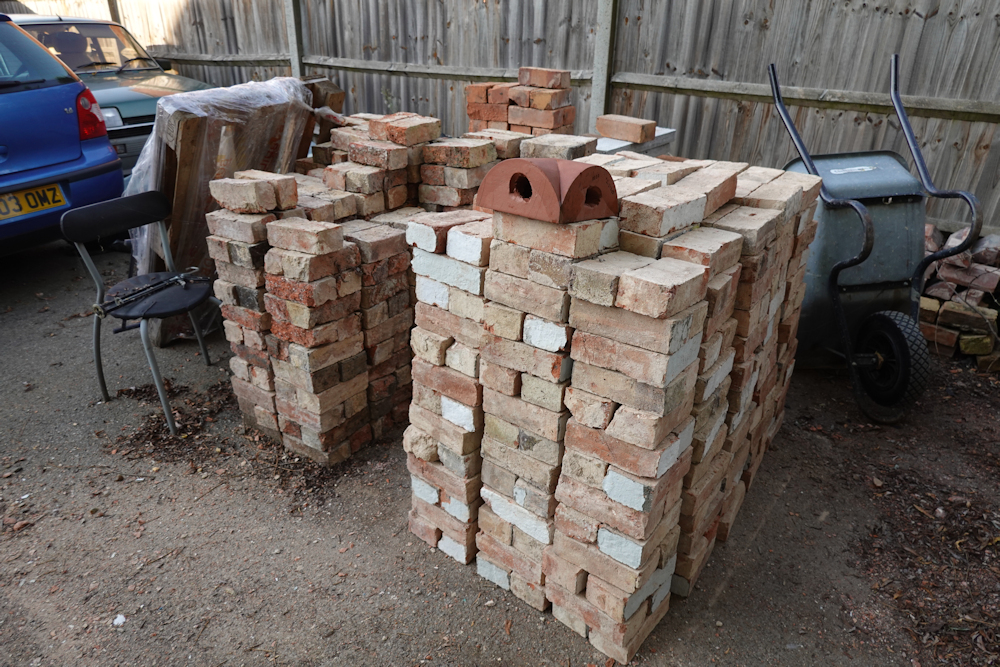
I counted the remaining bricks and was short by 2 or 3 courses even if I clean off the stack of uncleaned bricks with very hard lime mortar that is very difficult to remove.
A road trip north of Birmingham to Cawarden yielded some more bricks to mix in. They are Bedford Clamps and match very well. I also bought the most expensive brick in the world – a reproduction half round corner for the coping.
I’ve been experimenting with Bebbingtons weathering tint on the corner. It started off bright orange but now it’s a deep red and matches the coping. That’s quite cool.
Towards the end of September the wall is 5 courses higher. I had another week off and had some help for a couple of days. We managed 2 courses in 2 days. There are only 4 courses to go before the coping.
I’ve built the corner up to full height and balanced the corner coping on top to get a feel for it. It’ll be the same height as the existing part of the wall that still forms part of the gable end of the barn. A brick higher than planned so I’m going to run out of bricks again.
I’ve had a lot of work this year and the weather at the weekends hasn’t always been good for garden wall building. But the wall is nearly at half height – there are already 1500 bricks in there and I budgeted around 3500 bricks for the whole wall.
The wall is high enough to backfill the trench and I’ll be sore tomorrow having moved many tons of earth. The wall looks a lot taller from the garden side now it is no longer hidden by big piles of earth.
There was some excess earth left over. I suppose there would be after putting 4m cube of concrete in the hole for the foundations. It was good exercise filling the skip.
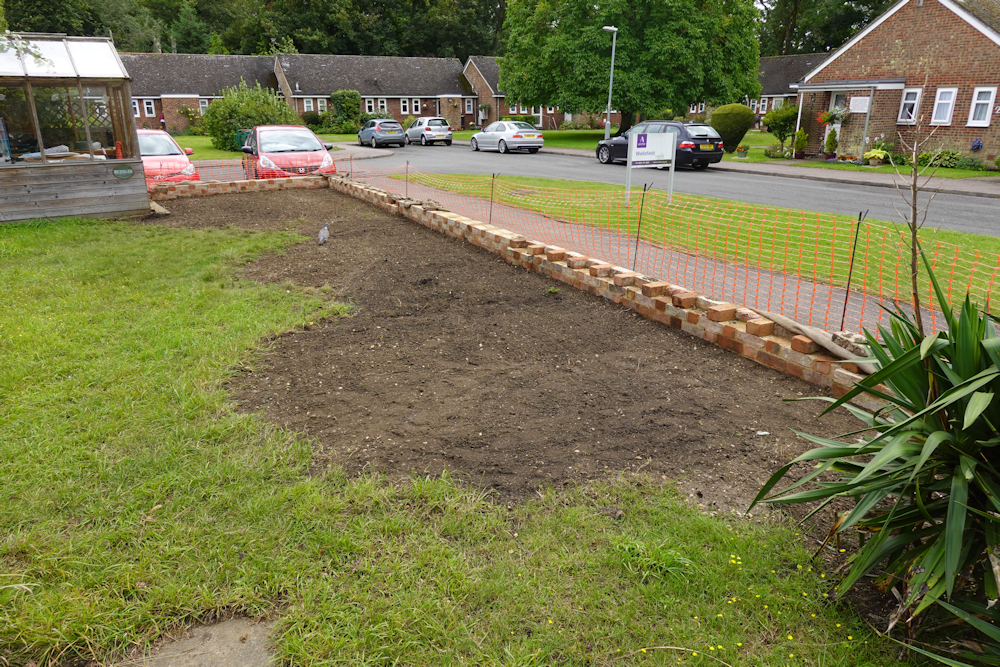
I have a bag of top soil but it’s not accessible until the skip is collected. Also my wheelbarrow has a flat tyre. Grass seeding will have to wait.
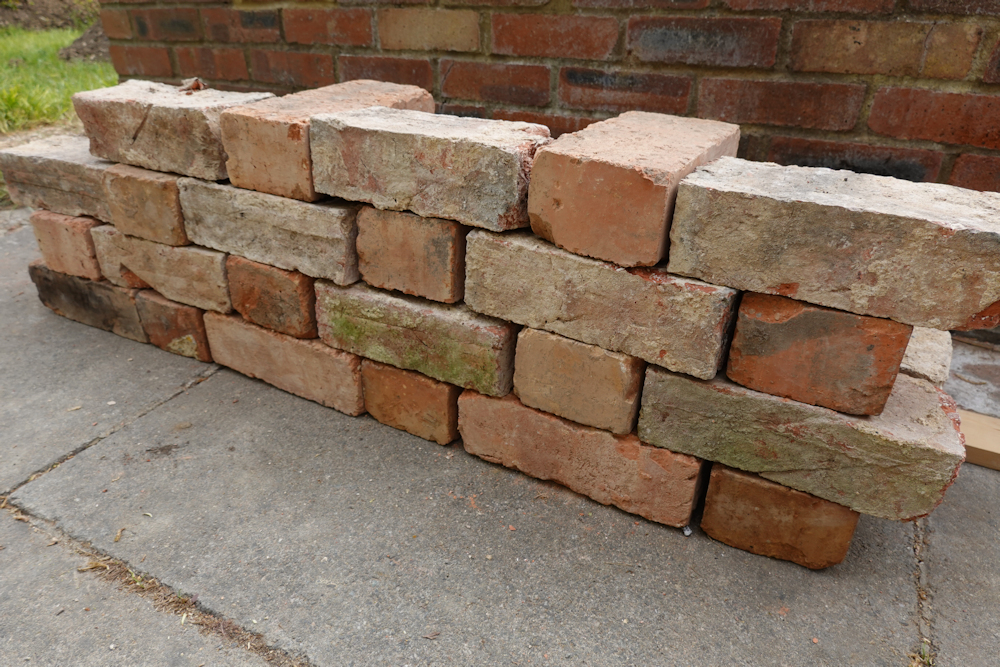
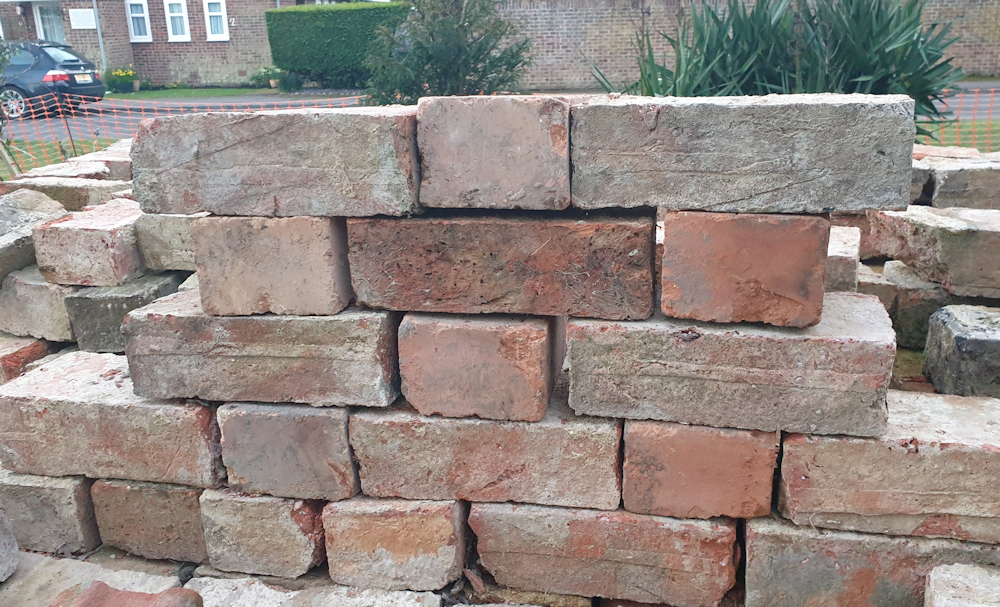
The wall is progressing at a slow pace. I’ve built the back of the wall up to 9 bricks just to see how it will look. The stretchers are the original bricks turned around and look a bit white at the moment as they’ve had lime on that face. They should become more colourful and blend in after rain cleans the bricks.
The original bricks are Bedford Clamps – they have a distinctive raised line along the stretcher face where the bricks were stacked after moulding which adds texture to the wall. They are slightly curved which adds further texture. I’ve been setting out from the new bricks I’m using as headers as they are much more straight.
The bricks are the ones used in the original wall but they look very different because they have ben turned around and have lime stains on the face. Photos of the original wall in Starting the garden wall rebuild
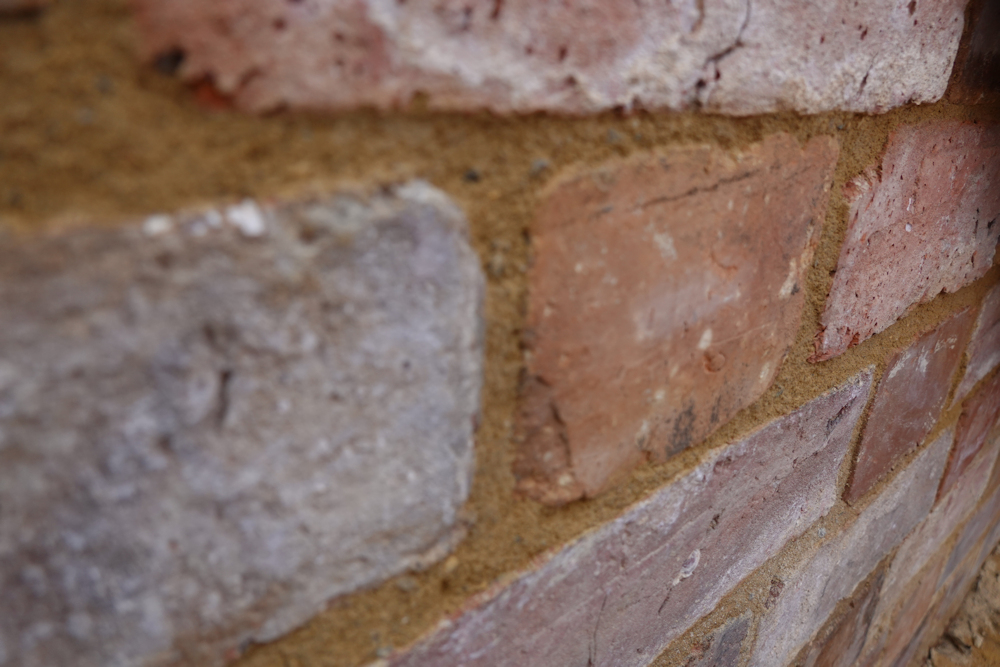
The pointing is the same as the rest of the house. It is trowelled flat, then after drying for a few hours struck with a masonry cleaning brush, then lightly brushed. The brushing recesses the pointing exposing the edge of the bricks and some aggregate in the sharp sand.
I’m speeding up. My record is 120 bricks a day so far. But it’s been very wet at the weekends so progress is still slow.
The rain helped make sure the coping and drip tiles work on the test wall. I’ve picked up 260 half round bricks from a wall that had fallen over in Nottingham.
I messed up on the join to the old wall. I built the pier 1/4 brick too far along because I was working off foundation bricks that weren’t aligned with the wall. I spent a day measuring up and knew about this but forgot. No problem – I adjusted the third course to compensate.
I compensated in the wrong direction and that caused problems with the joint to the pier so I’ve removed one of the strange double headers from the original wall and now I’m 3/4 brick out on the fourth course which gives me a better bond with the (redesigned) pier. Most of the misaligned courses should be hidden underground so it should look like I messed up once not twice. The transition from the existing wall is now seamless.
Working 7 day weeks towards the end of May to help catch up on money from last year so nothing more will get done on the wall in May. I’ll post again in June. I like to have a post every month to remind myself I’ve done something useful. EDIT – Weather wasn’t great for garden walls in June but I got a week in. I’ll keep at it and post when it starts looking different.
This is the biggest build I’ve attempted by myself. I’m guessing it will take 6 working weeks (edit – turned out to be 12 working weeks). I have a couple free weeks so have started laying bricks in the two courses below ground level. Laying out and setting heights has taken some time, but things should speed up once I have a straight level run to build on.
I built the corner at a measured distance from the existing wall, then laid the bricks out dry using a brick gauge to make sure I don’t end up with an odd size space in the middle somewhere. That’s worked well – I can remove a couple of bricks to mortar them in, then check the spacing is still OK before removing any more bricks.
The hessian is to keep the sun off during the day and the frost off during the night. Perfect lime building weather would be much more overcast but I’m getting a good tan at the expense of a lot of covering and watering of bricks.
The old wall was very badly spalled and only half the bricks could be saved and even those will need to be turned around. No problem I thought. I bought the same again in reclaimed bricks. But they aren’t a perfect match. They look OK as headers, but headers only make up a third of the brick count. I can lose a lot of the new bricks in the foundations, and I think it looks OK if I keep using the new bricks one brick above ground. I made a spreadsheet to work it out and have been trying all sorts of ideas.
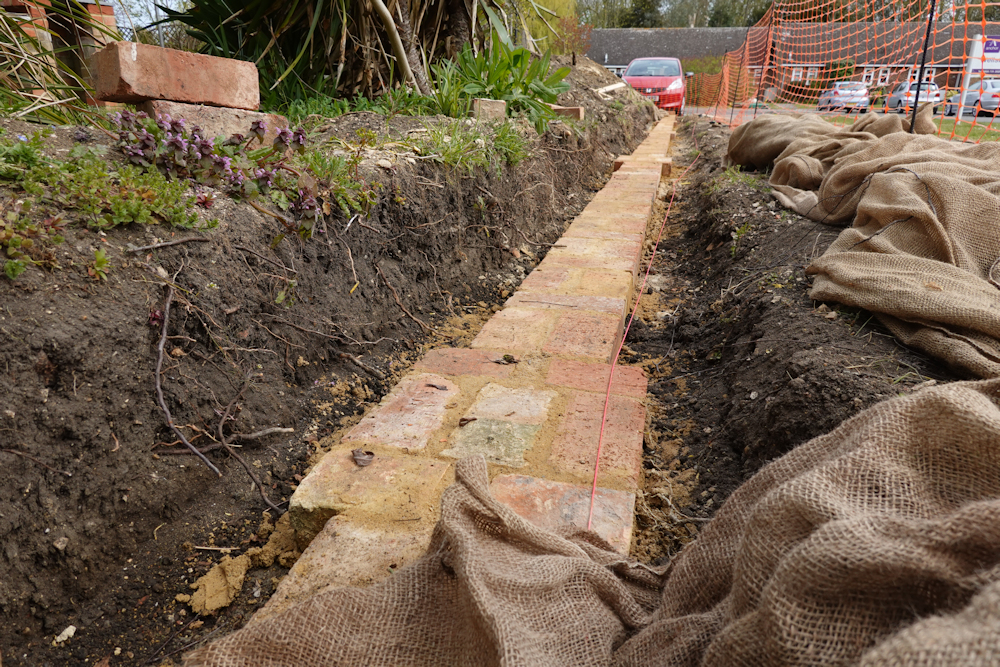
The wall has 4 piers on the long face sticking out by a quarter brick both sides to match the original. The piers go in last to avoid disturbing the string line.
I had guessed I could lay 100 bricks a day and managed 80 bricks a day on the long straight run. I will hopefully speed up on the next courses as bricks below provide additional reference. Each course has 190 bricks so it’s not going to be a quick build.
It’s useful to have a couple of courses below ground level. It took me a couple of bricks to get everything straight and level and most of the pier positions shifted very slightly while I found out what mistakes I could make with brick spacing. At some point they will need to go up straight.
The garden wall was delayed into the winter while a tree stump was removed and it’s getting warm enough to avoid bad frosts now. I spent a day figuring out levels and worked out that a 450mm * 450mm hole would be about fine everywhere. Planning 300mm concrete then a couple of bricks up to ground level. I don’t know exactly how tall my wall will be, but guessing I’ll run out of bricks between 1.2m and 1.4m.
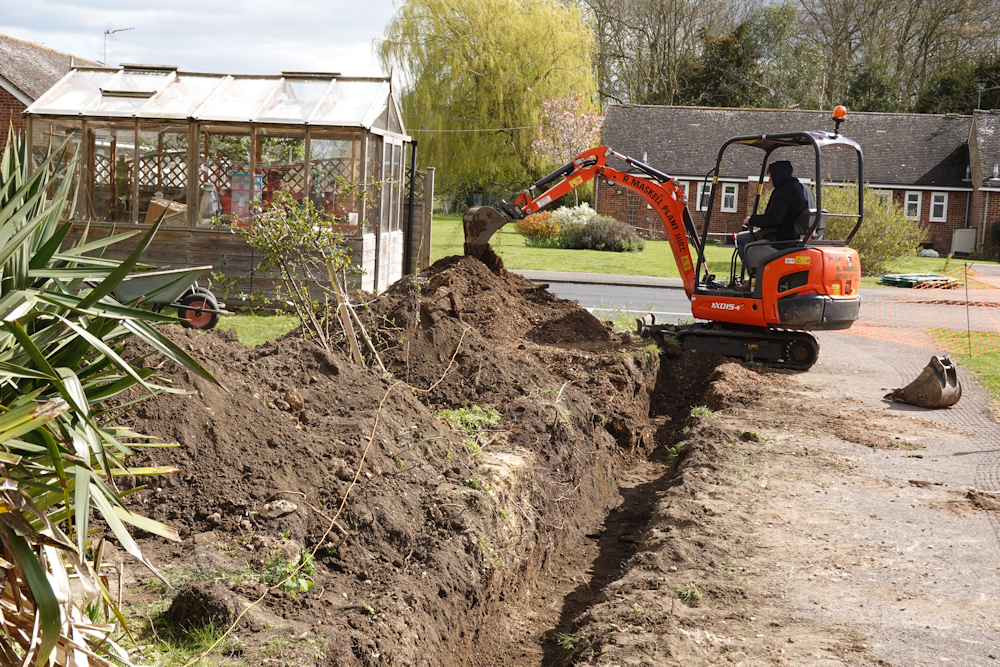
A man with a digger got the hole dug by lunchtime. Ripping up the old foundations made the hole a bit wider than intended.
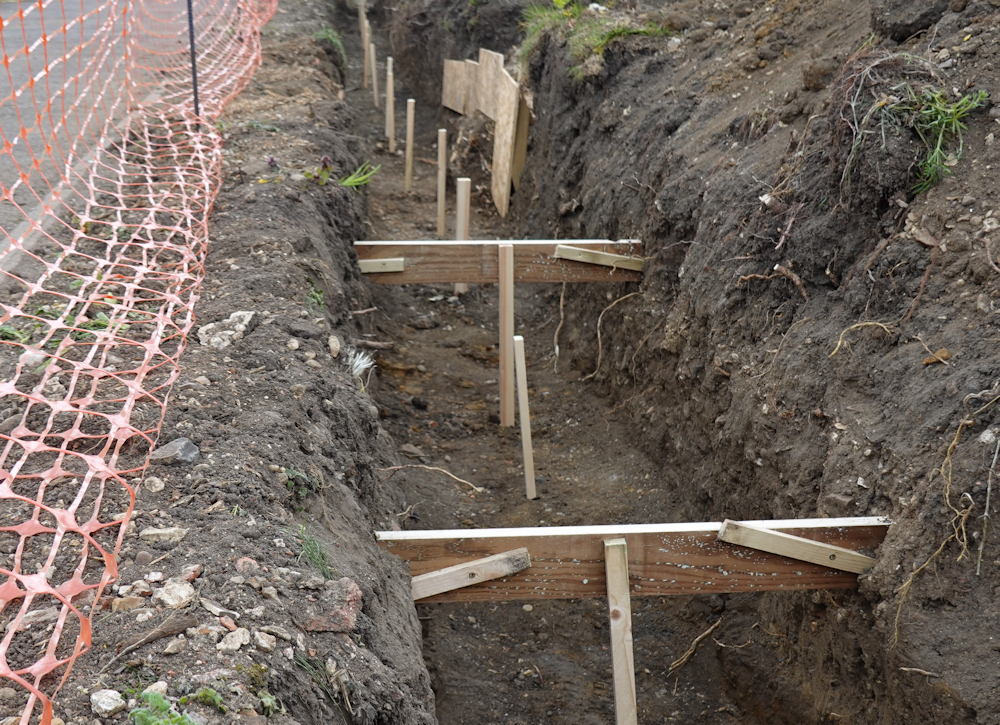
The ground levels step down by a couple of bricks at the corner of the wall. I’ve put formers in to make the drop one brick at a time. They aren’t where I intended as it was easier to put them where there were banks either side to drive stakes into. There’s also a bit of shuttering at the side of the hole where the tree was.
The vertical stakes indicate the level of the top of the concrete which is a couple of bricks below ground level. They don’t look level in the photo as they go squint when you hit a stone, but they should be accurate for height. They all go into the ground more than 200mm which is useful as you can’t see them when the concrete is poured and they get knocked with the rake.
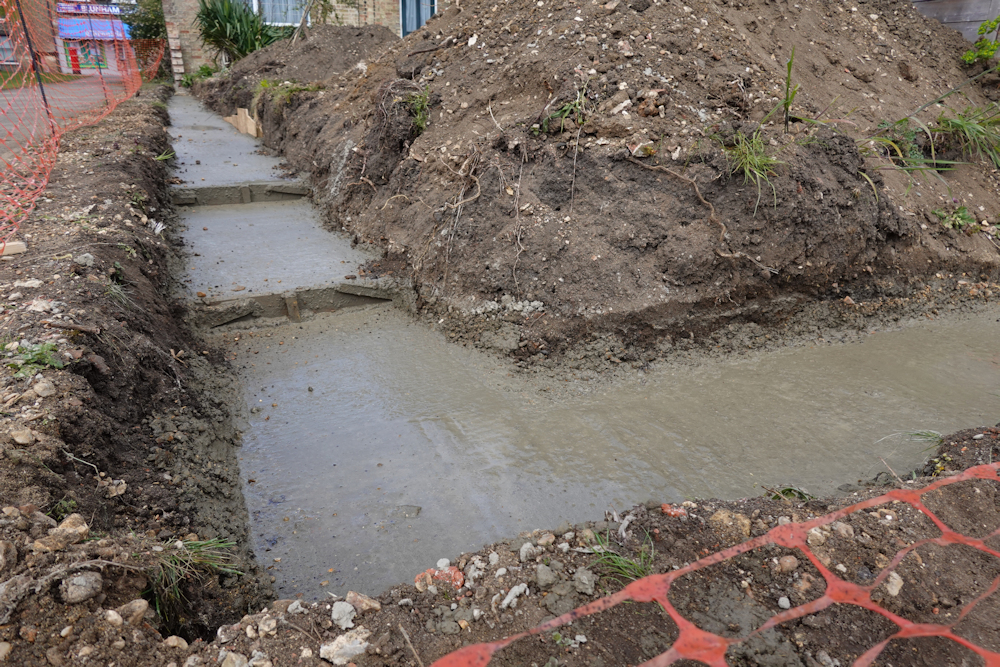
I used a mix on site concrete truck. They started off with some fairly firm concrete to dam the level changes and then filled the trench up with the normal runny concrete while I raked and tamped behind.
It’s mostly worked. The foundations start 1/8 inch high, then fall 1/4 inch low for a good length. Also one of the dams is leaking very slowly and one end has dropped by 1/2 inch. I’m hoping when the concrete gets around to it’s initial cure it will put a stop to that. We’ve been having light frosts so I’ve covered everything with hessian and can worry about it later.
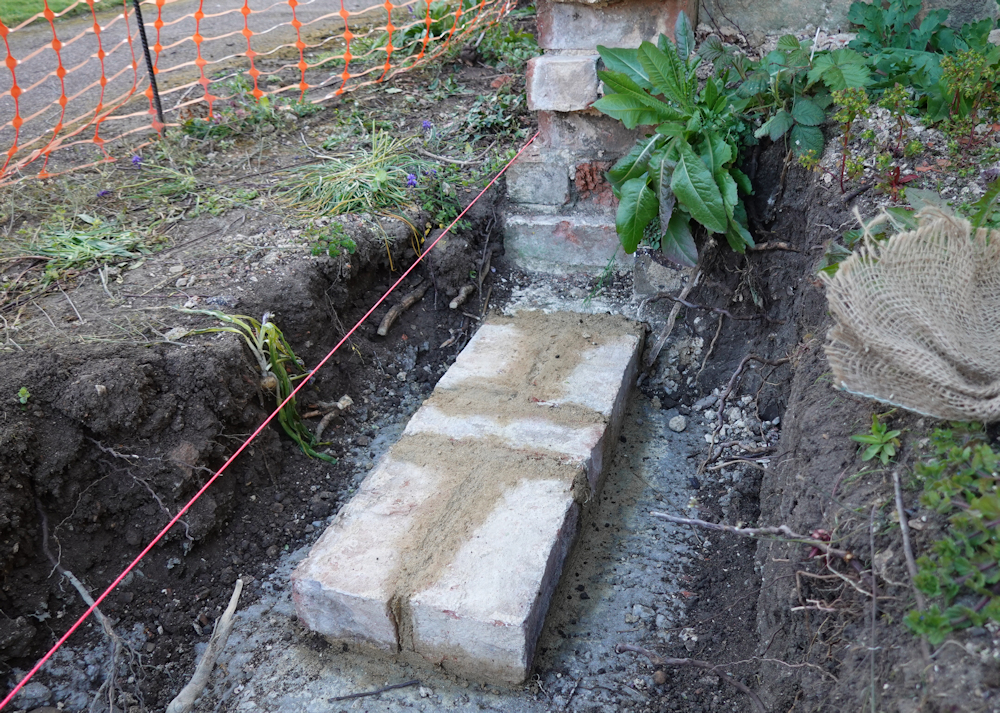
The first bricks went in a couple of days after the concrete pour. The existing wall leans a little and I didn’t have a good reference for the new wall as it starts off lower down than it used to and there is a slight change in direction. The existing wall was awful to set out from.
The cunning plan is to build a pier after these bricks. I can set the wall out nice and straight from there and also blend the old wall into the pier.
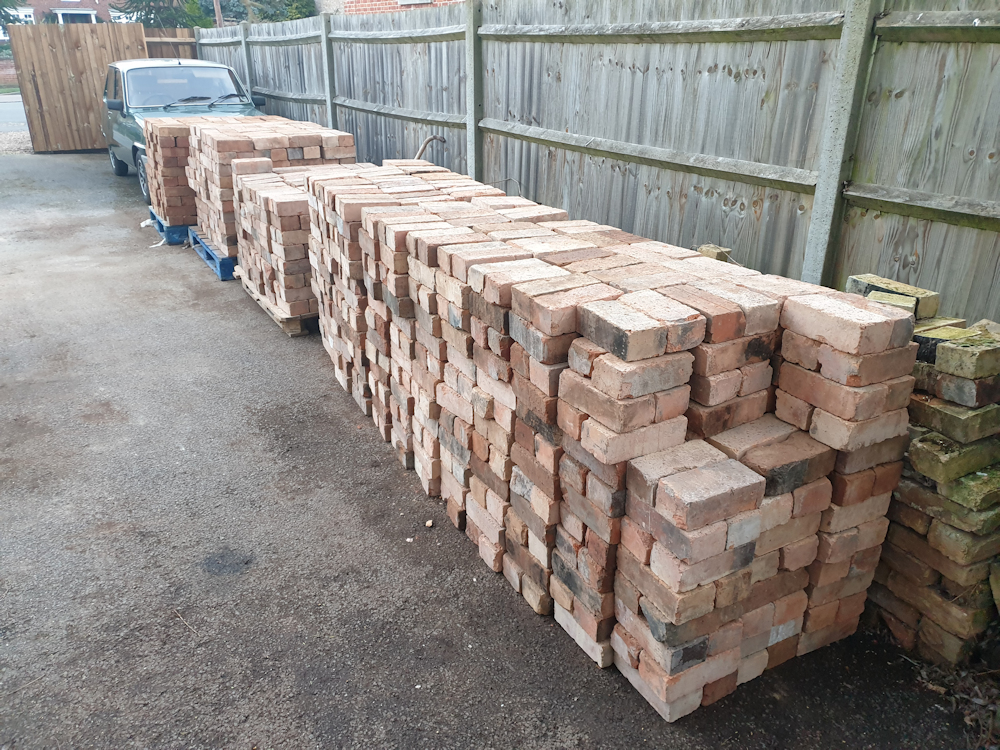
2000 bricks arrived for the garden wall last week. I also saved 1500 of the original bricks. Now I have a lot of bricks.
I had planned to use new bricks but the lead time is too long at the moment so I went for reclaims. The bricks came from Loaded with bricks in Birmingham and just about all of them look useable which is surprisingly good for reclaims.
The size and colour of the new bricks match the original bricks well. The originals are Bedford Clamps and are rare these days. The texture doesn’t quite match. but once there is mortar in there nobody will notice.
I’m planning to use the new bricks as headers and the original ones as stretchers (as the photo below) so I can retain the stripe of Bedford Clamps and also hide their spalled side. I forgot that there are twice as many stretchers as headers so my brick buying maths doesn’t quite work.
Next job is organising a hole for the foundations and getting the concrete poured. After that I should have a nice relaxing job laying bricks for some time.
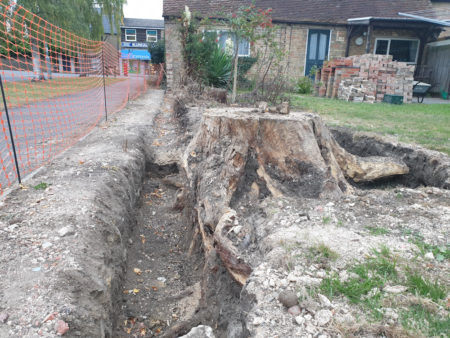
The lean in the garden wall seems to have been caused mostly by a Leyland Cypress tree removed in 2014. The tree made the wall lean over by 6 inches and also pushed the foundations sideways by around 8 inches. If we are going to have a straight wall there will be some stump removal needed because the stump is in the way.
It’s been a nightmare to try and organise the stump removal and work has stopped on the wall now. The tree folk are really busy after having been stuck at home earlier in the year and despite promises nobody seems to want to actually turn up to remove the stump. It is too close to frosts to start re-building the wall this year.
More than a month later the tree guy turned up with a stump grinding machine and (very professionally) removed the stump.
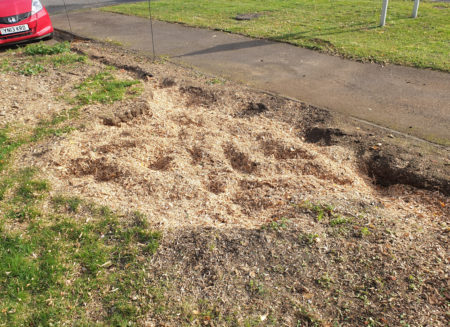
Now the awkward stump is just sawdust. There is quite a lot of sawdust but November 5th isn’t too far away and might provide a good excuse for a bonfire.
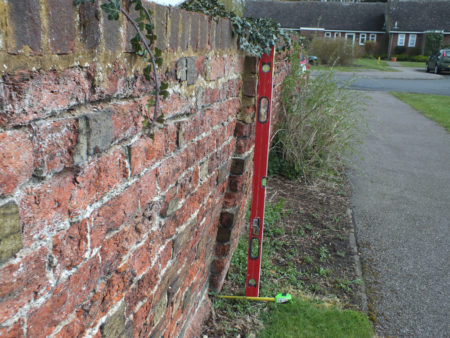
I’ve been measuring the lean of the garden wall every year. The lean has been increasing by about 1/8 inch every year, and it’s reached 6 inches now. There doesn’t seem to be any good reason for the wall not falling over, and given the lean is over a footpath it’s probably time to do something about it.
It’s an old wall built with Bedford Clamp bricks in Flemish bond. The gable end of the barn was built on top of the wall, and the barn is from around 1850 so the wall is probably earlier. Bricks are a funny size (around 71mm) and I’m guessing Georgian. The wall will be rebuilt using the original bricks. It’s been repointed in cement so the bricks are horribly spalled and will need to be turned around.
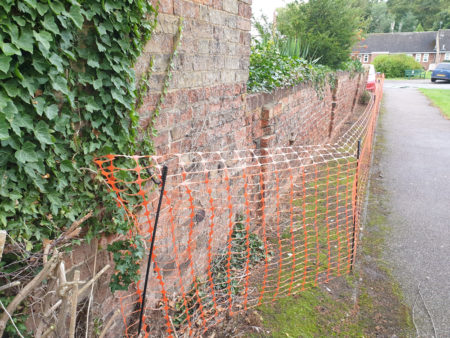
I’ve been sensible for once and installed some temporary orange fencing. I feel it says ‘stay well back – there are some highly trained professionals doing serious stuff here’. Also it’s nice to have some sort of fence while the wall is missing and when the foundation hole appears. Though the first couple of days will be vegetation clearing on the other side of the wall.
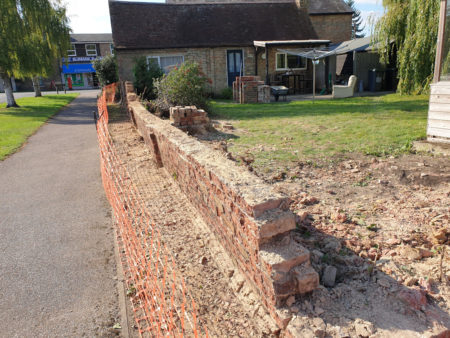
The poor wall is looking less well now. Nominally the wall is straight but has been pushed sideways and over by a Cypress tree. If it falls over now it will result in ankle bruises rather than squished children so I’m feeling a bit better about it now.
The bricks were very badly spalled. We’ve been cleaning up the bricks as they were removed and where the wall hadn’t been repaired in cement the bricks can be turned around and used again. But many of the headers are spalled at both ends and are too short to be useful.
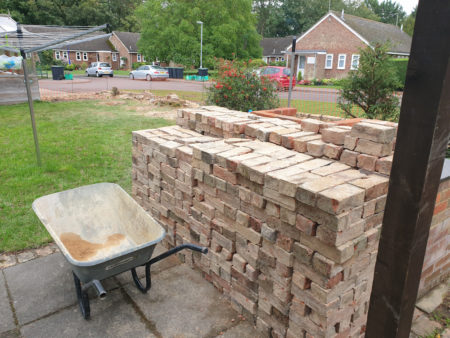
There are 1000 bricks in the stack so far. The wall had been repointed in white cement which is probably what caused the spalling. The top couple of courses and parts of the piers had been rebuilt in cement and not many bricks were salvageable from that. I’m going to be 1000 bricks short.
It will be a happy wall again, rebuilt in lime mortar that will last for hundreds of years.
At the rear of the house facing the 1970s bungalows a large stretch of wall was replaced with fence in the late 1980s. It turns out that the bungalow site was levelled to below the wall foundation. The bricks don’t reach the ground. The foundations were 6 inches thick so did make it to the ground, but they weren’t designed to be exposed and went crumbly.