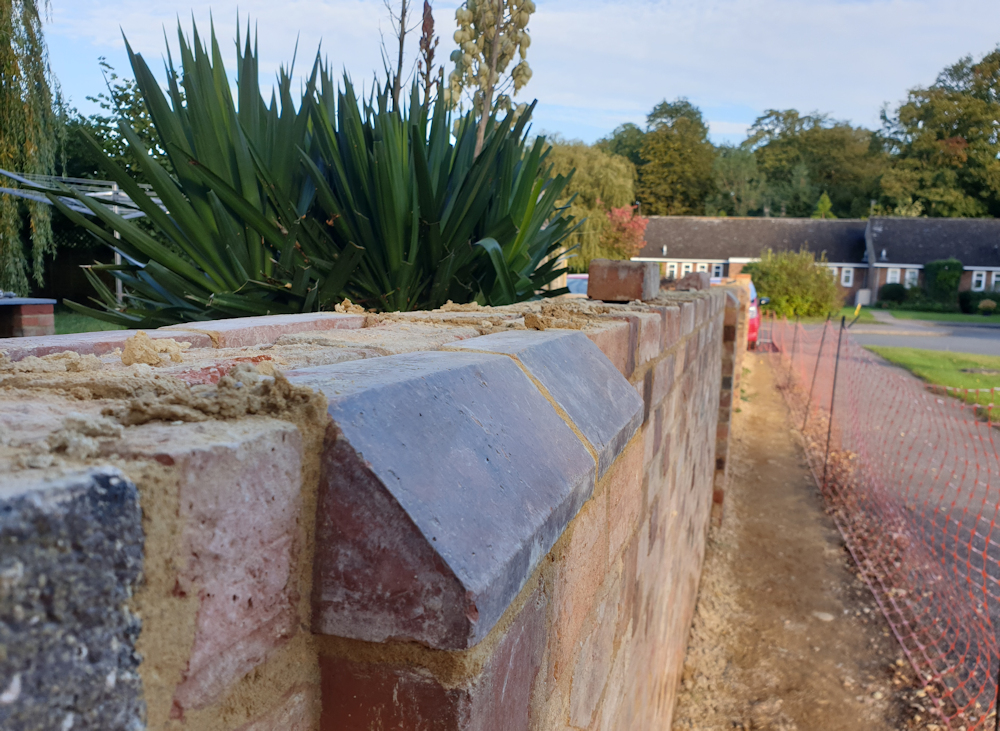
I’ve got to the top of the piers and have finished them off with plinth bricks to match the existing pier that is still built into the barn wall. The plinth bricks are red but are a little sooty and look blue in the photo.
There are 2 courses to go before the coping and I still have no idea what the original coping might have looked like. But there is spalling in the top few bricks of the existing wall incorporated into the barn gable so there was probably never an effective drip overhang.
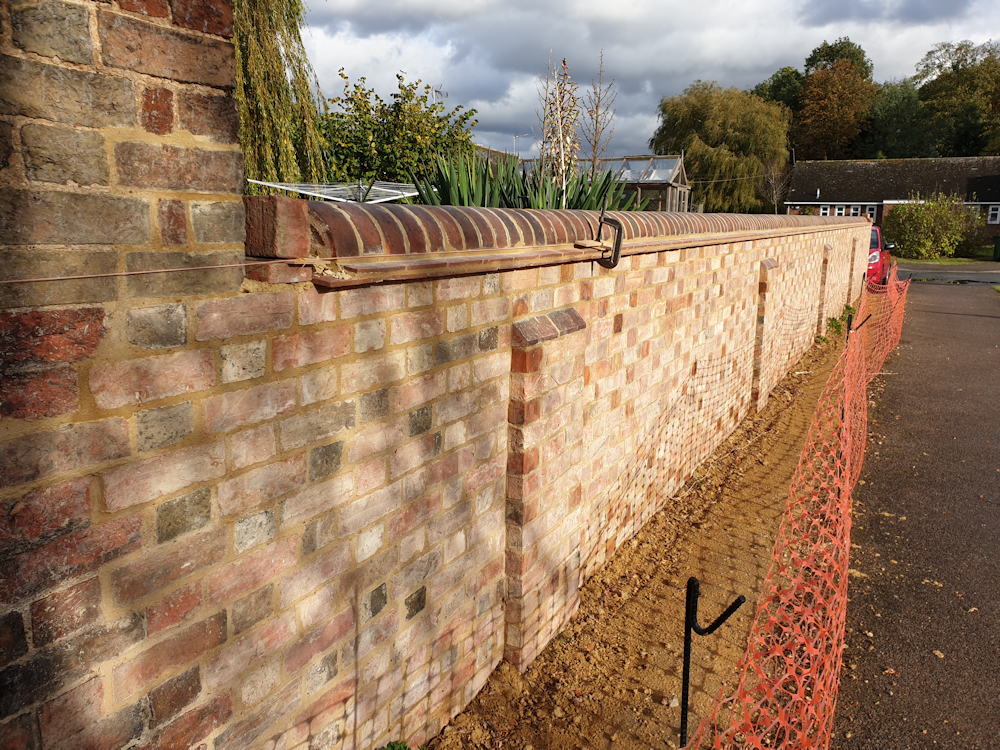
I’m using really rubbish early 19th century bricks that are very prone to spalling. I want an effective drip overhang and did some experiments with different methods before deciding on creasing tiles. It wasn’t until after I bought them I realised creasing tiles are a 20th century invention and have no place on this wall. Oops.
Creasing tiles only seem to be available for metric walls and are too short. I’ve cut them to give me a 40mm overhang. I did some testing with a garden sprayer and found they only dripped effectively when I got to a 1 in 8 slope.
I’ve made a start on the creasing tiles. I glued a bit of tapered wood to the bottom of my spirit level to set the angles and positioned the edge to a string line.
I want to do the whole course without cutting tiles but 1mm short on the mortar gaps will leave a 10cm gap at the end. And I’m doing them by eye. I’ve placed every eighth tile along the wall so when I get to each one I can see where I need to adjust the gaps a little.
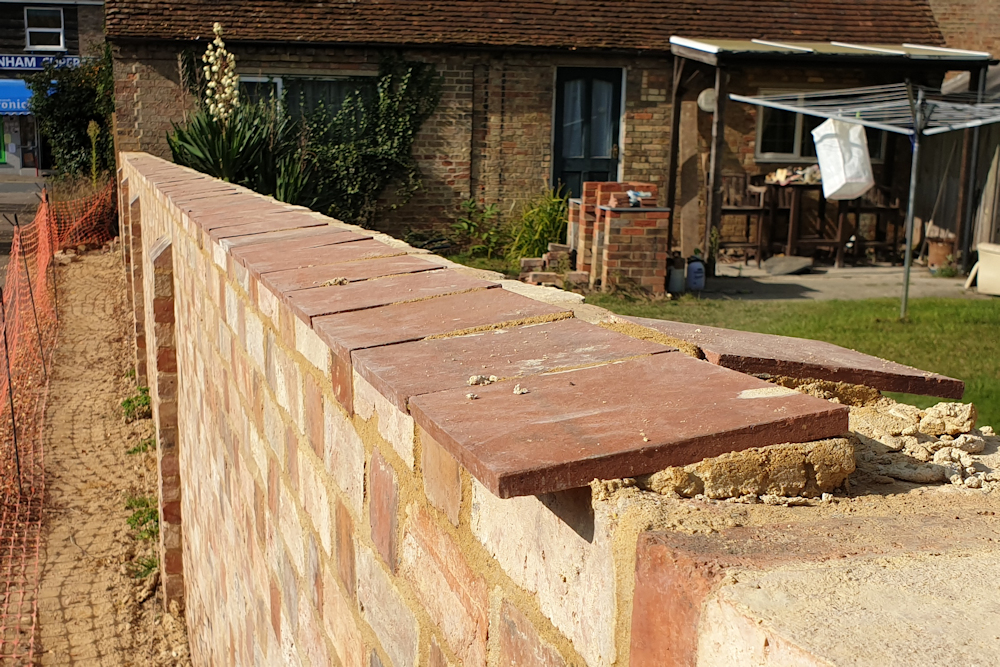
I cut the second course of creasing tiles a little shorter. They are angled more than 1 in 8 by accident but too much overlap with the coping bricks would have resulted in an excessively large mortar gap under the coping anyway.
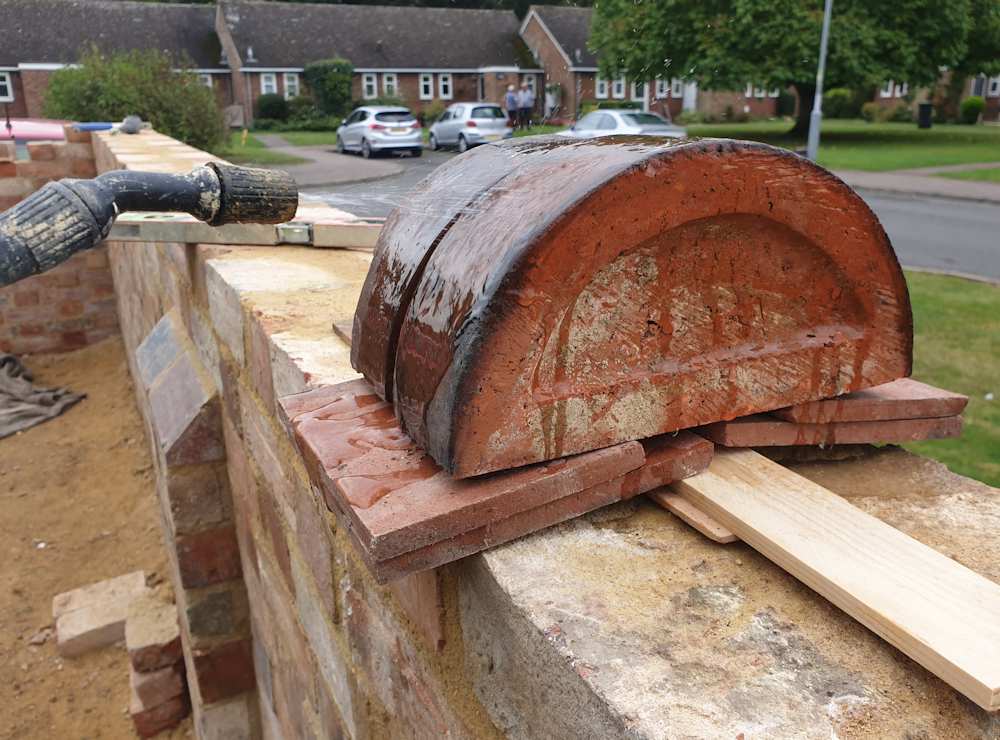
The idea is to bed the half round coping on mortar in the cavity inside the creasing tiles to avoid too much mortar oozing out and staining the tiles. The gap between the coping and tiles can be filled during pointing.
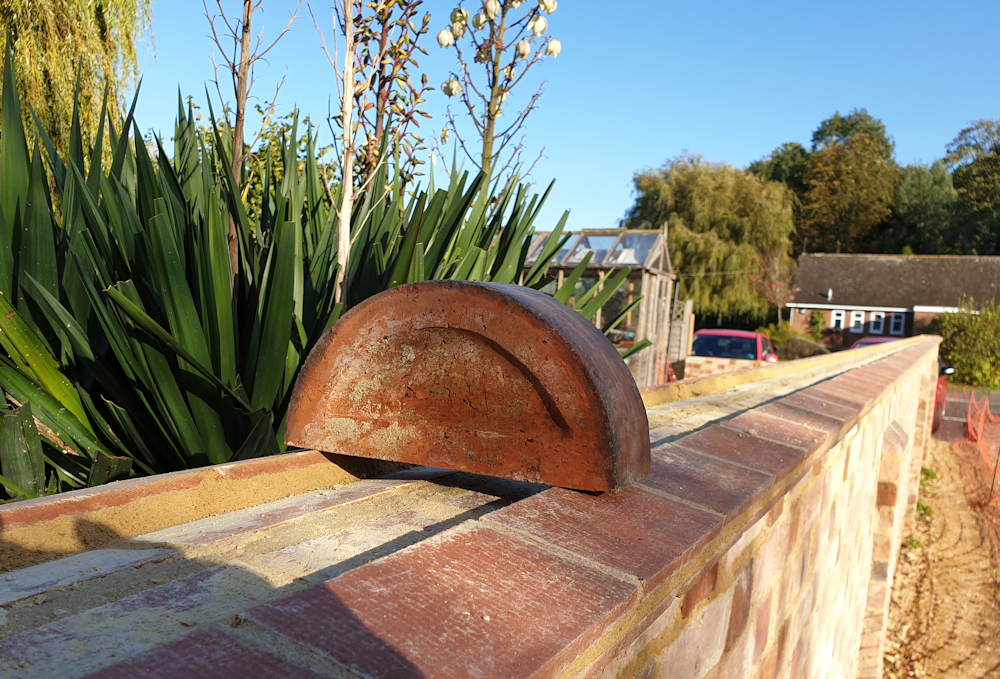
A picture sent back from the future shows how the drip overhangs work in heavy rain. The wall is dry but the piers (that have only capping but no overhang for traditional reasons) are wet and remained wet for the next couple of days.
I’ve started on the half round coping. I’ve found them really tricky and am only managing 35 a day. I’ve laid 60 so far. I found it helps to have the frog orientated to accept the next brick as in the next photo. The height of the coping varies so the string line is only a long term guide and the heights are set to the previous bricks.
The coping bricks are on edge so the first joint to get right is the vertical one, after that the horizontal joint can be adjusted. None of this was in my bricklaying book. I’ve got sloping creasing tiles to shed water so don’t need the ugly sloping mortar fillet that normally fails after a while.

At about halfway through I measured the brick plus mortar gap averaged over the last 50 coping bricks and used that to mark out the position of the next 95 bricks. Using the mortar gaps I was managing naturally made it easy to maintain the brick spacing to the end.
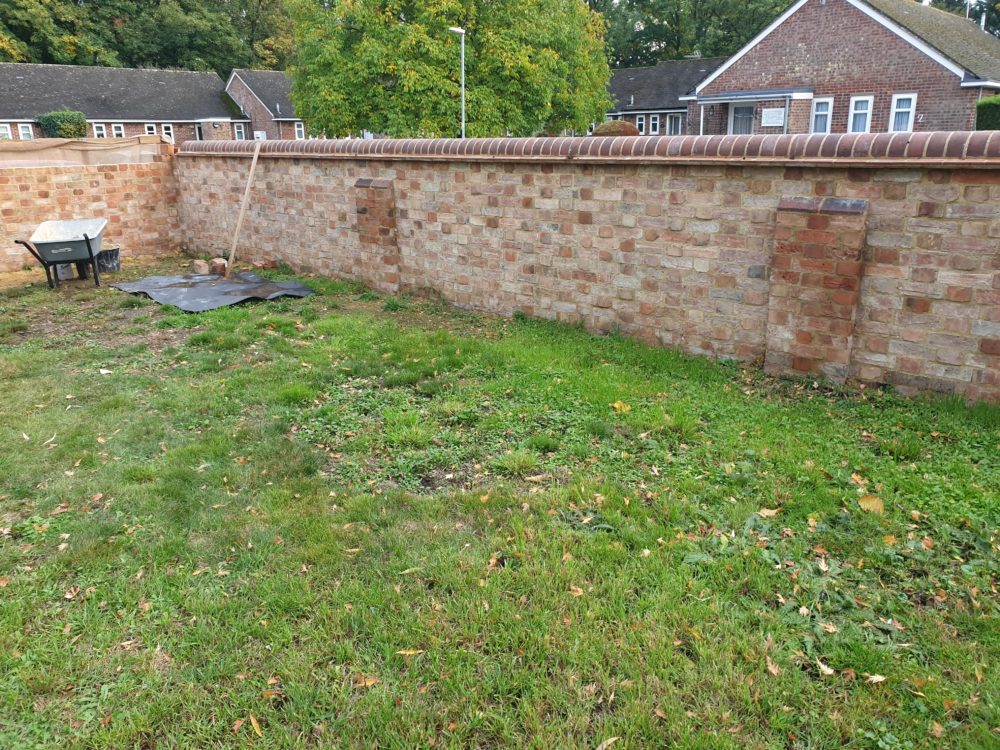
At the end of October the long stretch of wall is almost finished and it’s looking really good.
Got to post a before photo after this. It had been cement pointed so the bricks had spalled. Also a tree had pushed it over. And no nice coping to keep the rain off. It was worse than it looks in the photo. 6 inch lean increasing every year and quite wobbly at the far end.
The bricks are the same. I just turned them around. Still some spalled bricks to turn around under the barn wall but I thought it best to do the bricks under the corner first.

I left a short section at the back 6 courses low so I could climb over it rather than walk the long way around and that still needs building to full height.
But we’re into frosts now and lime doesn’t like frost. I’m going to down tools and finish off the short section at the back next year. The wall has taken all my time and there are other things to catch up on. Also plenty stuff to do inside where it is much warmer.