Category Archives: Building

New shed roof

The felt blew off the utility room shed roof more than a year ago. It was old and had become fragile. The boards were too rotten to re-felt and re-roofing looked like a big job so I put it off. There is now some evidence of water ingress inside.

Surprisingly the woodwork underneath is in good condition.

The purlin was undersized and has sagged. It was 3 x 2 (inches) spanning 4m. I’ve sistered it with a length of 4 x 2 cut down at the ends to straighten the roof a little and make it easier to fit the new sheeting.

Removing the roof has angered the rain gods. I was slowed down by the first rain in weeks.

I’ve used OSB for the rood sheeting to match what was there. There are 5mm gaps between the sheets to allow for expansion. There’s a 2 x 1 inch strip of wood screwed under the front of the roof sheeting I can nail the felt to.

I was recommended IKO Trade Top Sheet which is a lot thicker and is much easier to use. All the edges and felt overlaps are glued with bitumen adhesive as well as nailed. The adhesive needs to be applied to both sides of the join.

It was a pain getting the felt to sit on the roof without it sliding off. I ended up nailing a bit of scrap felt to the roof and rested the new felt on that. Once the new felt was nailed on I could remove the scrap felt. It doesn’t matter much if the nail in the scrap felt is at the bottom.

It went a bit wrong on the other side. I applied some felt adhesive early in the morning when it was still cold so it went on a bit thick. Later the sun made it very hot and the bitumen went runny.

The flashing was a pain. In the past someone had cut a big gouge in the bricks and there wasn’t enough brick left for step flashing. I had replaced a few bricks and wasn’t prepared to cut a gouge in them. So I ended up with a compromise.

Driveway gates

I put the posts in for a fence with gates on the driveway. I had hoped to put them a little further to the right but that area is full of services and there wasn’t a safe place to dig. I did try but found a gas pipe in an unexpected place. The posts holes are 3 feet deep and my arms are sore now.

The gates are quite wide with a 3.5m opening. I’m going to claim that’s so a skip lorry will be able to manoeuvrer so I get the skip where I want it. Actually I first marked out a smaller opening and it didn’t look wide enough so I made it a bit wider. Now the posts are up it looks huge!

A day later the fences are finished. Just the gates to make now. On the right the arris rails are mounted on brackets screwed to the existing post. On the left I’ve screwed a post onto the wall. Neither will take much load.

With the fence in place the opening is looking smaller again.

The gate frames were positioned in place using clamps and spacers and the feather edge boards added later. I had to remove the diagonals and adjust the gates to account for the sloping site.

The lock isn’t in place yet. I’ve found one that can be unlocked from both sides of the gate. Gate open stays aren’t in place either. I’m using a bucket of water to hold the gates open.

It’s ended up looking quite neat from the outside. The fence is not straight as it has to follow the shape of the driveway, and there is also a 20mm tip up in the middle of the gates to allow for settling as the wood dries out.

The diagonals are also removable for later adjustment in case I run into trouble. The wood was supplied soaked through so I’m expecting shrinkage issues.

Barbecue Rebuild

The garden came with a brick double barbecue.   The top courses have always been loose, but things got worse when I realised the bricks were a perfect match for my chimney and I stole much of the top course.

old-bbq

I took the BBQ down about 4 courses until the bricks seemed secure then built it back up loosely.  A lot of the bricks were damaged so some bricks left over from the new build next door were used to make up the numbers.

The new bricks are quite nice but didn’t match.   Over a few evenings the bricks were rearranged a few times to try out some ideas.   The BBQ was steadily redesigned and ended up a course higher than the photo with the bricks arranged in a chevron pattern.

The work tops in the picture are roof slates positioned to see whether slate would look nicer than concrete.

prototype

Once happy with the pattern the bricks were positioned on the lawn in their courses.   This worked really well and I didn’t once get the bricks mixed up while I was rebuilding the BBQ.  Later all of the courses were moved onto the lawn as it helped keep the underside of the bricks damp.

The sun was hot this week and the bricks were thirsty and needed a lot of spraying.   The scaffold tower was put up with hessian sheet over it to keep the sun off me and the new cement.   Otherwise it would have been far too hot.

laicey-abbey

The BBQ was originally built in cement so I used cement to match.   It’s the first time I’ve used cement for brickwork and I’m not used to it.  I don’t like the stuff.   I’m not the first to rebuild the BBQ and it’s in metric bricks so post 1965.   Things shouldn’t need to be rebuilt this often, and getting the cement off the bricks was a real pain.

There was a fair mix of different bricks from previous rebuilds and it’s awkward to lay bricks when one of the bricks underneath has a deep frog, then the one beside it has no frog or is full of old cement.

20200721_140247

I’m really pleased with how it turned out.   Mixing the new bricks in over the top 6 courses makes them stand out much less, and they add a bit of colour.   I went for a chevron pattern rather than a random mix simply because I have never done a brick pattern before, but the pattern isn’t all that noticeable.

The worktops are slate paving and were only £17 from the Rockery Centre in Sandy.   The slate looked great in the shop but when I put them on the BBQ they were light blue.   After a thin coat of linseed oil it went nice and black.

bbq-finished

I had expected the work to take a couple of days but somehow this contrived to take up most of the week.   It’s good to have a little job that can be completely finished and look good.    Also useful to straighten it out as I’ve been hosting a lot of BBQs this summer.

bbq-tables

New Windows!

John came over to fit the 3 upstairs windows this week (he made them at the same time as the kitchen window but I hadn’t got around to preparing the openings until recently).  The windows were made from Douglas fir painted with linseed paint and have double glazing and sealing strips.  They operate very smoothly.

new-kitchen-bathroom-windows

I still need to do something with the arch on the downstairs window which has sagged a bit.   Here is a before picture:

old-kitchen-window

The rear of the house has some nice features.   I’m tempted to remove the flat roof infill with the patio doors to the left to expose the walls and let a bit more light inside.

Electrics Second Fix

Second fix electrics started today and is already more than half complete.   I’m excited to have lots of lights and switches and sockets in the kitchen now.   I forgot to buy bulbs!

After the lights went in I started fiddling around with kitchen layout again and moved the fridge for at least the third time.  I no longer need to incorporate an enormous American fridge freezer, so I have space for a table at the end if I can find somewhere else to put a normal fridge (represented by a cardboard box for now).   Mostly the lights are still in the right place.

kitchen-layout

The new consumer unit is fitted, and will eventually be inside a nice cupboard with a shelf above.   The old one will have to remain until the rest of the house is rewired and the hole in the ceiling above it will  make decoration tricky.   Fortunately I have a floor to finish before I need to worry too much about that.

fusebox

We haven’t had much history for a while!  I changed my mind about a couple of light locations and pulled the bedroom floorboards up again.    This is the floor above the very bendy ancient ceiling in the snug with inch thick straw plaster.    The floorboards are up to 9 inches wide, and the beams near the chimney are 7 inches square.

The huge beams have been re-purposed from somewhere and I guess they were installed when the chimney was built.  The wiring is passing through handy mortise holes so the beams are on their side now, but previously they must once have been the middle beam in a 2 storey wall.   My first best guess was the chimney was added somewhere around the year 1700 based on the thin wide bricks and English bond brickwork, but the joists further into the room are neatly sawn 1.5 inches by 6 inches which would have needed more technology than they had in 1700 so I need to do more research!

floor-beams

Some time later – the magic of electricity!   There is a light switch near every door, but I’m so used to having no lights I still stumble through the rooms in darkness.

I bought a bunch of random clearance LED bulbs really cheap from Screwfix and have been experimenting.  The light to the right is 2700K and the orange lights in the alcoves are 1800K.    I shall experiment some more once the room is decorated.

light-bulbs

Preparing for New Sash Windows

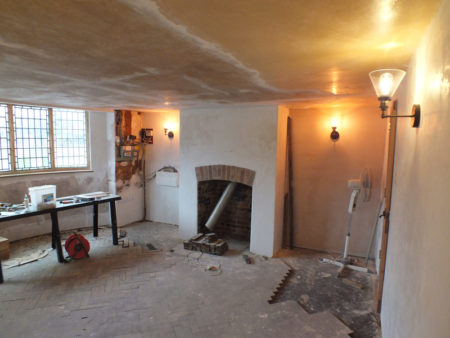
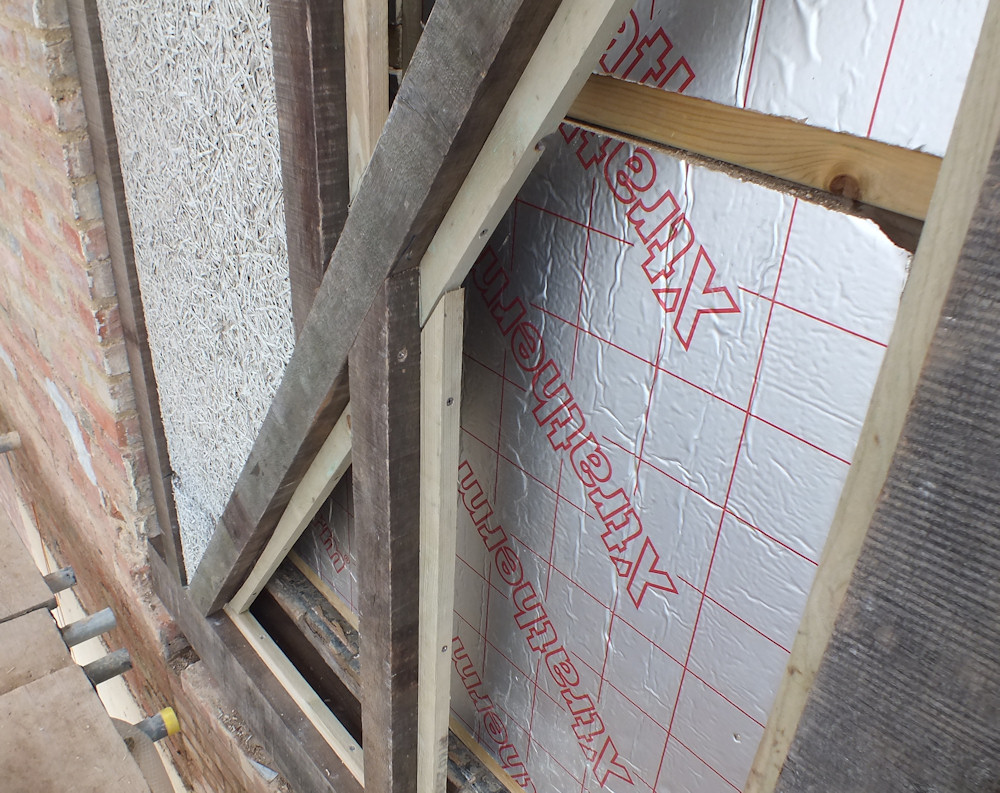
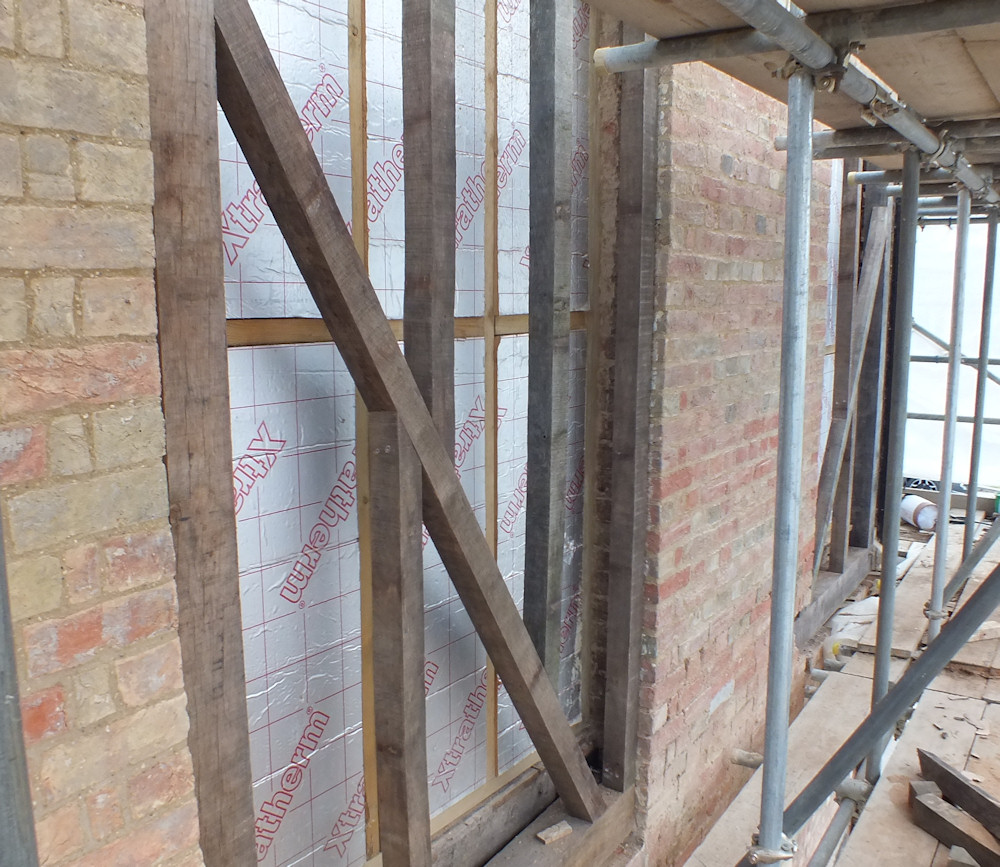
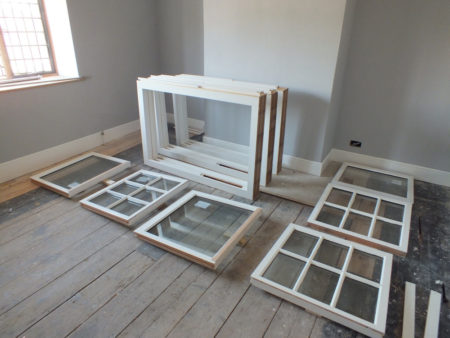
Finally a building regs change of use job unless I get distracted.   They want me to replace a pretend sash window in a bedroom for fire egress.  There are another couple of other late 20th century windows that would need secondary glazing and it’s only twice the price to just replace them to get all the windows to match.

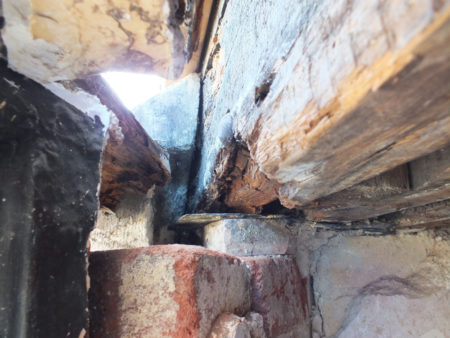
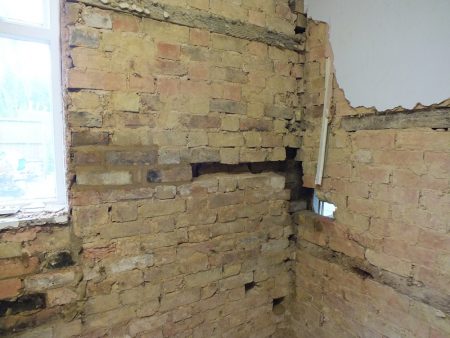
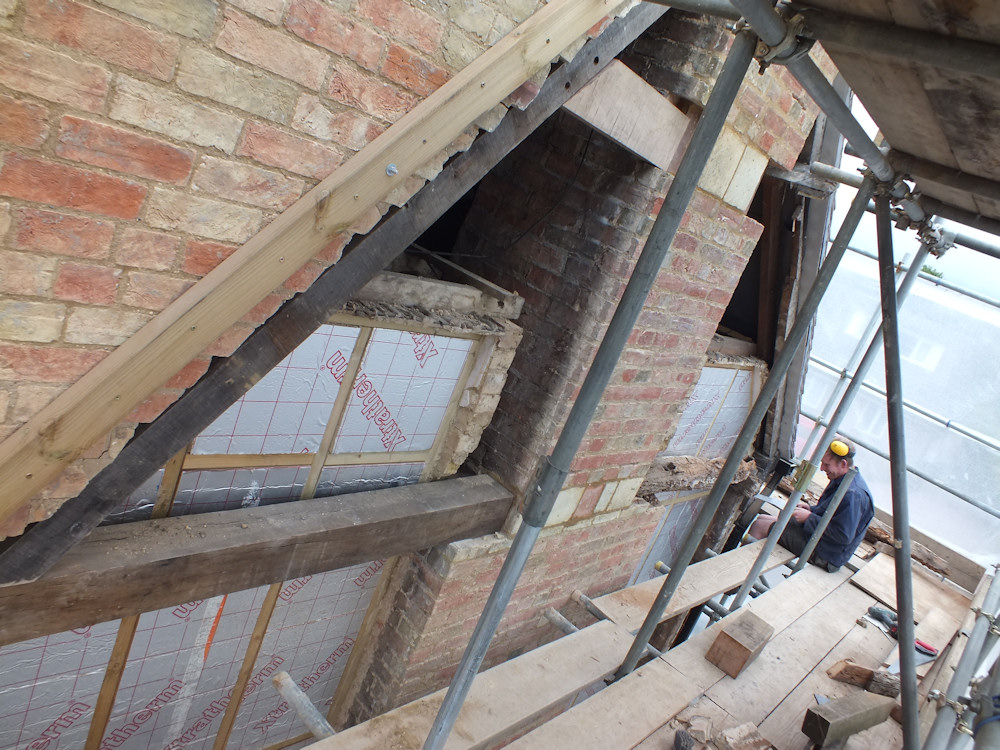
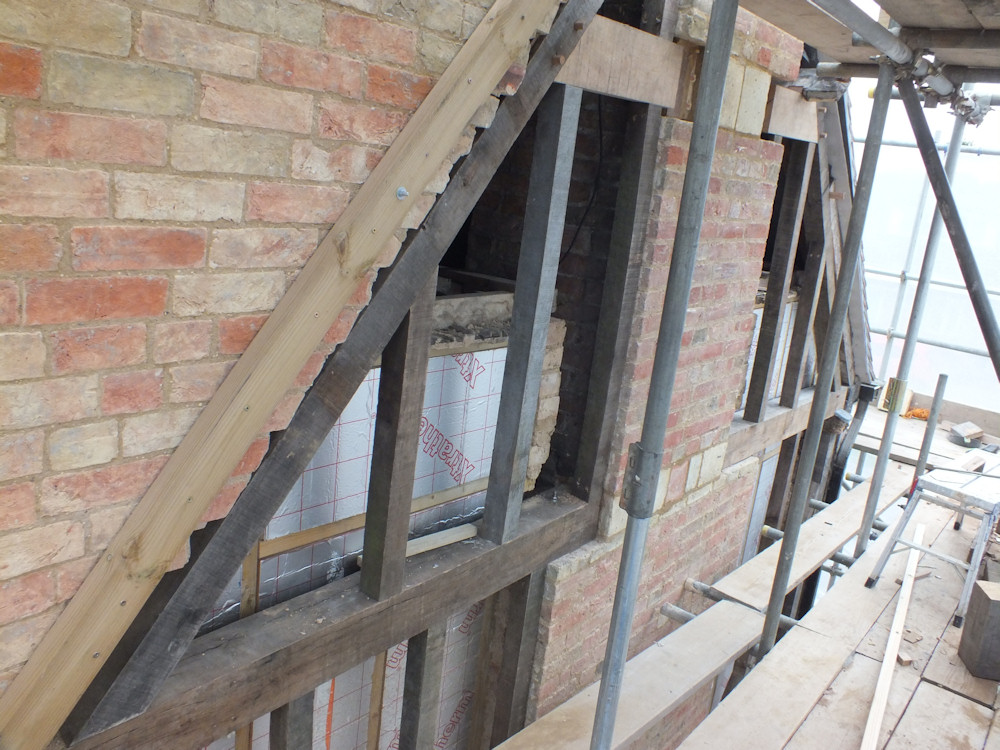
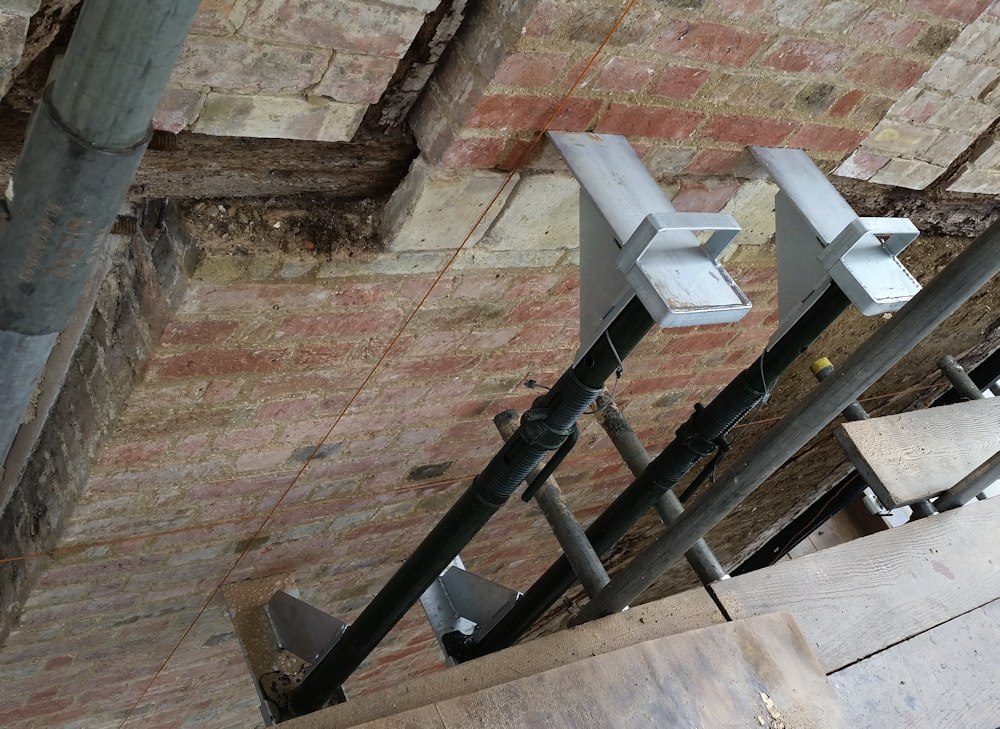
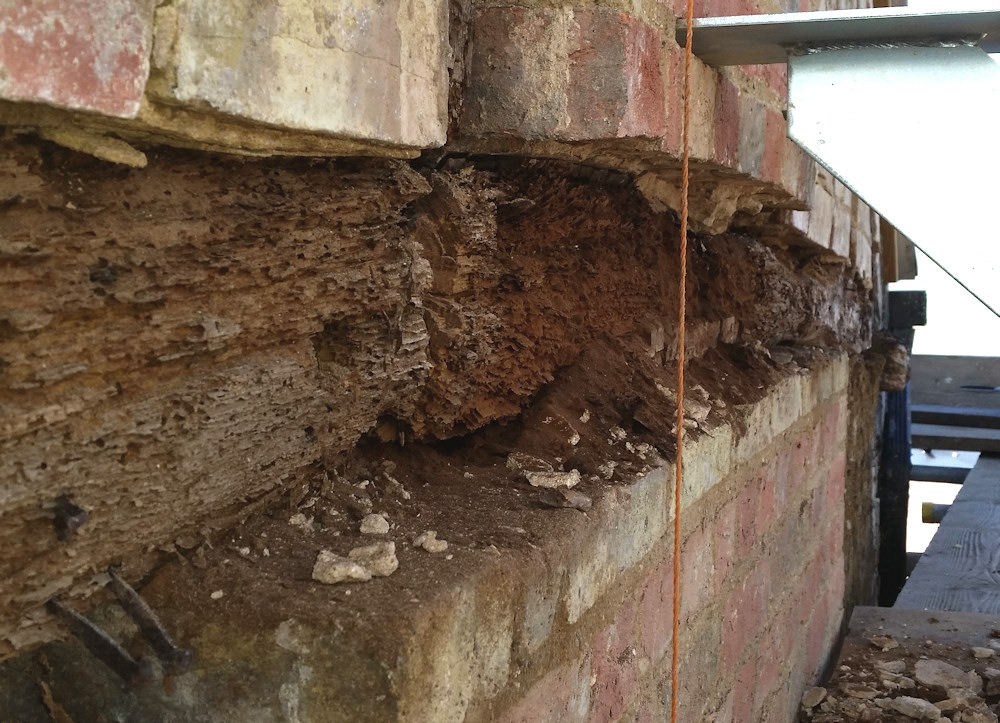
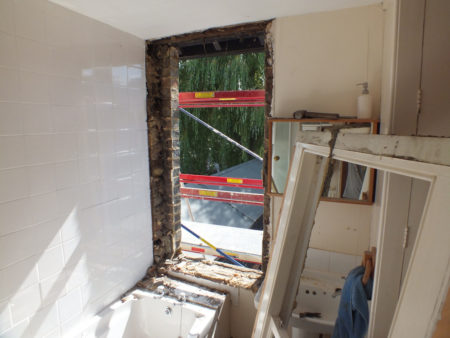
There is some prep work before the new windows can be fitted – I’m missing both the stone sill and the brick arch in the bathroom window, and want to replace a cracked stone sill which is falling towards the house in a bedroom.

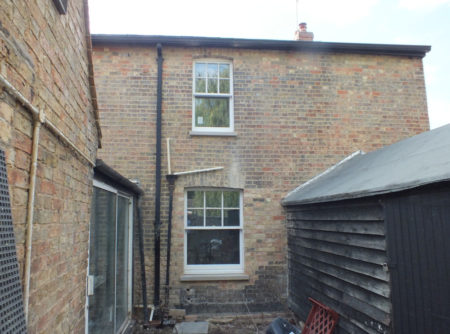
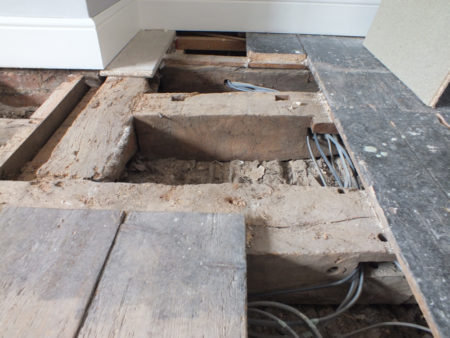
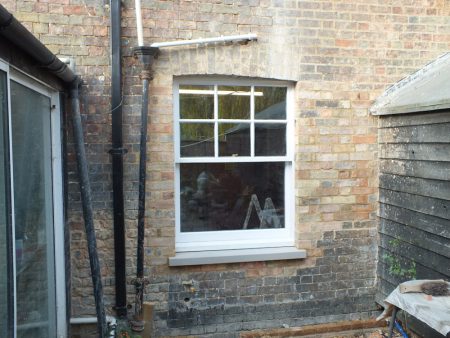
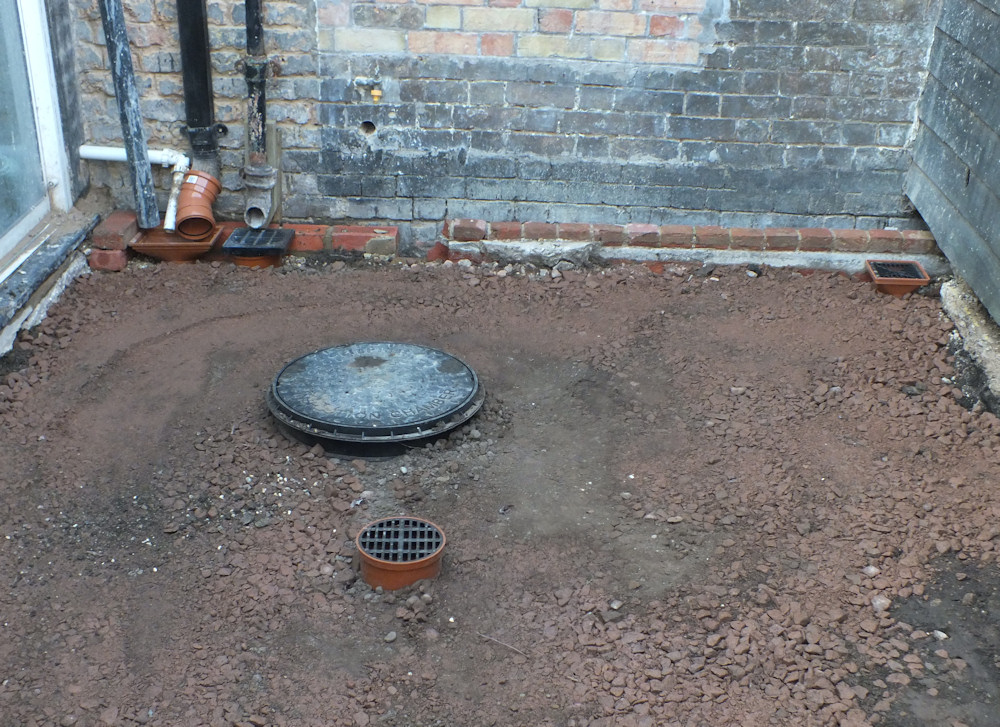
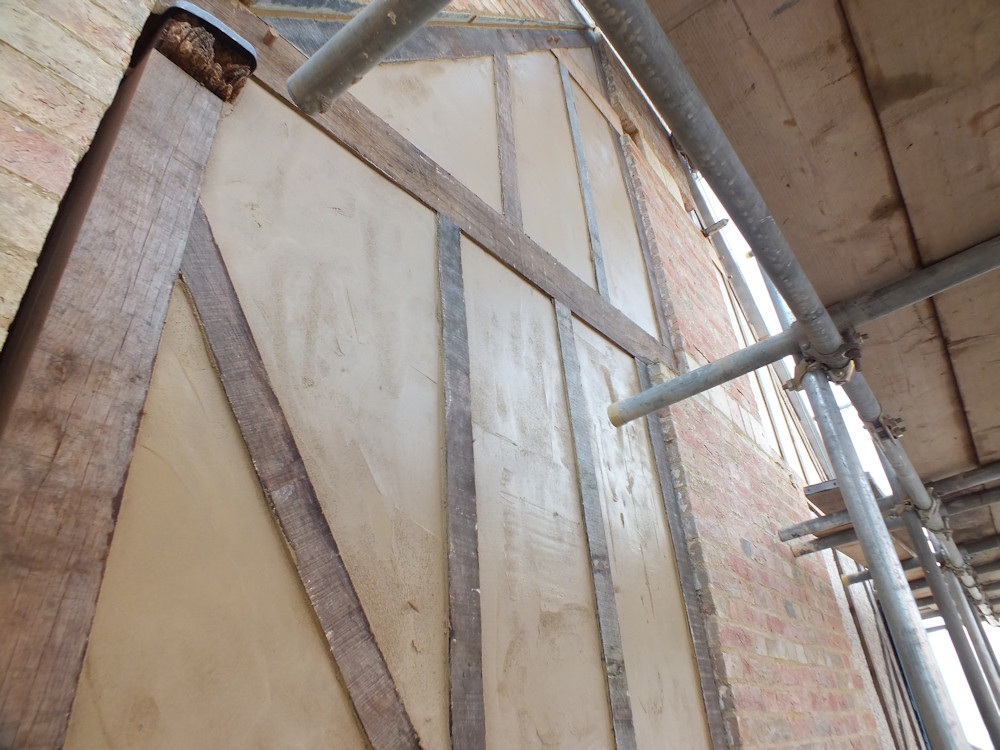
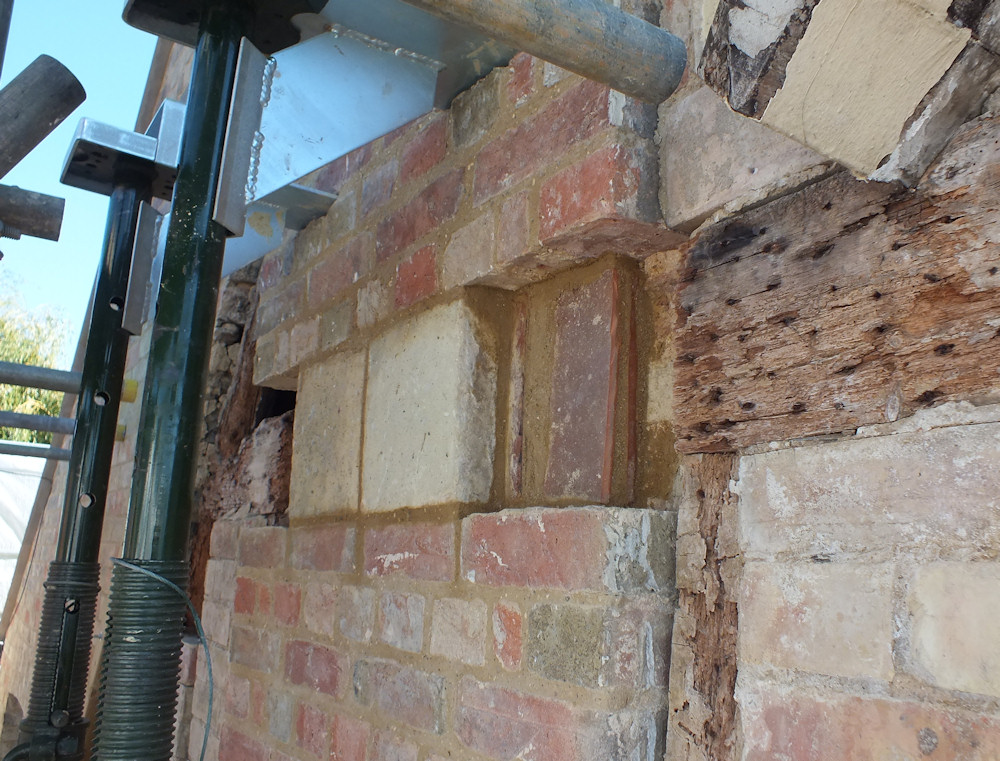
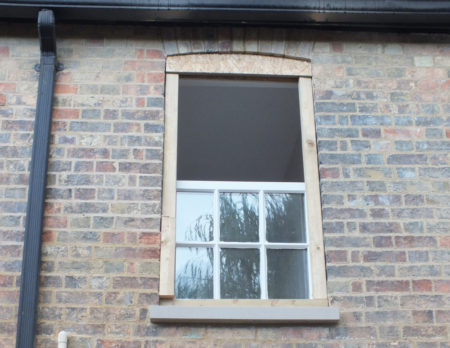
The bathroom window may have been installed in 1996 (judging by the newspaper stuck into the gaps) but the wood sill was quite rotten.  It came out very easily – fortunately the cement wasn’t stuck to the bricks!  The new windows will look like the replacement kitchen window.

bathroom-window-removed

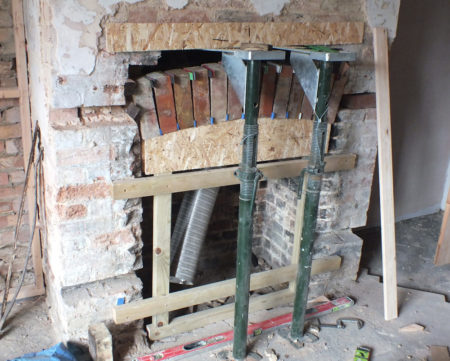
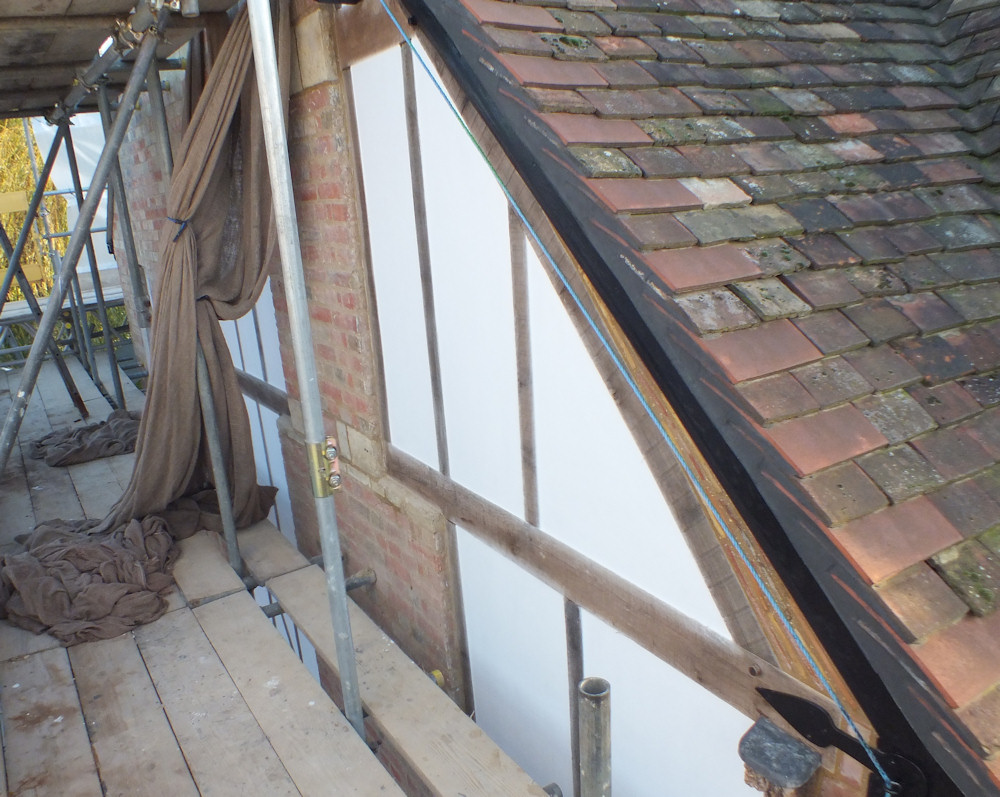
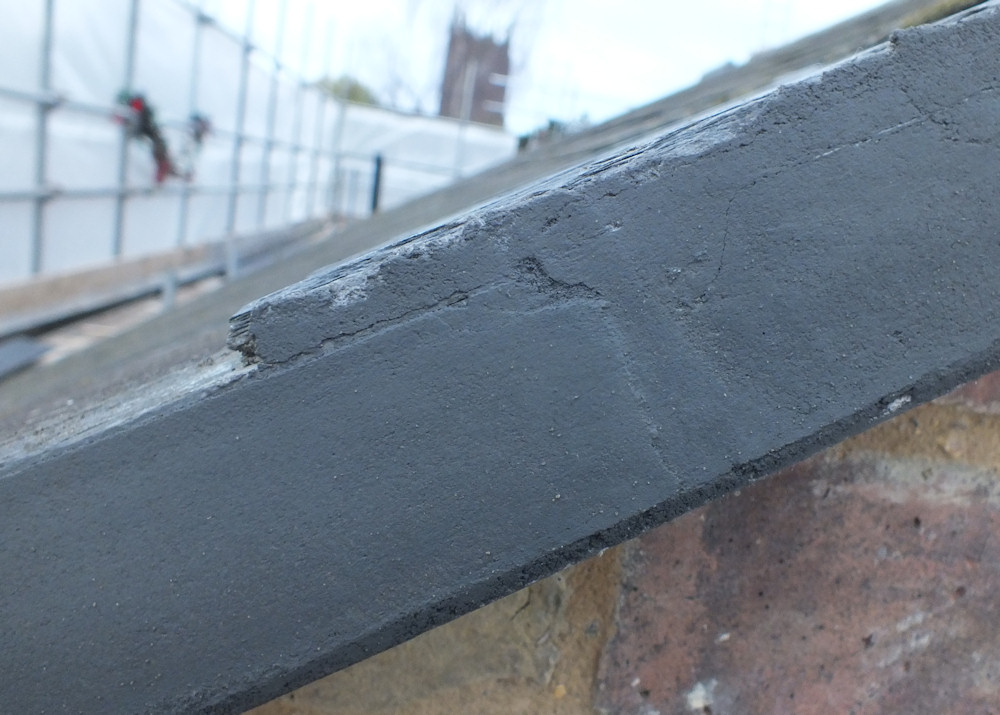
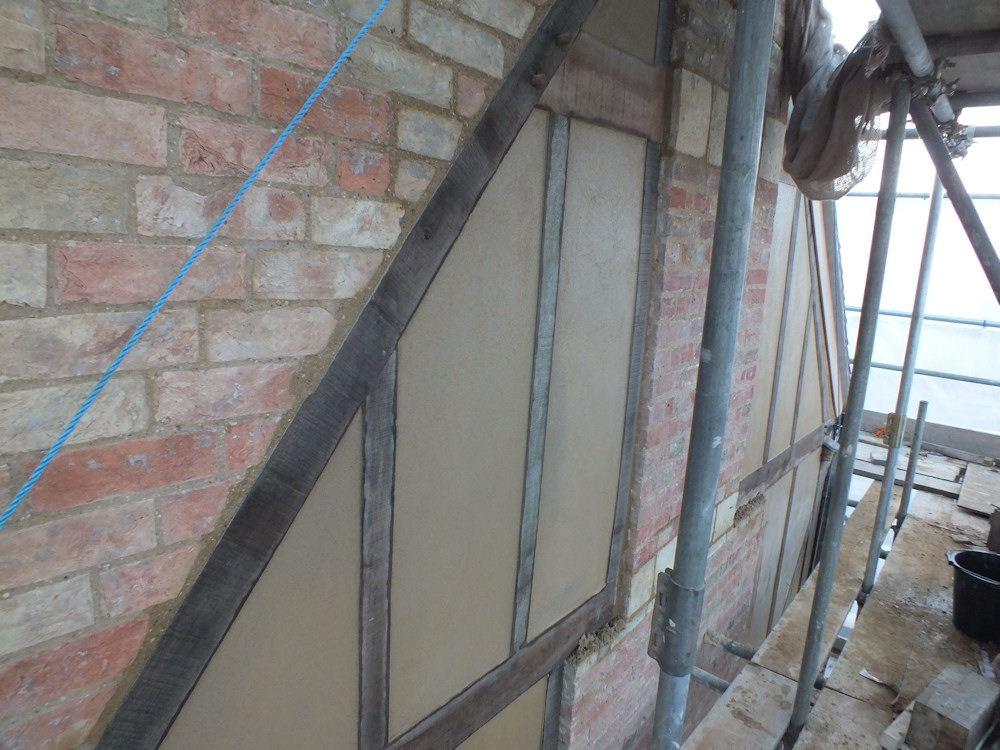
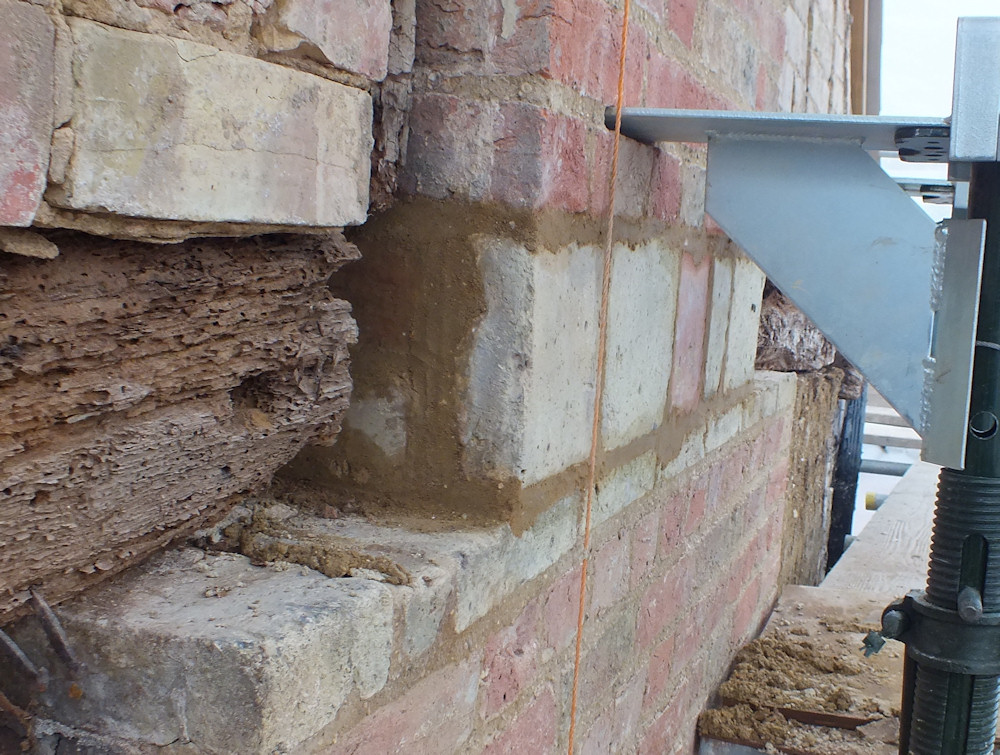
The new stone sill is now fitted in the bathroom window opening and I’ve trial fitted the new brick arch for the first time.  It nearly fits, though the mortar gaps are still a little small.  The Georgians never added an arch to this window so I’m copying the Edwardian arches further along the wall.   The middle of the arches are all 1 1/2 inches higher than the edges whatever the width which simplifies things as every opening is a different width.

trial-fit-arch

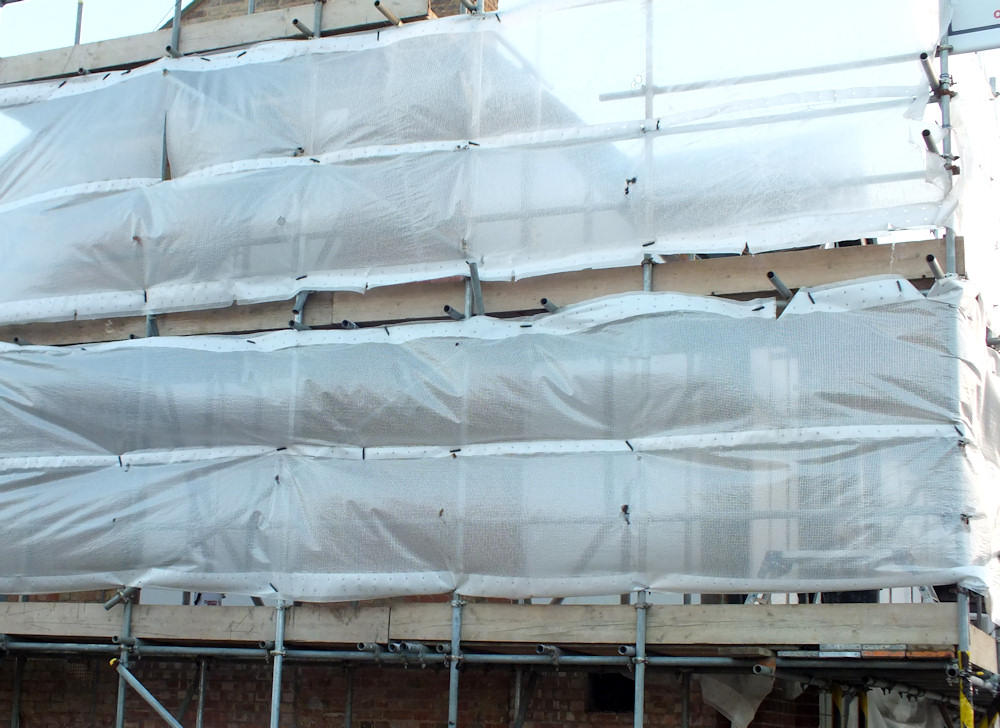
There is another heatwave at the moment which is very bad for lime mortar but great for linseed oil paint.  I’ll get on with gloss work inside and finish the arch next week when the weather cools.

Linseed paint is a real pain – it is lovely to apply but takes well over a day to dry to the touch, then never really drys because it is oil not paint.  But it’s fantastic stuff!  It’s why you can still find original Geoirgian windows around.   A 200 year life would be pushing it for modern paints which crack after 3 years and then trap the moisture needed to rot the wood.

painted windows

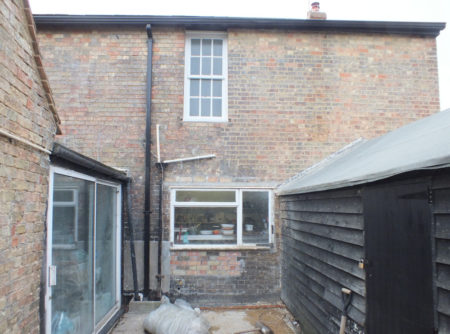
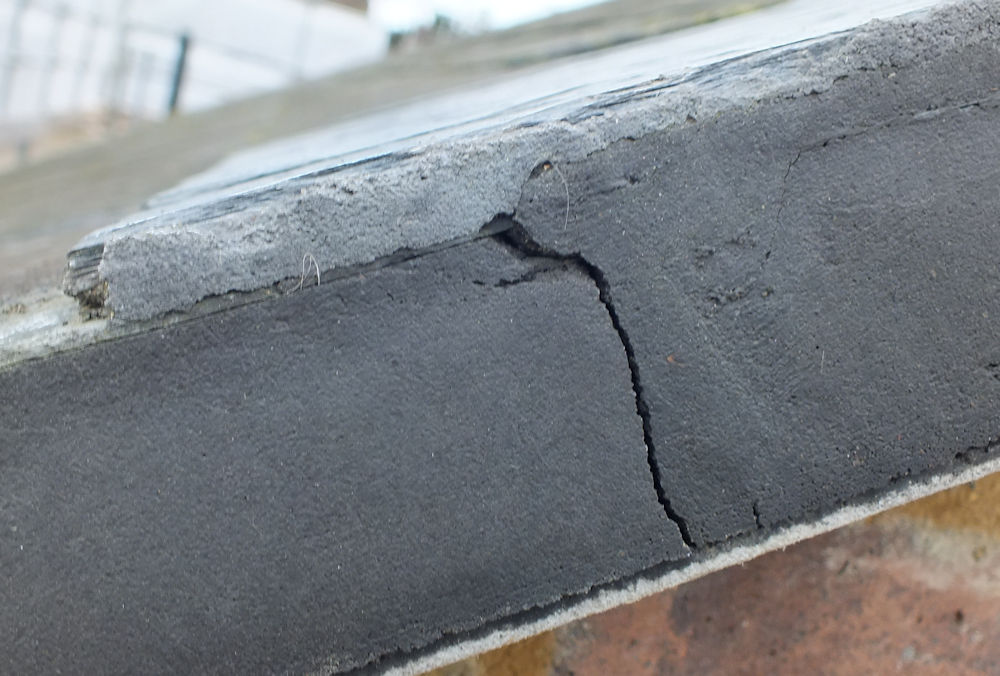
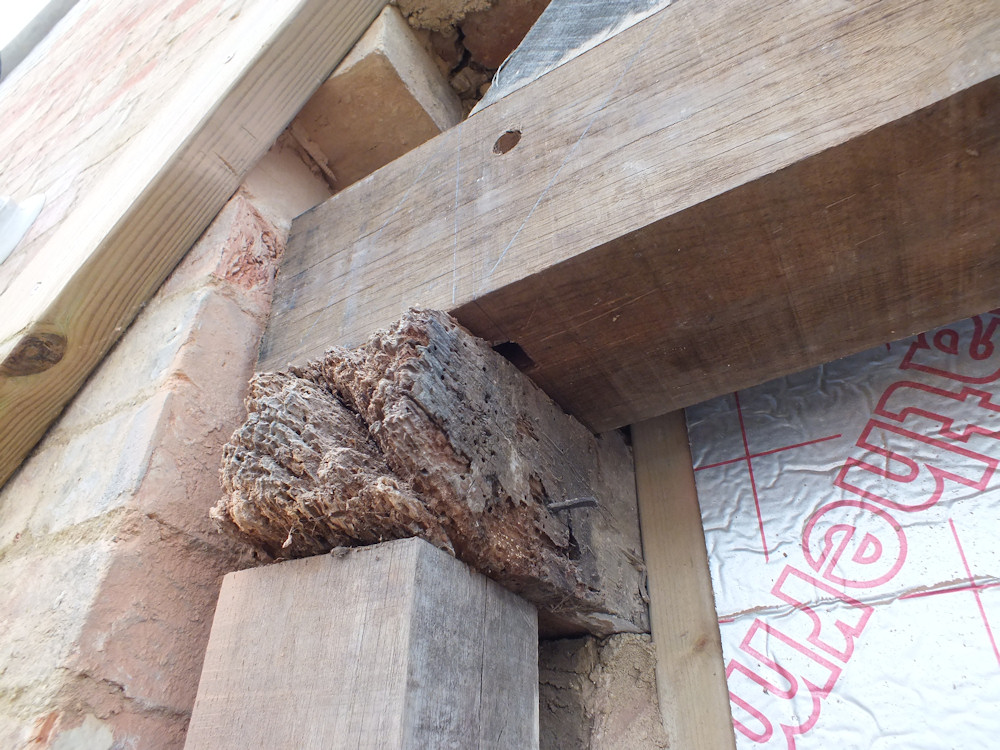
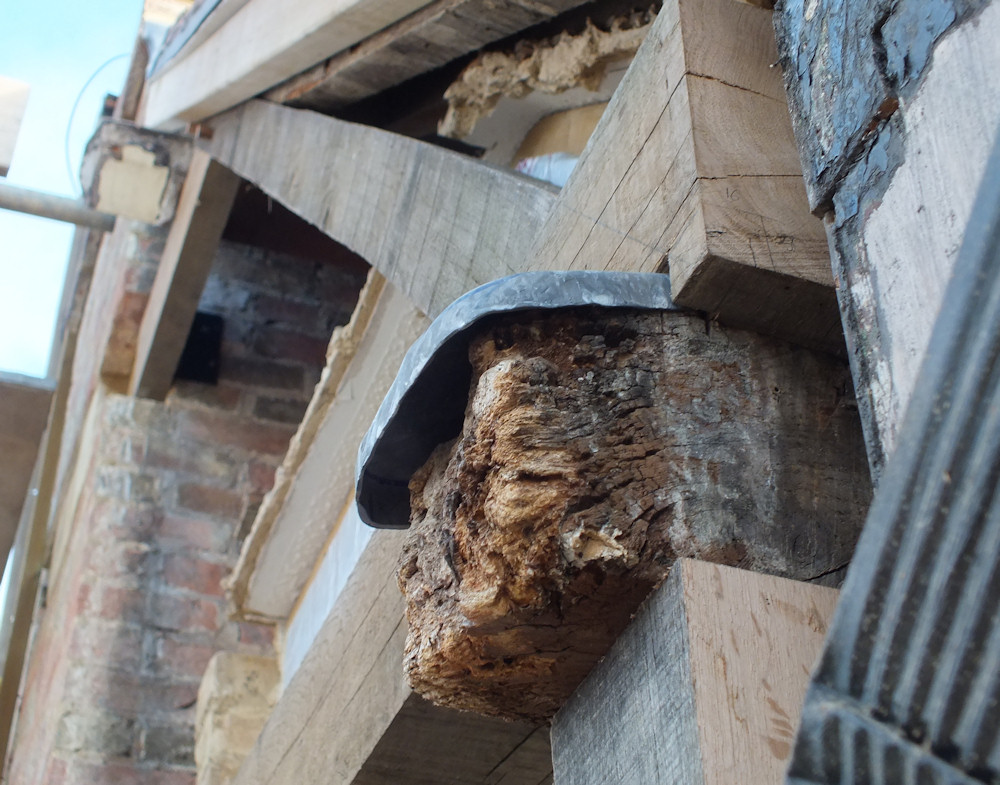
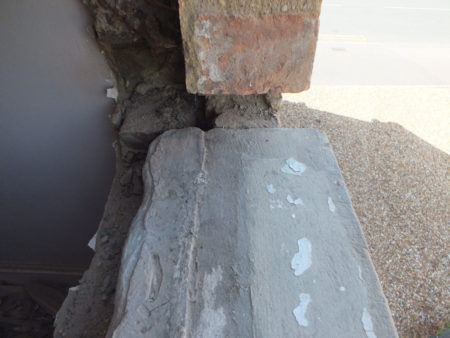
I’ve exposed an original stone window sill in the bedroom and have added a photo only because I couldn’t find a photo on the internet while researching my missing sills.   The wall is maybe late Georgian or early Victorian, but (edit) I’m going to bet the sill is from 1920 and was re-purposed from the bricked up window in the other bathroom.  I ordered a new sill to replace it, but the crack wasn’t that bad so I’ll save the sill for when I reinstate the window in the original location.

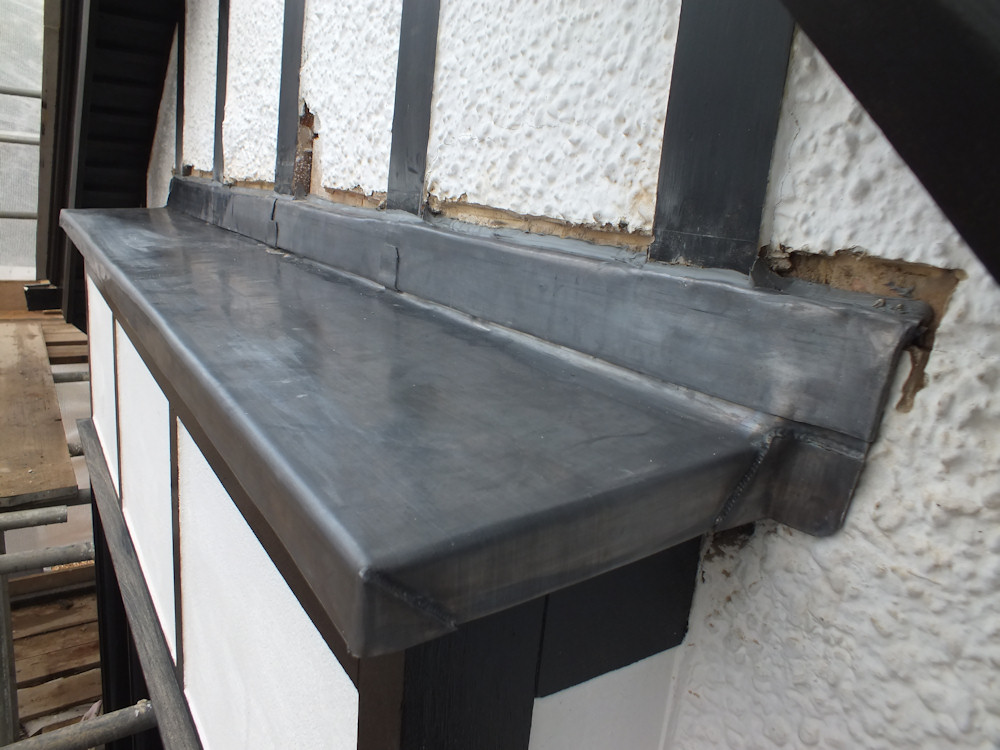
The sill is flat and 9 inches wide, same as the wall thickness, but set with a 2 inch overhang and also extends 2 or 3 inches either side of the outside opening.   That leaves a bit extending inwards to support the sash window.   I’m not sure mine ever had a fall to shed water, but the new ones are going in with roughly 1 in 25 fall.

stone-sill

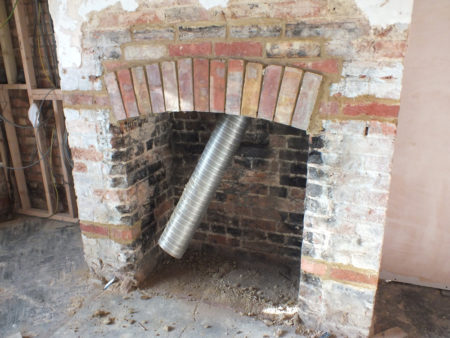
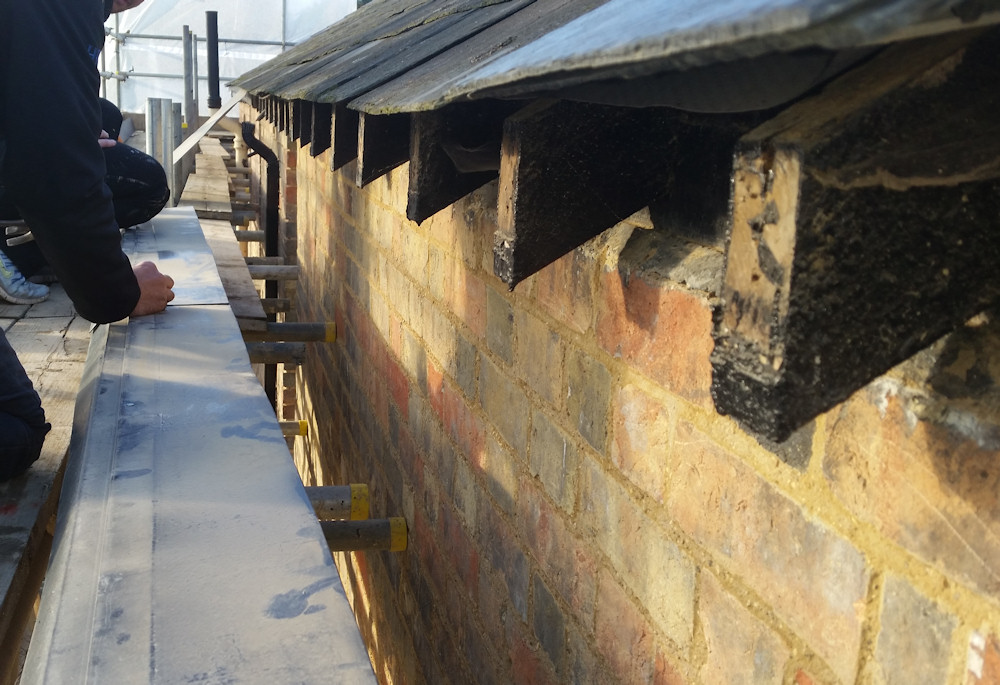
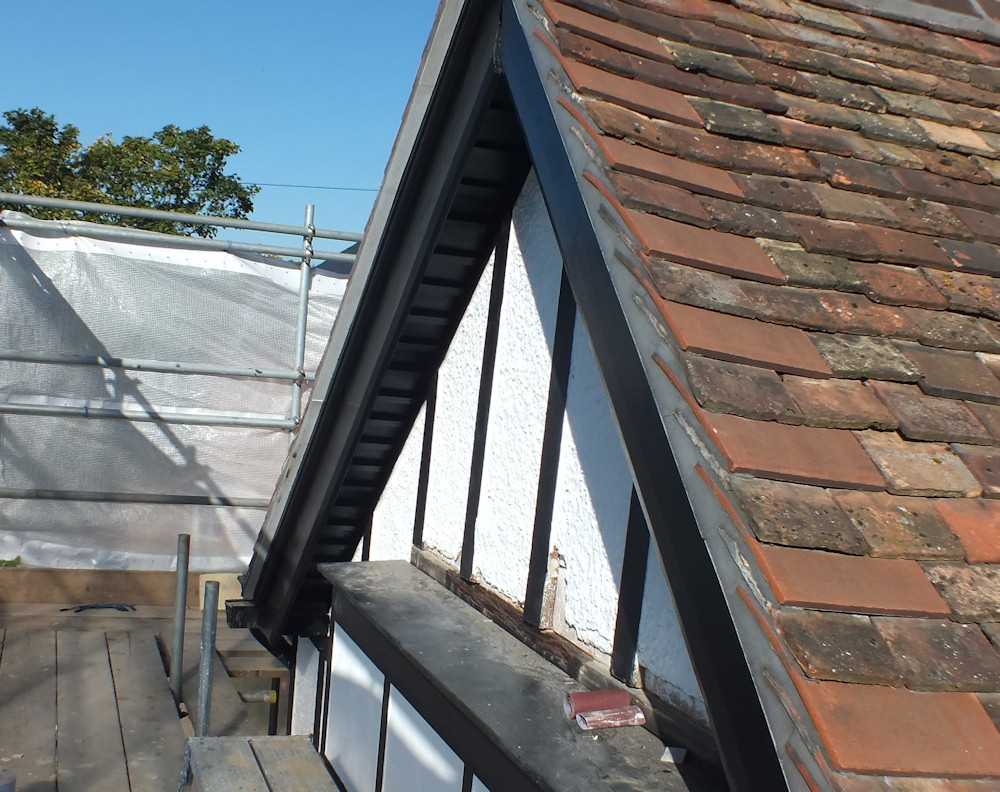
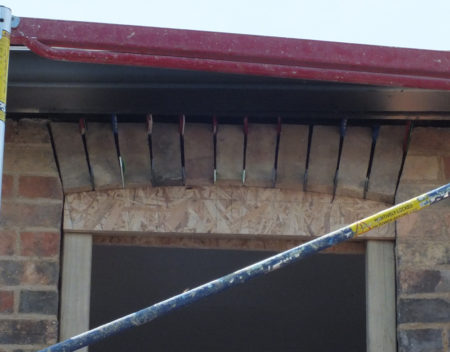
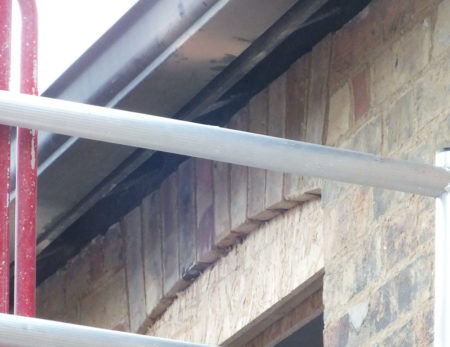
The arch is finished and I’m quite pleased that it looks like it has always been there.   Must have been as it turns out to be nearly impossible to retrofit an arch directly under the roof.

Access was limited by the roof and guttering and no access from above made the last brick especially challenging requiring a gravity defying brick pointing finger (I use cut down table knives) to apply a very small amount of mortar at a time, then on edge to compress it down to the base of the arch.   Much mortar ended up on the ground.

window-arch

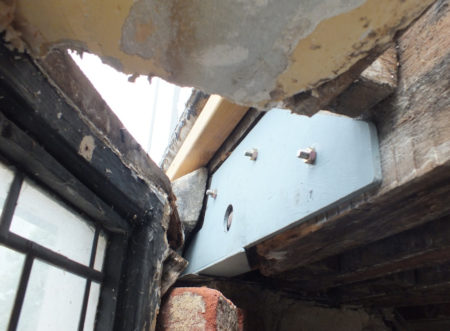
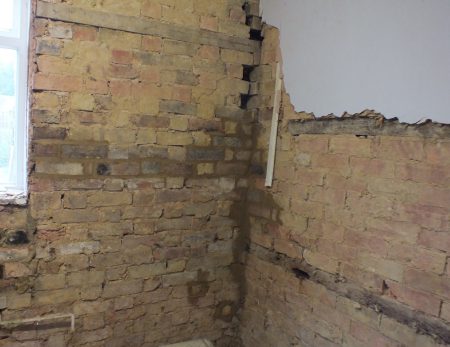
I messed up on the window height for the bedroom window.  The sill had a fall back towards the house, and resetting it to fall away from the house reduced the space available for the window and  now I’m 10mm short.

The lintel was squint and looked a bit loose so I’ve taken the opportunity to re-bed the lintel a little higher which gives most of the space I need.  The sill might end up being a tiny bit low but I have some room to work with now and can at least get a little mortar underneath it.

bedroom-window-hole

Of course as soon as I make a huge hole in the bedroom wall we have heavy rain and thunderstorms!  The trick to sill fitting is to set out the sill on spacers and then push the mortar 3 inches underneath from each side and compress with the pointing finger.

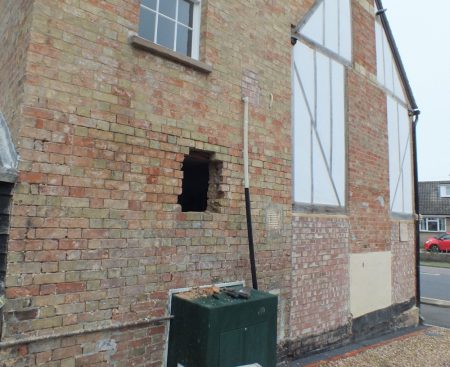
The old window went quickly back in the opening after it started raining, and the new fall to the sill turns out to make it thunderstorm proof.  Even with all the gaps no water got in at all despite the heavy rain bouncing off the glass.  The two bricks above the sill are a job for tomorrow – the thunderstorm was quite unexpected as I hadn’t looked at the weather.   Waterproofing seems to be more about falls than sealing everything up.   I’m tempted to seal the new windows in with lime mortar which should allow the wood to dry after thunderstorms faster than burnt linseed sand.  Not using silicone as that would rot the wood even when it isn’t raining.

new-sill-bedroom

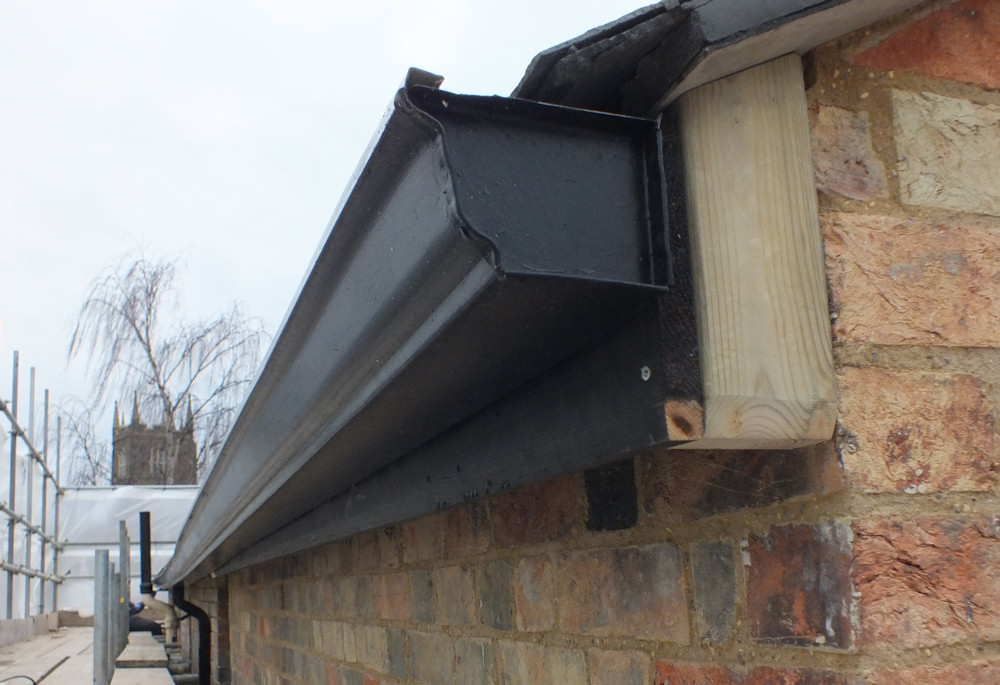
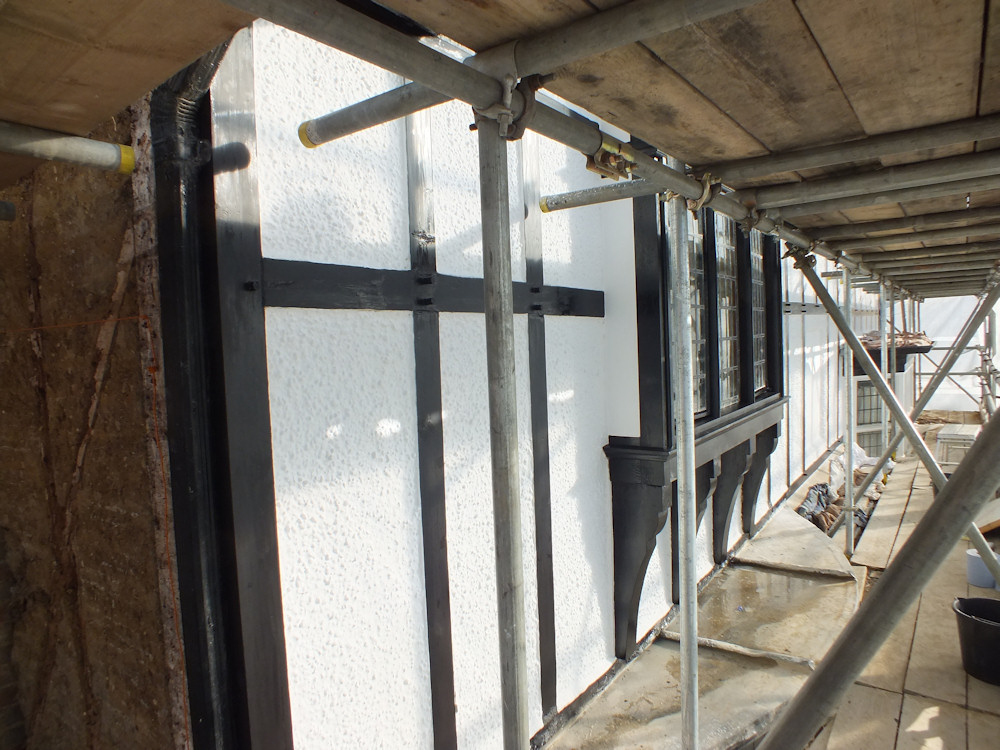
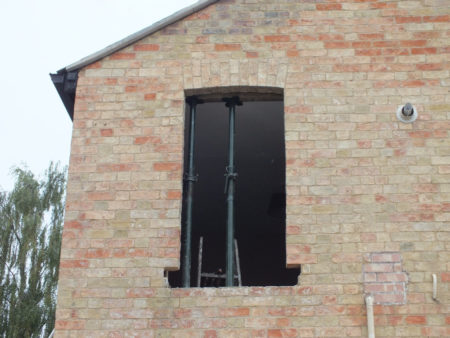
With the scaffold tower down it looks so cool to have an arch and a sill in the bathroom opening – they transform the window.   The new window is loosely in place behind the arch former, but only the top sash is resting in there at the moment.   I’ll post some before and after pictures after the new windows are fitted.

The same bricks were used in the photos below and above.   I think the north wall is so clean because it was limewashed from new.

bathroom-window-opening

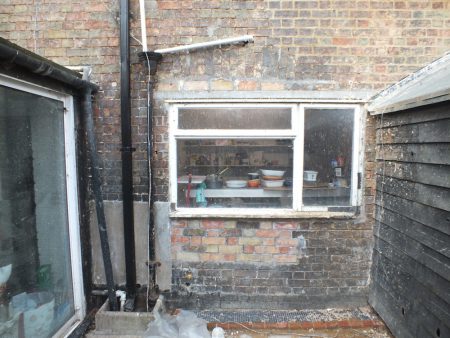
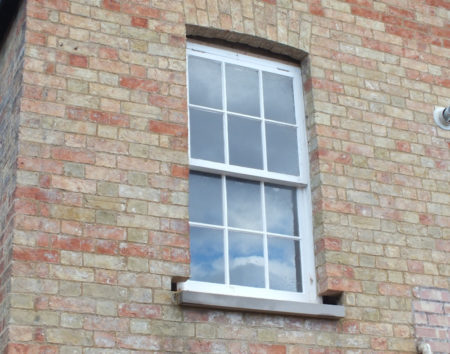
A photo of the new bathroom window here.

New Snug Bay Window Roof

The problem with the Snug roof was it used to fall towards the house.   Water would puddle until it was deep enough to overflow to the front.   I think the roof was built with no fall, then started falling towards the house as the timber framed facade settled with the weight of all the brick infill  This photo was taken April 2015.

puddle-on-bay

Setting up to make the roof fall away from the house turned out to be unreasonably complicated.  If I made the rear of the roof straight it would end up 40mm too high at each end so I set up from the front of the curved bay.   Wedges cut to fit on top of the existing joists are set to about a 1 in 50 fall which means the roof has ended up higher in the middle than at the ends. Fortunately It looks OK from across the road.

The way to do this is to clamp a new bit of wood to the side of the existing joist, set the new wood to the correct height and angle, then draw a pencil line from the existing joist for cutting.   I’ve gone for a small ventilation gap under the front of the roof and added 100mm of insulation with an air space above before the roof went on.

snug-roof-wedges

The roof is made from redwood tongue in grove planks (which were cupped making them a real hassle to work with).   John suggested using a circular saw to cut the curve and it worked a treat.

I’ve gone for an inch more overhang than before to make sure the roof drips past the stone sill below.

roof-planked

Hopefully it won’t rain too much before I get the leadworkers in.

Snug Bay Lintel Repair

I had been putting off the snug bay window.   The roof falls towards the house and has leaked for a long time.   A temporary roof covering went on over a year ago after we knocked off some failed plaster and found wet structural wood behind.

snug-bay-roof

The reason I had put off the job was concern about rot in the lintel visible from below.   Thankfully it was nowhere near as bad as I feared.   The bearing surface had rotten causing the lintel to fall by about 10mm,  but the rot was localised and the rest of the beam was still in surprisingly good condition.

beam-end-rot

All the beam needed was a new end.   A steel plate will now act as a bearer for the lintel.   Next job is to fix the hole that has appeared in the bay roof.    I’m planning a new bay roof that falls away from the house.

steel-plate

Snug Fireplace

The bedroom is finished apart from paint and I’ve started on the snug.   I’m planning to fit a wood burner and have removed the late 20th century fireplace to get back to the builders opening.

The brickwork is not presentable and will need to be plastered.  My idea is to leave a brick arch exposed to add some interest.   In the photo the arch former is in position for a trial fit of the arch.  The OSB board above the baby acros is there to provide a surface to line up the face of the arch which will be 10mm proud of the brickwork.

arch-template

The arch uses the same bricks as in the main room.  The colour differences between the bricks should be reduced when they are sealed. Failing that I will have a multi-coloured arch.

It’s a bit mean to future historians to build the arch in 100 year old bricks so I’ve made good use of red bricks left over from the new build next door to fill gaps where fireplace mounting wood was removed, and also a couple of loose bricks above the arch that I have saved to match replacement bricks for the exterior wall.

arch-complete

I think the sides of the fireplace opening will need to be plastered as the corners of the bricks have been knocked off.  Possibly I will be able to only plaster the corners and make a nice curve.   I’ll likely leave the back of the opening in sooty brick.

Kitchen Window

The original sash window in the kitchen had been replaced by a picture window in the 1980s, but the original crooked brick arch remained in place.  We decided a sash window would look nicer.

kitchen-window2

It was quite a job to remove the concrete lintels from above the picture window,   We removed them in two halves so half the opening remained supported while we bricked up the other half.

kitchen-window-brickwork

The new window was made by John to match the original Edwardian windows elsewhere in the house and looks lovely.   He made another 3 windows for upstairs which we will fit next year when the weather warms up a bit.

new-kitchen-window

Bond Timbers

I’ve seen bits of wood embedded in the inside of walls before and assumed they were intended as something to nail things to.   It turns out they are called bond timbers and were commonly embedded in walls up until at least 1850 as a reinforcement that might stabilise the building a bit should you have forgotten to build foundations.  One of my bond timbers had rotten so I’m replacing it with bricks.  The rest aren’t too bad.

bond-timbers

The Edwardians built the half brick internal wall to the right and they also put some bond timbers in, but they missed the point and put them where they wouldn’t tie to the timbers in the external wall.  The external wall doesn’t seem to have moved much recently as there were no cracks in the modern plaster, but it is worth making things a little more sound while the wall is exposed.    I put in a few new bricks in to the corner and re-jointed other bricks to tie the walls together all the way up.

kitchen-corner

I have taken on some more work, partly based abroad, so progress will likely slow even more.

I have ordered some new sash windows for the rear of the house to replace the nasty 1996 efforts, and I have come up with an elegant custom secondary glazing system for the front of the house which will give me something to do in the winter evenings.

Back After a Break

I’ve been a bit quiet recently.   The weather hasn’t been very inspiring so I’ve been busy earning money this year to pay for work on the house instead of actually working on the house.   Also I didn’t have any matching bricks to tidy up some of the holes in the kitchen wall – this hole was from the industrial extractor fan outlet.

extractor-hole

I found bricks at Solopark in Cambridge which I think will match reasonably well.  They are still wet in the photo but should lighten as they dry out and end up quite close.

extractor-hole-bricked

The hole made a lot of difference to light in the kitchen.  I have planning permission for a ground floor window beside the hole but a full height window doesn’t work with the ground levels and a domestic sized oven extractor would become difficult.   I’ll try to borrow light from the snug and shed instead.

I’ll be quiet again for a while – there are a few similar holes to brick up that I won’t bore you with, but check back after that for the the exciting kitchen window.

Drainage

Drains have been a problem since we moved in but I need to fix the damp wall in the kitchen before I go much further with that.  The drains tended to become blocked in much the same place in the yard, but much less often since the willow was trimmed.

It turns out the kitchen drain had a botched concrete joint and no rodding access.  Later on a land drain was installed by knocking through the pipe and concreting in the new connection. Tree roots had found their way under the concrete and filled the drains with roots.

concrete-drain-connection

Replacing the defective joints with an inspection chamber was fairly straightforward, but lowering the hopper is taking a lot more thought.  Ideally it would be at the bottom of the trench as that would hide the pipes and keep the kitchen wall dry, but I don’t want any overflow to end up in the trench.

inspection-chamber

I ended up building a retaining wall with a 2 inch gap to the kitchen wall with the side open to the trench that runs around the house. It is just enough gap to clean out with a stick and I’ll put a cover on top to keep leaves out.  The gully and hopper are set to ground level and will have an edging behind so any overflow will flow into the yard drain and not the trench.  All the drain pipes still need to be realigned.

kitchen-gully

Finally the land drain has been brought closer to the inspection chamber to allow ground levels beyond to be raised a little, and I’ve added a new hopper for a gutter on the shed and a pipe to extend to the barn gutter later on.

drains-completed

The building inspector was happy so I could move tonnes of earth back into the hole.  You can save money on pea shingle by using wooden shuttering close to the pipe and filling the pipe side with pea shingle and the other side with earth.

pea-shingle

I’ve filled to about 3 inches below finished level.  I’m planning to surface using granite setts, but might decide to lay them later on once the outside wall of the kitchen is finished.

filled-in

Sometimes it is difficult to see beyond what was there to start with.   Later I have other ideas for what I might start calling a courtyard, and I’m in the mood to have the finished level a few inches below the original level (which I set out to) so haven’t surfaced.   I think there is room to adjust the height of the drainage.

Finished! (Almost)

I can only claim to have finished the exterior of the upper storeys of the main house and it only took 4 months longer than planned.  I’ve not really started on the building regs change of use stuff that I’m supposed to be doing.   A final coat of limewash on the north gable and some cleaning up are the only things left to do before the scaffolding comes down next Thursday.

I’m planning to keep the gable covered with hessian over winter to reduce the chance of frost damage to the new render, so this is a sneak preview of how it might look when it is revealed next spring.

limewash

The oak will darken over time and the frame will become black and white.

You can’t see a lot through the plastic sheeting, but from the road the timber frame in the gable looks like another part of the half timbering on the facade.  I think it will look interesting when it is finally uncovered.

view-through-sheeting

Snagging

The rear gutter wasn’t mounted well – some screws miss both the gutter brace and the the facia board and just manages to engage in the tip of the rafter. There is a long row of these.  I think I’ll have the gutter and facia board off and do it properly as it’s not a job that can be done later from a scaffold tower.

gutter-screw-rear

With the ends of the slates supported by the facia board there was a fair risk that we would break some.  We were lucky.  The new facia board is 2 inches taller than the old one.  The plastic eaves protector came out with the old facia board and needed to be nailed to the new one before fitting.

facia-removed

The north corner of the house is slightly lower than the south so there isn’t as much fall as there looks in the photo.   We placed a hosepipe at the end and adjusted the gutter height so there weren’t any puddles.  It was quite a fiddle to set accurately.

gutter-installed

This is probably the first time that water doesn’t puddle in the gutter – it had always followed the line of the roof which isn’t straight. The eaves protector has been trimmed at the gutter mounting points to avoid forcing the gutter down.

no-puddle

A few cracks had appeared in the verge caused by the cement being pushed past the battens.  Also the undercloak has separated from the cement.  I’m planning to seal the gaps with lime.

verge-cracks

I made up a 1:1 lime to soft sand mix with some black cement colour powder and worked it into the cracks.   Hopefully that will make it fail less quickly in the future.

filled-crack

The rest of the roof is OK – it doesn’t leak any more, there are no condensation problems inside, and nothing has fallen off.

Rendering the New Timber Frame

It is late October and it is madness to be considering lime rendering at this time of year.   Normally you would get your exterior lime work out of the way by the end of September.   The trouble is the lime will take a month to dry in cold weather and will be damaged by any frost before it is dry.  I’m gambling against a frost in November else I might have to do it all again next year.

The render will be applied onto woodwool boards which are fixed onto roofing battens screwed to the oak frame.

woodwool-frame

Both oak and lime require stainless screws.   The tannins in oak corrode normal screws and electroplating doesn’t like lime.  The holes need to be pre-drilled and a steel screw driven in and then removed to reduce the chance of the stainless screw breaking as it goes in.  There is no chance of removing the stainless screw from oak.

The bricks immediately above the oak frame were not supported and had come loose so needed to be removed and replaced again.   I have fitted a slate undercloak between the bricks and the frame.

slate-undercloak

Hessian is my plan to reduce the chance of frost damage.  It should prevent dew forming on the surface of the lime and freezing, and will hopefully insulate a little to retain heat from the wall.  It is supported on eye bolts drilled into the brickwork with a rope threaded through.   I’m hoping to come up with a plan which will allow the rope to be withdrawn from ground level after the scaffolding has come down.

hessian

More than half of the first coat went on in a day.  My current recipe for render is a bucket of rendering sharp sand, a bucket of soft sand, and a bucket of lime (NHL 3.5 to help avoid frost damage).  1:2 lime to sand is quite a strong mix, but tests with less lime proved crumbly.  The surface will be roughed and scratched when it becomes firmer tomorrow.   I had planned to whitewash the infill to match the front of the house, but the earthy colour of render looks nice.  I might try adding some pigment to the limewash.

first-coat-render

Late October turned out to be warm and the render is drying well.   It is still drying slower than it did in the summer but that is handy as it allows me to use lime late in the afternoon and finish it the next day.  It should be possible to apply the final coat around 5 days after the scratch coat (which has been scratched).   I brushed the remaining smooth bits after the photo to help the next coat stick.

scratched

The final coat of render seems to be taking about twice the time of the first coat.   I troweled on the lime trying to make it smooth and level, then after a few hours used a polyurethane float to flatten it, filling in low spots with more lime.   Next day I went over it with the polyurethane float again, then lightly wiped it with a damp sponge to fill in the imperfections.  This left a flat sandy finish which I will claim is traditional.

The finished render is recessed about 5mm behind the frame which will make it easier to lime wash.

final-coat-render

It’s about time the scaffolding came down.  The lime work is finished.  I used a mix of brick and tile to infill between the new and old frames and have fitted some steel to hold them together.

brace-and-infill

New Timber Frame

The new timber frame started going in on Saturday (the original was rotten).  My cousin John made it from air dried English oak.   It was nerve wracking removing the old frame – the inside of the house is full of acro props, the chimney extended to support a purlin, and various braces added to support the brickwork.  In the end it turned out the original frame had stopped being structural a long time ago.

timber-frame-started

The original wall plates are better than they look.  The ends were damaged by waterproof paint but the rest was able to dry into the bedroom wall so hasn’t been too badly damaged by beetles.  The wall plates stuck out from the wall to allow material to accommodate a fish tail joint in the tie beam.   Some lead hats were fitted before the frame was pegged together.

wall-plate

The current roofline is shallower than the original, and the oak timber ends behind the facia board before it meets the chimney and does nothing useful structurally.   We kept that feature because I wanted to indicate the original roof line, but annoyingly the new wood is curved and probably could have been extended all the way to the chimney.  I might stud and resin fix some new oak in place to complete the rafter.   The tie beam is extended past the wall plate (it was originally cut diagonally) so it can support the facade.

roof-line

The studding is taking a long time because all the wood is a funny shape and each joint has compound angles.   The pattern of stud work matches the original apart from some slight modifications to avoid gaps of more 600mm between studs which is the width of the woodwool board infill.

studwork

The frame is starting to look nearly finished with most of the second floor studding in place.  I’ve still to finish off the barge board on the front of the roof which is tapered.  I tapered the wrong face and need to buy another bit of wood but the frame took a week and it is Saturday again today.  I’ll get on with the infill.

first-floor-studding

Gable Undercloak

The front gable has an 8 inch overhang.  Originally the roofing battens were exposed but now the roof has been felted. I wanted to add some sort of cover under the felt and hit upon the idea of ply secured by strips of wood about the same size as the original battens.

undercloak

I think it turned out quite nicely.

undercloak-painted

The plan was originally to sort out the timber frame in the other gable before completing the paint.  The new plan is to finish the paint, install the remaining leading, repair the paint, then ruin it all with dust when the timber frame goes in.

The leading was out of schedule partly because I didn’t notice a tiny crack in the original leading until I was just about ready to start painting.  It’s on now and just needs rendering in place and the paint touching up.

oriel-leading

Black and White

The first coat of linseed paint has been going on over the weekend.   I quite liked the natural wood but it will last a lot longer with UV protection and some oils.

Linseed paint doesn’t crack or peel (unlike the modern gloss paint that ruined the timber), and is breathable so the wood should remain well protected.   It should only need nourishing with boiled linseed oil every 15 years.

first-coat-linseed-paint

The window frame used to be white but I’ve gone for black for more of a Tudor effect.   I still haven’t finished the first coat – The edges take a long time so it will probably end up taking 2 full days per coat.  It’s starting to look nearly finished now.

front-linseed-paint-first-coat

Rotten Timber in Chimney

It turns out the new gable timber frame is due to arrive at the start of October (the old one was rotten) but before the frame arrives there is a lot of work to do.   There are two beams that pass right through the chimney, but beetle infested wood isn’t great structurally so needs to go.  Some unusual use of acro props with a strongboy at each end (I’m working higher than the longest acro so can’t use the ground for support) will hopefully dissuade the chimney from falling over while the beams are cut out.

acrow

It seems the timber frame is earlier than the chimney, and was much modified when the chimney was added.  The brick size and English bond pattern used in the chimney are characteristic of the 17th century.  The first records of a pub on the site are from 1646, but I don’t know whether the building had a previous use, or whether they decided shortly after building it that a brick chimney might be nice.  If I can find any wood that has survived the beetles I’ll hang on to it so I can have it dated at some stage.

beam-through-chimney

When the chimney was built 2 inch thick brick tiles were added to either side of the timber beam in order to support the chimney brickwork.  The tiles on the inside were still supporting the chimney so I left them in place and replaced the timber with bricks before putting the external tiles back in place. The mortar will look tidier and match the rest of the chimney after brushing.

bricked-up-chimney

Further up the chimney a 2 inch thick beam was removed and replaced with tiles so I could retain the tiles on the outside.   This section is near the top of the 9 inch part of the chimney so had a course of bricks behind.

chimney-top-beam