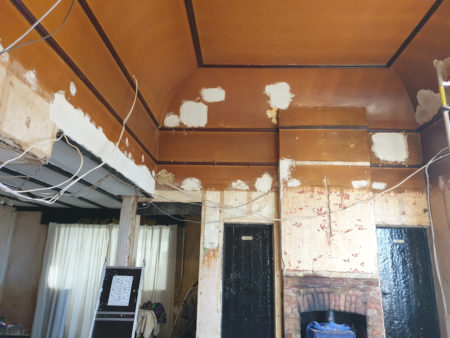
The were a lot of holes in the ballroom ceiling and they are slowly being filled with plaster. The walls have been damaged quite extensively and will probably need a skim, but most of the brown coloured ceiling above is in good condition apart from a few holes. The ceiling wasn’t brown originally – the colour is from a century of tobacco smoke.
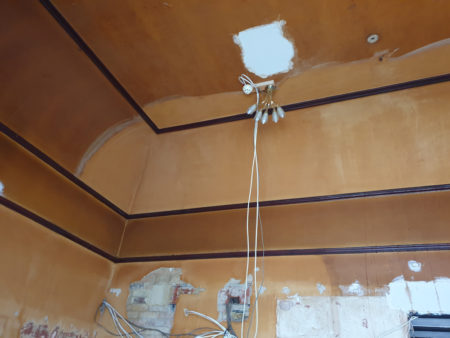
Once the plaster on the ceiling is finished I’m planning the first coat of ceiling paint to brighten up the ballroom. I’ll do the second coat when I start decorating.
The walls below can’t be completely finished until the electrician has been, but I can save time later on by making them straight and getting some plaster on them.
For base coat directly on bricks I’m using a lime render similar to the one I used outside. It goes on much more thickly and smoothly than the white lime repair plaster which is more of a skimming plaster. I realised while applying this bit that small bit of (modern) plaster above doesn’t line up with the door jam. Oops – will knock that off and extend the new plaster to the original a little higher.up.
I found some rotten parquet at the bottom of this bit of this wall. I’m hoping the rest of the concrete floor in the ballroom wasn’t laid over parquet because that would be really annoying. But it is good to find out the main room was once finished in parquet like the snug.

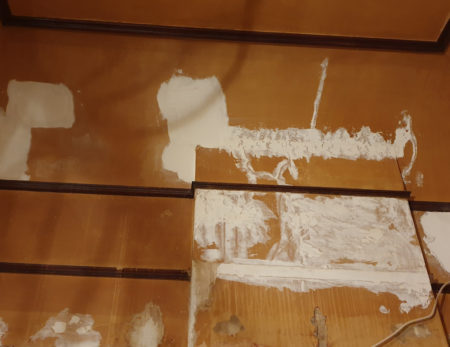
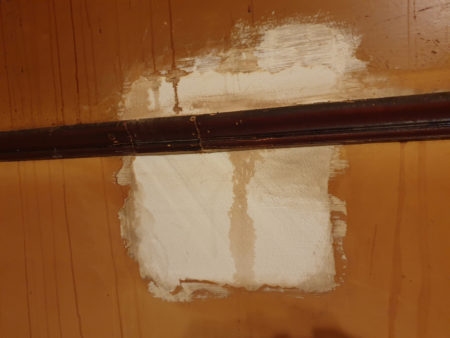
For the lath I’m using St Astier R50 Ultrafine lime plaster because I panic bought a few bags before lockdown. It’s a skimming plaster intended to go over plaster or paint or whatever is there. It is strong, sticky, and has a chemical set so it doesn’t crack. It’s not exactly the right stuff for base coats as it can’t be applied thickly with any neatness.
Most of the repair plaster repair is now close to the surface and just needs finishing. This one was a fiddle as the picture rail had been cut away. I spliced in a a bit of picture rail recovered from the chimney and the join isn’t noticeable from the ground.
I’ve decided to clean the ceiling using sugar soap before the final coat of plaster on the repairs. I had thought the paint was gloss, but it seems the gloss was just the muck on top.
Applying the soap with a sponge on the ceiling overhead and scrubbing was physically exhausting and the next day was a recovery day. I’ve been adjusting the process – spraying and soaking the surface, letting the sugar soap soak, then just wiping off to reduce the effort and that has sped things up.
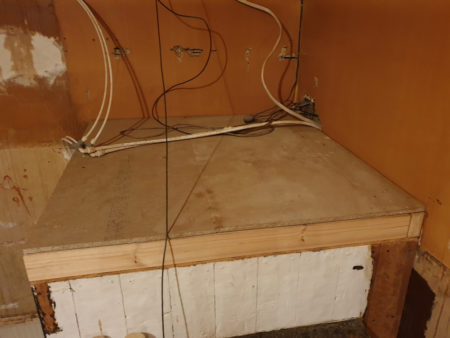
The entrance vestibule now has a roof. the ceiling of the vestibule was once part of the false ceiling. I cut the joists back but the ceiling is weak and the vestibule made the corner of the vaulted ceiling above inaccessible by scaffold tower.
I had imagined throwing a few loft boards on top would have been a minor job but it took a whole day. The odd shape was one thing but a lot of time was spent routing joints to make the most of what I had after I found my stock of loft board wasn’t all the same thickness.
The new roof provides a good platform for painting this corner of the ceiling.
There is not much plaster repair in this post because I find it really boring. It’s day after day. I’ve been building up repair plaster to just below surface level then doing the final skim with filler and using a great big drywall sander to get things level for paint.
It’s almost finished. I’ve tried a bit of paint over the repairs and the repairs are not noticeable. One day more and surely I’ll be able to at least paint the ceiling.