Category Archives: History

Last orders at the bar please

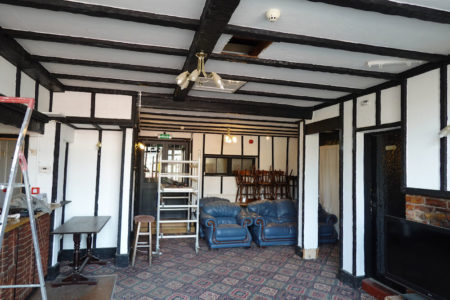
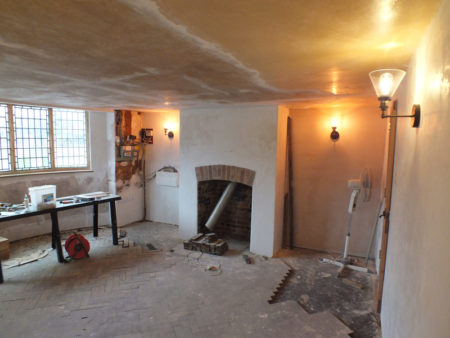
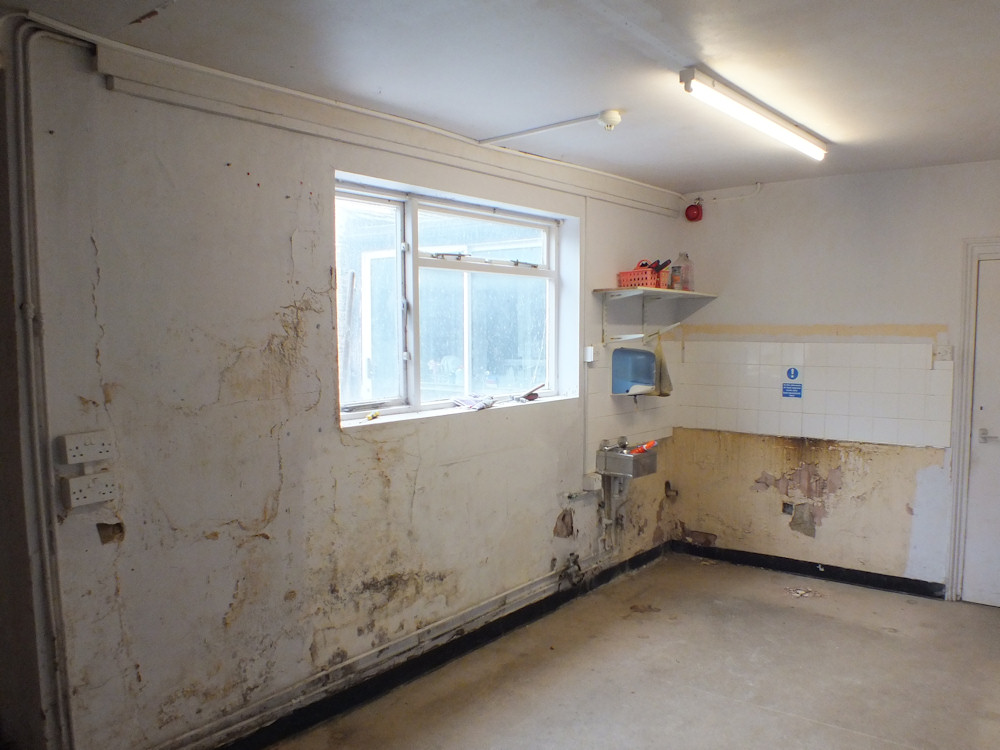
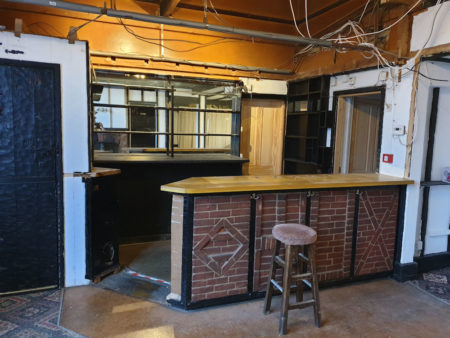
It’s raining outside so I decided to demolish the bar.    It’s a shame as a lot of effort and craftsmanship went into that, but it’s in the middle of my dance floor and the parquet arives next week.

The bar had split the room into two corridors leaving an awkward space for the living room.    I missed the opportunity for a selfie in the photo. Too late now.  You’ll have to imagine.

bar

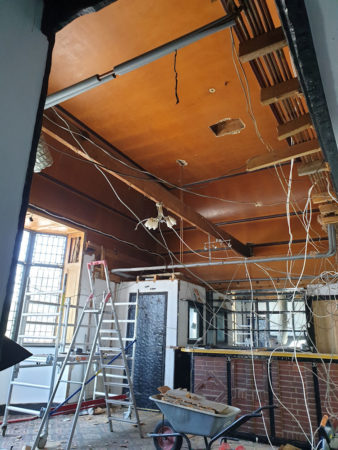
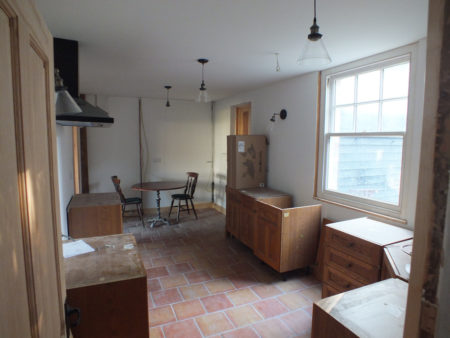
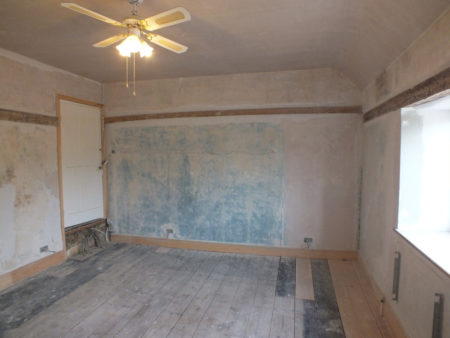
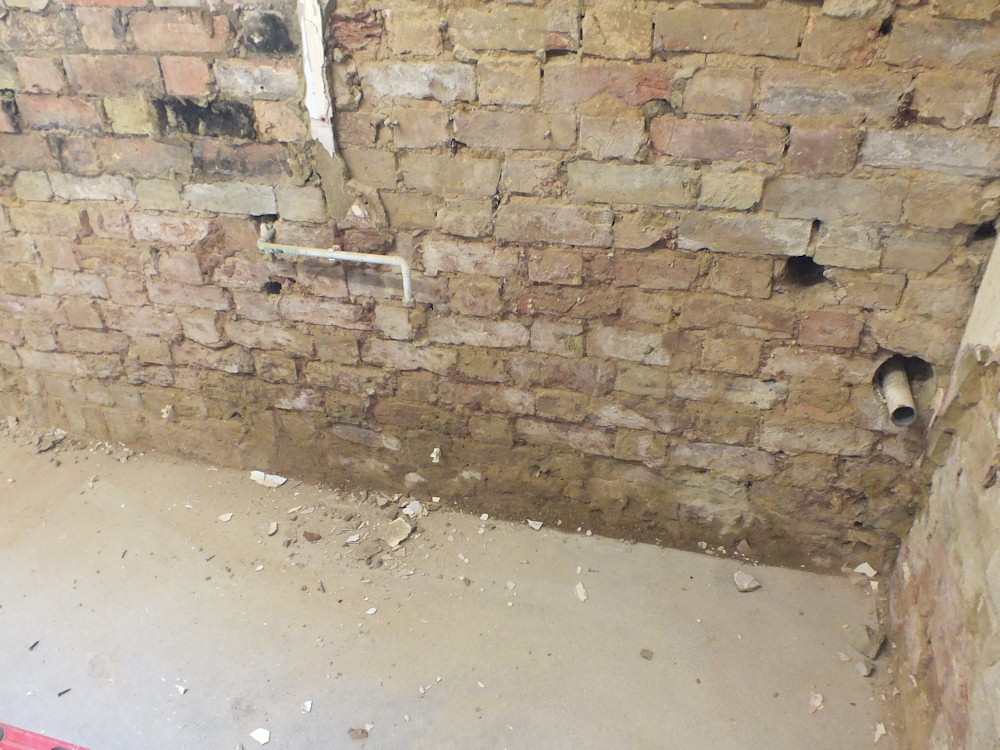
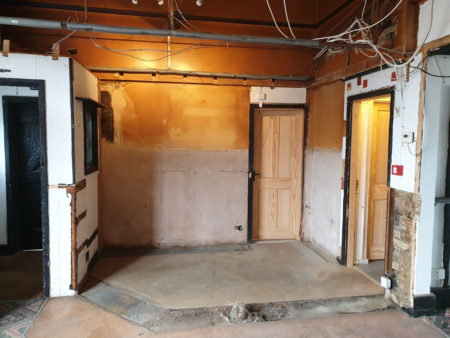
Removing the bar opened up and brightened the downstairs.   I found some history too.    On the right of the photo the brickwork at the end of the bar appears never to have been plastered, and the other walls have been replastered to the same level then just skimmed a little higher.  I think the room must have been wood panelled when it was built in 1920.

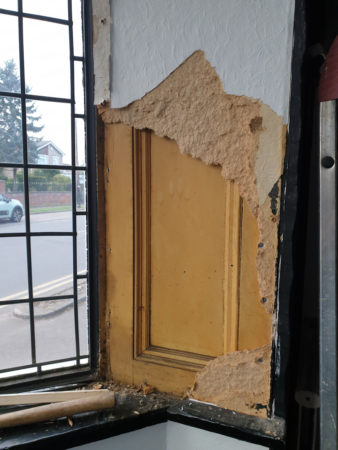
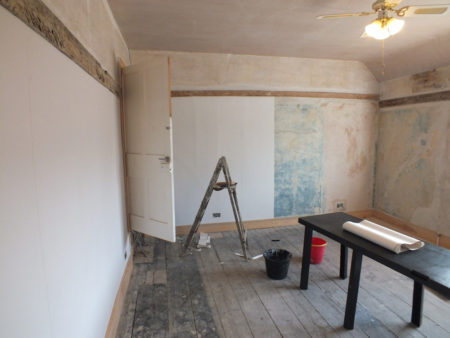
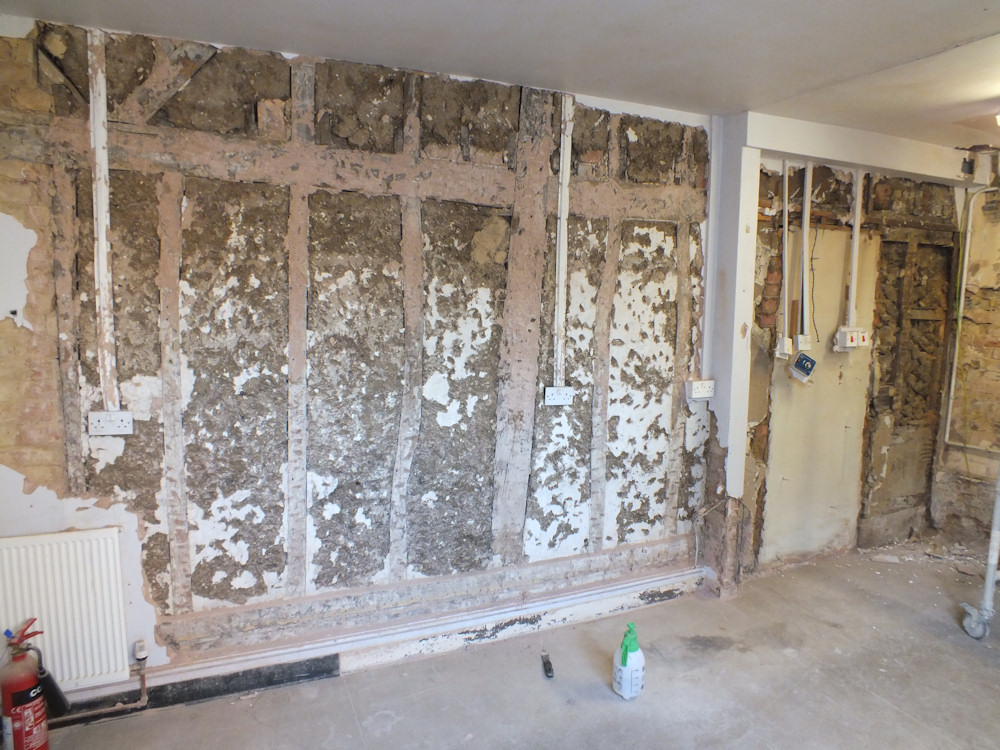
The dark blotch on the wall to the left indicates the location of the original entrance vestibule.  The wall also has outlines of the mouldings where they were painted around, so I have the shape of the original mouldings!   Also the colour of the original paint – a dark purple.   I had hoped to keep the current vestibule, but it is so tied in to the false ceiling I doubt it will survive the rest of the false ceiling removal.   I want to move the vestibule door to the other side too but plan to reuse the door as I think it is cool.

bar-removed

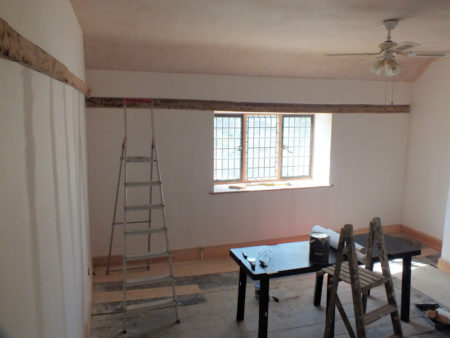
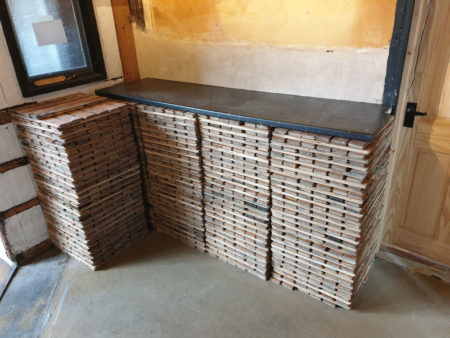
I very quickly missed the bar as it had been really useful for putting things on.   So I’ve built a new bar from solid oak bar using 52m2 of parquet flooring.   It took 3 hours just to stack the 1500 pieces so I imagine laying them might take even longer.   I was reluctant to use parquet after the 2 weeks it took to replace 6m2 in the snug, but it’s a ballroom now so it needs parquet.   I refuse to be outdone by The Palace of Versailles!

parquet-table

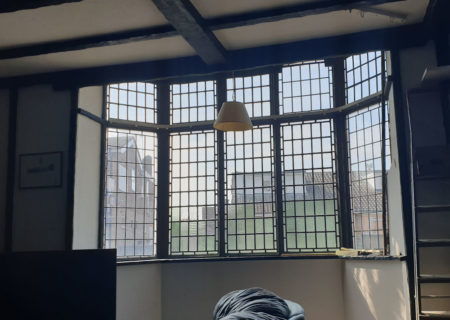
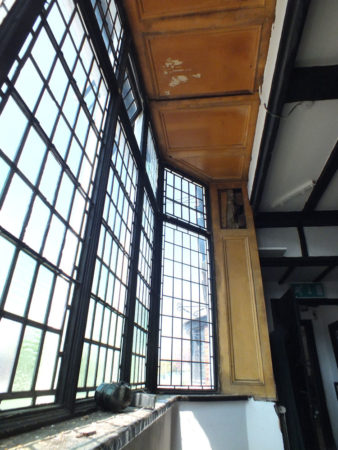
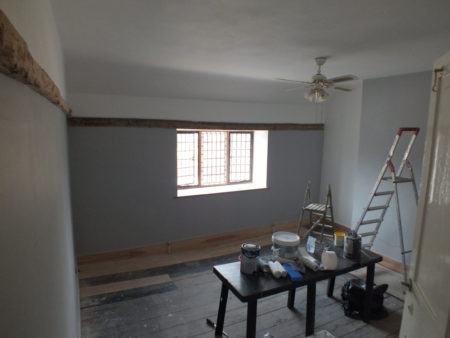
When it stops being rainy I’ll update the window painting post below.

Exposing the 1920s Ballroom Ceiling

I love mock tudor as much as the next person, but I think sometimes it can be taken a little too far.

mock-tudor

Above the ceiling in the foreground is a well preserved 1920s vaulted ceiling and I’ve been careful to avoid running any services in there just in case I wanted to expose it again.    Exposing the original 1920s ceiling (as well as finding a slightly different balance for the mock tudor) is my plan for the next couple of weeks.

I’ve realised it will be a super project to keep me sane during the lockdown.

laicey-legs

I’ve been unpicking the ceiling bit by bit.  It has been easy as the ceiling is nailed together and I have a crowbar and a big hammer.  With the boarding gone it is easy to see what is structural and in what order everything comes apart.

I had been a bit worried about the big beams which are made from 2 lengths of 6×2 pine nailed together so are quite heavy.    Chopping them in half then lowering them on rope worked really well and was safer than it looks in the photo!    Better to have no help as I wasn’t worrying about where anyone else was standing so could concentrate on me.

removing-beam

The main ceiling construction was nailed outwards at each end.    I found the most convenient method of removing the joists was cutting through one end with a reciprocating saw, then crowbar the joists from the central support.   Once those nails got to the end of their travel the joists started a slow and gentle fall to the gound with very little assistance and by the time they got to the ground they had extracted the nails at the other end by themselves.

Some bits will have to stay in place for now to support pipes and lighting.    Normally I have a tidy at the end of the day but removing the ceiling was exhausting so I’ll tidy tomorrow.

celing-removed

It is very dark in there now.    I think the ceiling was once white but hasn’t been painted since 1920.   Pub tobacco smoke has caused it to darken.   A huge chandelier or two will hopefully brighten it up a bit.

I’ve had a sweep up and will get on with something else until I can get plumbers and electricians around to let me finish the ceiling.   I’m turning my attention to considering what sort of floor would be nice in a ballroom.   Of course the first photos that popped up were the Palace of Versailles and that was good inspiration.   I’m thinking more parquet.

Uncovering panelling around the big bay window

I’ve been putting off doing anything with the bay window in the main room, mostly because it is very big and will take ages.  The other reason is I’m trying to avoid taking another room out of action until some others are more finished.  The room was double height from the 1920s to the late 1970s when a false ceiling and mock tudor was applied inside.

The void above the ceiling can be seen here:   http://www.the-salutation.co.uk/blog/domed-lath-ceiling/  You can probably see where I’m going with this and with modern insulation and a scaffold tower for decorating it will look spectacular.

big-bay

But I don’t want to start on the main room before I’ve finished some of the other rooms.   I just want to secondary glaze the window as it was really cold in there last winter.

I’ve started off having a peek behind some of the mock Tudor and look what I’ve found – 1920s panelling!   This is going to be fun.

panelling

A bit of destruction later and it turns out the panelling extends above the window too. It has survived in remarkably good condition.   A couple of panels have been removed for access in the past, but it should be possible to make new panels and mouldings and restore the panelling.

You can see the scale of the window when there is someone in front of it on a scaffold tower.    The whole room is oversized.

wood-panelling

A false ceiling was largely supported by a bit of wood bolted to the 17C timber frame.   The holes in the top of the panelling provided access for that and I can’t fit new panels until I remove the false ceiling.

The paint on the inside of the window was very thick and was getting in the way of my secondary glazing prototyping.   Removing the paint will take a couple of days, but the mouldings underneath are pretty.

paint-removal

See Further progress on the window.

Electrics Second Fix

Second fix electrics started today and is already more than half complete.   I’m excited to have lots of lights and switches and sockets in the kitchen now.   I forgot to buy bulbs!

After the lights went in I started fiddling around with kitchen layout again and moved the fridge for at least the third time.  I no longer need to incorporate an enormous American fridge freezer, so I have space for a table at the end if I can find somewhere else to put a normal fridge (represented by a cardboard box for now).   Mostly the lights are still in the right place.

kitchen-layout

The new consumer unit is fitted, and will eventually be inside a nice cupboard with a shelf above.   The old one will have to remain until the rest of the house is rewired and the hole in the ceiling above it will  make decoration tricky.   Fortunately I have a floor to finish before I need to worry too much about that.

fusebox

We haven’t had much history for a while!  I changed my mind about a couple of light locations and pulled the bedroom floorboards up again.    This is the floor above the very bendy ancient ceiling in the snug with inch thick straw plaster.    The floorboards are up to 9 inches wide, and the beams near the chimney are 7 inches square.

The huge beams have been re-purposed from somewhere and I guess they were installed when the chimney was built.  The wiring is passing through handy mortise holes so the beams are on their side now, but previously they must once have been the middle beam in a 2 storey wall.   My first best guess was the chimney was added somewhere around the year 1700 based on the thin wide bricks and English bond brickwork, but the joists further into the room are neatly sawn 1.5 inches by 6 inches which would have needed more technology than they had in 1700 so I need to do more research!

floor-beams

Some time later – the magic of electricity!   There is a light switch near every door, but I’m so used to having no lights I still stumble through the rooms in darkness.

I bought a bunch of random clearance LED bulbs really cheap from Screwfix and have been experimenting.  The light to the right is 2700K and the orange lights in the alcoves are 1800K.    I shall experiment some more once the room is decorated.

light-bulbs

Plaster Conservation (with Lining Paper)

The Bedroom is one of the older rooms in the house.   The blue colour is distemper on top of haired lime plaster on wattle and daub. The pink (a gypsum skim over lime) was applied by the people* who filled in the door opening to the right, raised the ceiling, then chopped a new door opening through the wall plate!

*I’ve been calling them Edwardians but it seems that Gypsum became popular only after WW1 when skilled plasterers were killed and a new generation took over.   The remodel was complete before 1926 and started after William Thomas became landlord in 1910.  I’m going to change my estimate to 1920.

I’ve exposed the beams (I think the wall plates were originally exposed or hidden by the ceiling.  The tie beam was originally above the ceiling).

bedroom-plaster

The original plaster was protected by wallpaper and is still in reasonable condition after several hundred years.  Originally lining paper was applied before paint, and it is is lovely to be able to take off layers and layers of paint and get back to nice smooth plaster using only a wallpaper stripper.

So I’m being nice to future restorers and covering the original plaster back up with lining paper before paint (using a cold water paste so the paper can come off again in the future).   It is my first time wallpapering and lining paper seems forgiving.   On the far wall the outline of the timber frame is quite visible through the paper.

lining-paper

It looks a lot better with the lining paper finished.   I went for maybe 0.5mm or 1mm gap between the sheets, then painted the joints, then used filler to hide the gap.    The paint allows the filler to be sanded a little and the joints in the paper aren’t noticeable after paint.

lining-finished

A bit of paint later and the room is closer to being finished.   Ceiling needs another coat and I might yet continue the wall paint past the beams towards the ceiling.

bedroom-paint

I did end up painting up to the ceiling above the beams.   Looks more balanced, but there is something very nice about bare wood against white walls.

Gable Unveiled

The new lime render on the gable has been protected from frost over the winter with hessian sheeting.  This is the first time I have been able to see it without the scaffolding.

The build phases of the house are clear from the gable.   The timber framed part was built first, then the chimney was added*, then the house was extended backwards in brick by Georgians and upwards by Edwardians, the lower part of the timber frame was replaced by brick in modern times, then finally I replaced the rest of the timber frame.

new-gable

It is quite bright and will take a little getting used to but I think it is an improvement on how it looked before.   It was a very ugly gable.

old-gable

It matches the front reasonably well but it seems a little out of place to have part of a very old building set in to a much more modern building.

front-gable-uncovered

*Positioning of unused mortices in the original gable timber frame indicate the chimney was added after the gable was built.  The chimney is constructed in English bond with a brick size of 225mm * 60mm and about 73mm course height indicating a late 17th century build date, but the building was operating as a pub in the early 17th century..  There is some evidence in floor joists of a wooden chimney (smoke hood) which would not have been common after the 16th century.

I have saved some wood for tree ring dating to hopefully establish a build date, though it is somewhat academic as the brick plinth under the gable is the only original material visible on the exterior of the house.

Stripping the Kitchen

The original kitchen is in a poor state.  The causes of damp included a badly leaking gutter, missing flashing, high external ground levels, a rotten window frame, leaky pipes, trouble with an external drain, and waterproof coatings inside and out.  I’ve fixed some of those things and the rest are on the to do list.

The modern short term thinking way to fix all of this damp is strip the plaster and replace with tanking plaster rather than fix the thing that caused the problem in the first place.  That is what had been done here and it was a pain to remove.

kitchen-plaster

Digging a trench to lower the ground levels outside worked a treat.  Unfortunately I didn’t go all the way to the end of the wall because there was a drain in the way.  I’ll need to lower the drain before doing much with the kitchen as the wall is still wet at the base around there.

damp-brick-wall

Fixing the damp patch won’t be straightforward.   The drains have been botched and will need to be done properly with an inspection chamber.  As usual I’ve started off by digging a hole for myself.

excavation

The internal wall of the kitchen is the external wall of the original building probably dating from the 17th century.  It is still there and remarkably well preserved with the wattle and daub and even a convenient door opening that someone, probably a Georgian judging by the decoration, hacked through.

Domed Lath Ceiling

I’ve been insulating again, this time in the crawl space in front of the attic.   I haven’t been enjoying it so it has taken a very long time while I have found lots of ways to avoid doing it.

The attic is supported by 8 inch joists below which hangs a domed ceiling with lath nailed on to wooden supports with a curve cut into them. It’s not often you see a domed ceiling from above so here is a photo..

domed-lath-ceiling

The attic and domed ceiling were constructed in 1910.  The room that was there before is still there in parts with a wide bricked up doorway and Victorian looking wall paper. I’m not sure what the layout was before 1910, but the extent of wallpaper suggests this area might once have been a corridor.

bricked-up-door

The ceiling underneath has been vandalised by plumbers and electricians over the years but is remarkably intact with it’s original wood mouldings.   A false ceiling was added below, probably in the 1950s or early 1960s.

void

I had been wondering why the false ceiling was added.  It would have been a pain to redecorate without a scaffold tower, but it turns out the thermal design was terrible with a huge area of lath and plaster forming the only thermal barrier between inside and outside.  It must have been a bit chilly in there.

I have a scaffold tower and have added insulation up to 1m thick in places which should hopefully sort out the thermal issues.  I think a domed double height ceiling would be nice.

Timber Frame Rot

The Salutation has the impression of a smaller building in the north gable.   There are probably parts of the original timber framed building probably dating from around 1650, though it turns out very little of the current frame is in the same place as it was first assembled.

It has been hidden by render since before cameras were invented so we don’t have any photos to show what it was like.

north-wall-render

I had been tidying up the edges but tidied a bit too much and knocked some of the render off.   Underneath a lot of brown dust came out revealing wood in very poor condition.   A little more knocking and some of the original frame was exposed complete with wattle and daub infill panels on the first floor. (The frame has brick infill above and has been completely replaced with bricks on the ground floor).

Thee timber frame passes right through the chimney.  I think the frame was modified to accept a chimney which was added later.  Structurally it seems a poor idea to hold the chimney up with beetle infested wood.

initial-explore-timber-frame

In for a penny, in for a pound.   It isn’t the neatest frame in the world and would probably never have been exposed.   The wattle and daub infill is flush with the frame and there is no sign of whitewash so it was probably rendered from new.

The earliest layer of render we found was lime on lath, but the Edwardians appear to have added a layer of cement render which prevented the wood from drying, then more recent muppets added waterproof paint.

timber-frame

I haven’t uncovered the whole of the top of the frame yet as the render appears to be performing a structural role.  The other side of the frame can be seen in the attic photos.

top-frame-stripped

The whole frame is completely rotten (apart from a single post and the beam above the first floor which are merely half rotten).   The frame has been soaking wet for a very long time and a screwdriver can easily be poked all the way through any of the timbers.  The wattle has rotten away completely and the infill panels are loose.  There is very little that can be saved.

rot

The frame has little structural importance as the rest of the house seems to have already learned not to rely upon it.   This is going to be one of those tricky decisions, and possibly an opportunity to tidy up the north wall which has long been very ugly.

Further examination of the frame reveals there is nothing left.  Even the solid looking timbers bend remarkably easily and can be poked away with a screwdriver.  Concrete block and render would be the quickest way to sort it, but I’m toying with the idea of dramatic reconstruction with the timber exposed.

failed-joint

Archaeology in the Attic

The roofers have stripped the front of the roof so there is plenty of light in the roof space for photos.   I’ve being trying to date different parts of the building.

You can see the evolution of the building from inside the attic.  To the left on both sides of the chimney is the top of the gable end timber frame of what we assume is the original building first noted in 1646.  I think 1640s would be the Jacobean period, the one just before Cromwell.  The wood is tree shape rather than cut like modern wood and has since been in filled with brick.

arric-end-wall

To the right of the timber frame the lower, darker bricks are from the original low roof extension, and the upper bricks and purlin support were built in 1910 when the roof was raised to it’s current height.

Here is a blurry photo from the 1950s.  You can see the form of the original building to the right of the gable, and the change in brick shade between the two extensions.   You can also see a chimney to the rear of the house which isn’t there any more.  There is still evidence of the chimney removal in the roof timbers.

The chimney closest to the photo looks slightly ghosted above the roof line.  That’s not a photographic effect – the top of the chimney had been rebuilt with slightly lighter bricks.

1950s-north-gable

The ceiling joists are interesting.   With their ends sitting on the spine wall, the joists to the bottom of the photo are nice Edwardian ones that you can stand on.  The ones to the top of the photo are made from bits of tree again and are part of the early low roof extension.

I had assumed the extension was built somewhere between 1800 and 1850.  The timbers suggest the cost saving was not only in the lack of foundations, but combined with the thin glazing bars on the last original sash window I’m now guessing the extension is closer to 1800 which makes it Georgian!  Makes sense as the later Victorians were better at building.

ceiling-joists

The front of the house (Edwardian) has a structural timber frame with brick infill.  The bricks are hand made and what I had assumed was grey cement mortar turns out to be lime covered in loft dust. I think the render outside might be lime, but it is coated in waterproof paint which can’t be removed without damaging the render.

brick-infill-front-wall

I’m learning that I’m not very good at dating buildings, but it is fun to see the different phases.  Dating is made easier by the almost complete rebuild in 1910.  Anything done to a decent standard is Edwardian.  The shonky stuff in lime is earlier, and the shonky stuff in cement is later.

View From Church

Colin from blunham.com sent photos of the Salutation taken from the church tower.   This time I’ve overlayed the photos and cropped them to the same size.   They show how the house was extended sideways and upwards in around 1910 and a previous pitched roof extension in the foreground removed.  Also they show a flat roof toilet block assumed to date from the 1960s.

The first is a coloured postcard dated circa 1900.church-1900

The second photo was taken by Colin in 1987.
church-1987

The gable was painted (in magnolia!) after 1987.   I had assumed the wall on the flat roof area looked ugly because they used inappropriate materials.  A closer look suggests they made a lot of effort to use hand made bricks and to match the gable.  The wall only looks ugly now because the gable was painted later emphasising the flat roof extension.

The wall in front of the flat roof extension has a bend in it directly below the window.  The bricks to the left are a different colour.   I’ve not figured out yet whether the bricks are part of the extension visible in the first photo, or if they are part of the garden wall that may have replaced it.

An Edwardian Facade

Colin from blunham.com hosted a photo evening at the village hall a few weeks ago.   He has collected a huge number of old photos of Blunham, some of which you can see on his past and present page.   There were many photos of the Salutation that I hadn’t seen before and Colin has sent them to me.  Many many thanks!

The Salutation is (or mostly was) a very old building.   The first landlord occupied the place in 1646 according to Bill Exley’s research and the local council records. It appears to have started off as a timber framed building with 2 rooms upstairs and 2 rooms downstairs. It was extensively rebuilt, mostly by Victorians and Edwardians between 1850 and 1910, and now the only structure that might be original is in the left side of the house furthest from the church.  Another original beam might have migrated to the later barn – there is a weird 17th or 18th century beam failing to support the 19th century barn roof.

By “circa 1906” the building had already been much modified.  It had been extended backwards and a single story pitched roof extension added to the end closest to the church. The windows are lower closest to the church because the Victorians (presumably) added an attic room in on that side.

1906

Here is a new (to me) photo that was probably taken shortly after 1910.   The building has been extended upwards and towards the church, the previous extension removed, and the “tudor revival” front added outside the original structure.  The Horseshoes pub has the same curtains in both photos, and other buildings haven’t changed much.

1910

By the ‘1950s’ the shop had been rebuilt and all the houses on the other side of the road demolished.  A flat roof toilet block had been added on the church side of the Salutation.  Here is a similar view in 2014 when a house is being built next door.   I’ve added a date to help future historians.

march-2014

I had assumed the current façade was built in around 1925 as the council note that “In 1927 the place was valued under the 1925 Rating Valuation Act – the valuer noted that it had a low rent because house was rebuilt when Tenant was in”.  Cross referencing with Colin’s page the tenant was “Wm. Thom. Davey” who was there between 1910 and 1933.

My current guess was the previous tenant moved out prior to the rebuilding work, and the new tenant was invited when the work was close to completion.  That would date the current facade to 1909 or 1910.

But what did the new front like when it was build?  Another photo from 1951 shows the concrete roughcast render that is in place today, but still unpainted in the photo.  Also there is the cricket club in drag and looking brilliant!

cricket-club

It seems the Edwardians invented the concrete render that has caused damage to so many timber framed buildings.  They had a few problems with damp and cracking, but by the time they splattered the Salutation they seem to have figured it out.

Apart from all the paint the Salutation has a remarkably original Edwardian facade that is well worth preserving.   I quite like it so future generations ought still to benefit from a slightly ugly but almost completely original Edwardian frontage.

Edit from later – the facade was added and a major rebuild happened 1920 to 1921.   They used gypsum plaster on lime which was a post WW1 thing, and the electricity meter had meter reading cards behind it starting in 1921.

The Void

On the plus side an architect visited today and we got on well. He reckons the design, planning and approval process is likely to take 6 months. The main thing I want to do is make the void into a room. The void was formerly a double height ceiling to the front room with the tall bay window. The double height room was created in the 1920s when the mock tudor frontage was added and the upstairs room was removed. It was blocked off with a false ceiling at a later date. The only access is through a small hatch in the downstairs ceiling.

It is almost possible to stand up in the void and it takes up about a third of the upstairs space. It would be much more sensible as bedroom and bathroom but the floor would need to be lowered slightly and the ceiling raised, and a window or two added to the front. The architect has suggested I arrange a meeting with the conservation officer before we go too far.

void

Fast forward 7 years…….   Removing the false ceiling and getting a ballroom

Old Wood Beam

The water damage in the upstairs front room had caused some plaster to fall off the wall. Behind the plaster there was a suspiciously old piece of wood. That part of the house dates from approximately 1650 and would have been built originally with a wood frame and mud. The mud was replaced with brick but there is evidence in the roof space that some of the wood frame survives. This bit appears to be in good condition but some other bits are a bit suspect. I’ll expose what I can to check on condition.

old-beam

5 years later I exposed the beams