Category Archives: Ballroom

Photos before and after decoration

The wall and ceiling decoration is finished in the ballroom. Here’s a before photo looking from the ballroom into the secondary room after the false ceiling was removed. (Here’s an even more before photo).

And the after photo. See – I have been doing something. Both of the wooden strips in the ceiling are picture rails which will open up some more decoration opportunities.

There is still plenty to do. The cubby in the middle of the photo above will get cupboard doors. Architrave, skirting and plumbing have to wait until the floor is finished.

In the other direction the window and vestibule aren’t quite finished. But it’s good enough so I’m going to try to get the snug finished before hopefully laying the ballroom floor over winter.

Finishing the decoration downstairs

The first fix electrics are done and the channels filled in ready for paint. I want to paint the walls before fitting the switches and sockets and there’s not so much more tidying to do before I can paint.

I’ve been putting off the ceiling. It is in lime on lath with lining paper which is the perfect way to do it. Unfortunately it has gloss paint and textured paint on top and is waterproof so I can’t remove the lining paper to get back to the lime.

A fair bit of the lining paper fell off after the burst pipe. The rest just won’t budge. The missing plaster in the corner was missing the lath so a deliberate hole for some reason. I’ve put some lath back in.

I’m doing a bodge and skimming over everything. I’m using Ecomortar R50 lime mortar which sticks well to stuff lime doesn’t normally stick to. I think it will work fine.

I don’t plaster often enough to remember how to do it. I got the mix just right – firm but sticky. I forgot the timing and did the finishing too late but it worked out OK with a bit of water spraying. Now I’m getting the hang of it the remaining ceiling should be done in a couple of days with a rest in the middle for sore arms.

While resting I’ve been fussing about the wall with the arch. It is side lit by the window so you can see the crookedness. I’ve figured out what it is for. It’s not a chimney as it’s under some stairs built at the same time.

It was originally part of a lean-to and there were bull-nose bricks on the base. I think those were to make it easier to push barrels on top and this was where the beer was dispensed. This area was the bar after 1920 and I suspect the lean-to was open to the main room and acted as the bar before 1920.

The ceiling plaster is finished and I’ve started painting the woodwork. It took all day to re-paint the mock tudor ceiling beams. 50m of edges done at a snail’s pace.

The linseed paint should dry to a satin matt finish but it will take many days to dry. By then I should be ready to paint everything else.

Most things now have the first coat of paint. I’ve plastered the ceiling in the cubby under the stairs and the last thing is the entrance vestibule.

Outside was easy – scraping off any loose paint and sanding the edges smooth seems to be working. Inside the thick textured paint has shrunk and cracked. I’ve found I can get the walls smooth with a paint scraper and am planning to paper over the cracks with lining paper. But I’ll do that when I decorate the snug where I will be using use lining paper to protect the lime from inappropriate paints.

With that I’m done posting about decorating. I’m sure to do a before and after once I’ve finished.

More paint on the ballroom walls

The downstairs has been looking dreary in bare plaster with lots of patching for nearly 3 years. After 3 days of filling most of it now has the first coat of paint. It’ll get the second coat done once the electrics are finished.

I’m using Earthborn clay paint because it’s breathable. It’s also expensive but should cover the walls in 2 coats which will save a lot of time. I’ve not finished yet as I ran out of paint but already the room is transformed.

I have no idea what the cubby with the overhanging roof was for. With the addition of a little woodwork and a door it will become a handy place for vacuum cleaners and wifi.

The wall with the arch is side lit and all the bumps show up. It’ll need more work.

I did a bit of plastering on the bay window too. The plaster at the edges under the window didn’t align with the surface of the wood panelling. Now it does.

I want to bring the architrave down to the skirting to tie in the wooden panelling with the lack of panelling beneath and make the huge window opening look more grand.

Rising Damp

Rising damp is a problem that only started in the 1970s when it became popular to waterproof walls with cement and modern waterproof paints. Rising damp wasn’t a problem when breathable walls and coatings were the norm.

When high exterior ground levels and impermeable materials outside made water come up your wall the accepted solution was to remove the plaster and tank the inside of the wall with cement and waterproof plaster. That can never work as it doesn’t fix the water problem.

My ground floor was built on two levels. I dug a hole in the higher level floor behind the wall and the soil was not wet. There is only a small amount of water to deal with. The problem is the cement and gypsum plaster (and the waterproof paints) inside don’t allow that water to get out.

I’m planning to fix the damp problem by removing the cement and gypsum from the bottom of the wall and replace them with lime. Exactly the opposite of tanking. I’ve chipped away the cement to the point where the steel mesh hasn’t rusted away.

I never seem to get anything done on the house in the winter so I’m getting on with it again the following March. I’ve used a lime render for the base coat made from sharp sand mixed with plastering sand which comes to about 6mm below the finished surface.

I’m using St Astier Ecomortar R50 for the top coat of plaster as it can be used on top of concrete and gypsum plaster.

There is still a little filler needed especially where the lime plaster meets the existing plaster. The sand size in the lime plaster makes it difficult to get a smooth transition.

I ended up going halfway around the room. This is my cubby under the stairs which was once part of a lean-to and was presumably somewhere to put a couple of beer barrels.

I’m surprised how well the rounded corners turned out. An advantage of lime plaster is it can be worked when it’s nearly dry which makes this sort of thing easier.

I think I’ve figured out where the water was coming from. There is an inspection chamber that used to back up due to tree roots blocking the foul drain. I fixed that and things have been good for a few years. I’m suspecting the tree has found another way in.

On the plus side I found that shellac is good for blocking stains from the plaster that had been damp but shouldn’t be damp any more as any water can get out of the new lime plaster.

Ballroom floor trial dig

I bought a lot of parquet for the ballroom floor and it’s been piled up in a corner for a couple of years.

The problem (other than too many other lockdown projects) was the floor concrete level which needs to be one parquet lower than it currently is. There was once parquet similar to the snug as evidenced by the remaining bits around the edge (the triangular bit in the photo) they concreted over in the 1970s.

I had been putting the job off because I thought I would have to replace the entire floor. But a trial dig suggests the base of the new concrete is much weaker than I imagined and the old concrete below seems quite strong. That makes the job much easier – I should be able to knock off the new stuff and get back to the old base.

I’ve been a bit slow getting into things on the house this year. I’ve spent time in the spring fitting a new chassis to my elderly van. Then I’m busy testing aeroplanes all summer. Autumn isn’t busy yet so maybe something will still happen on the house later in the year.

There is no scaffold tower in my ballroom

Sounds like a Swedish English translation but it is really true! The tower that has been there for the last year has been tidied away. I have a very welcome 3 month contract so progress is going to slow again. I’m having a tidy inside and outside and finding long lost tools.

Wiring isn’t done yet. I’ve given up trying to find an electrician. Job is awkward and they have plenty of non-awkward work they can do instead. Electrics will be down to me.

Christmas lights are still up. I’ll need a scaffold tower to take them down. 🙂

Painting the ballroom walls

Plaster repairs, filler, and prep for painting all take ages.  It was beginning to feel a bit overwhelming working day after day without any obvious progress.

So I’ve put the first coat of paint on the walls that are ready so far.    That feels better.

Plastering the ballroom walls

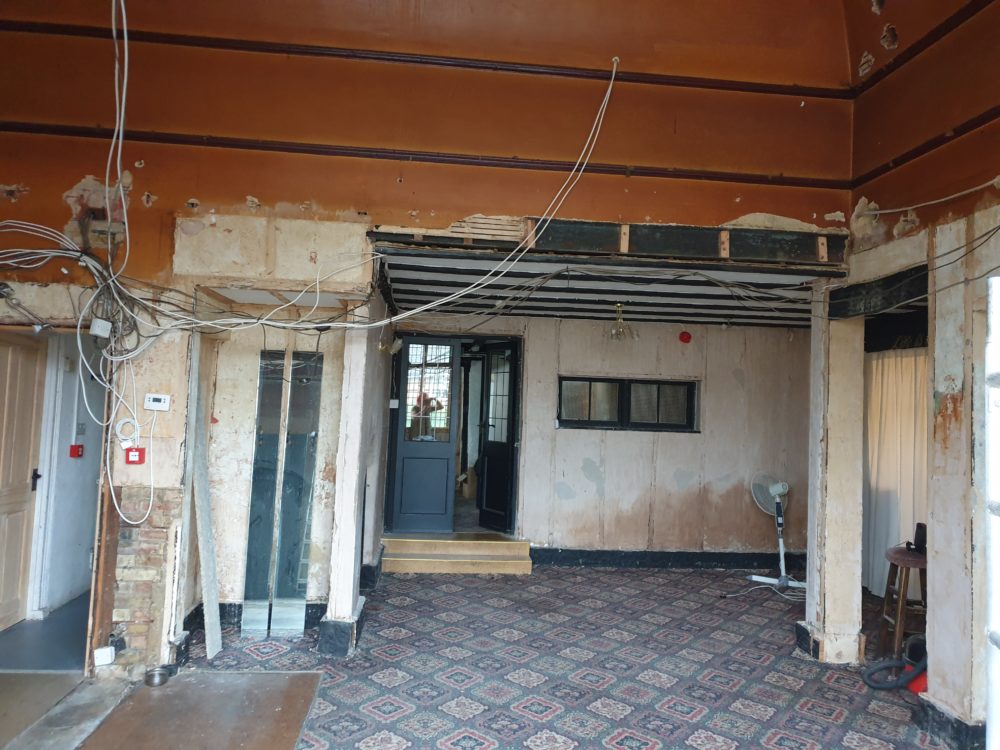
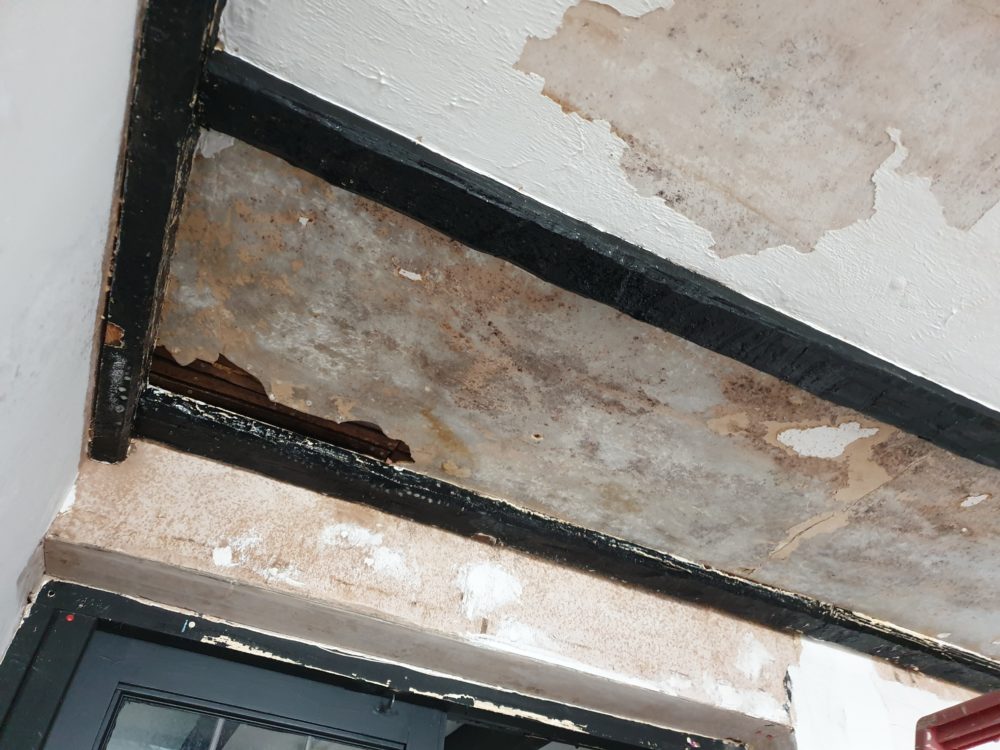
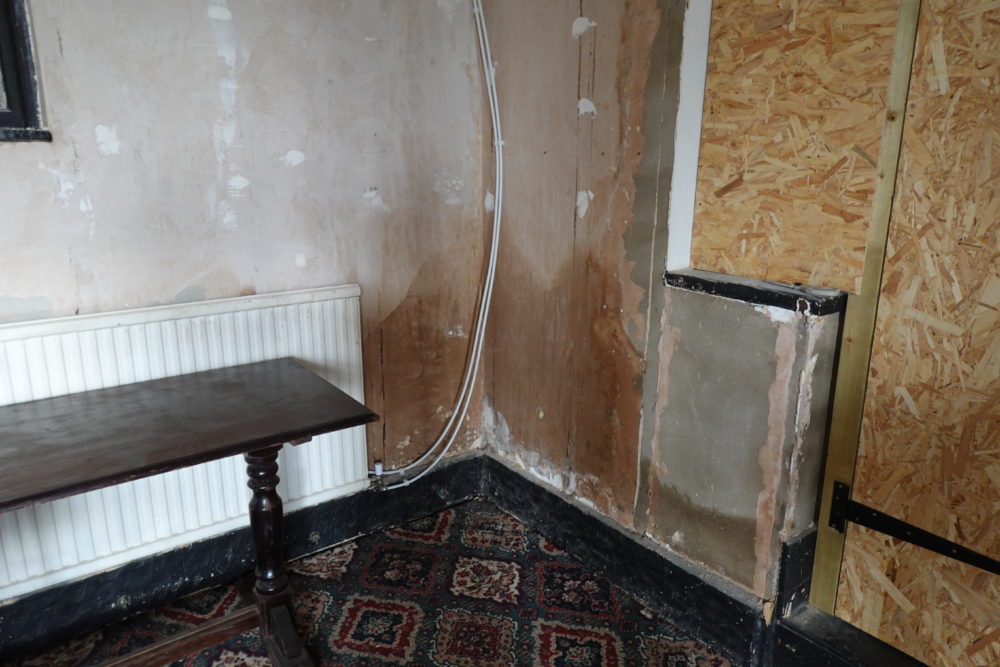
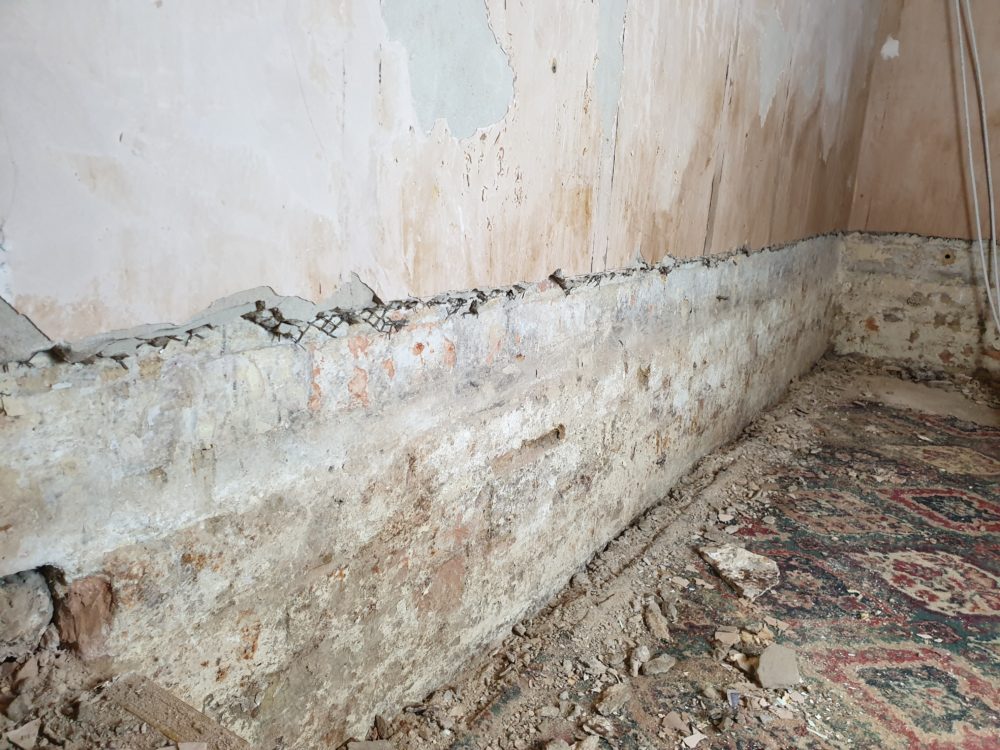
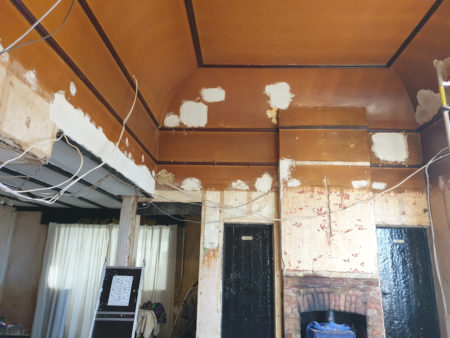
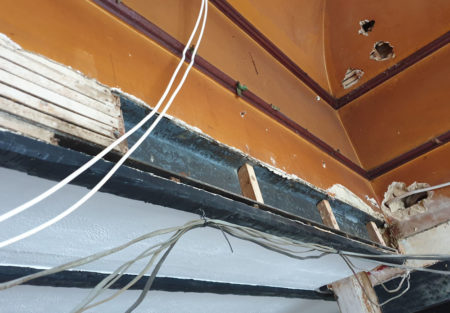
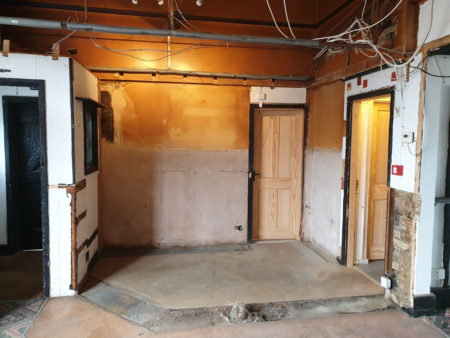
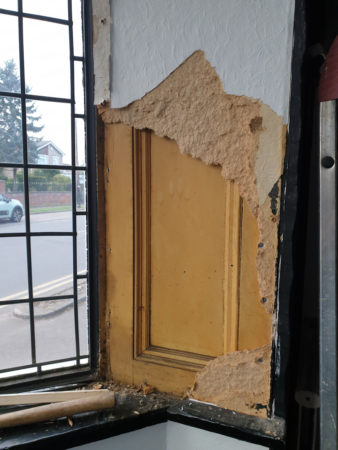
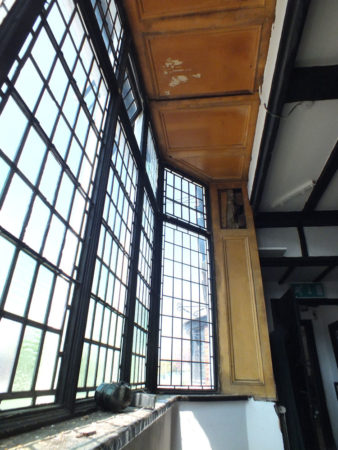
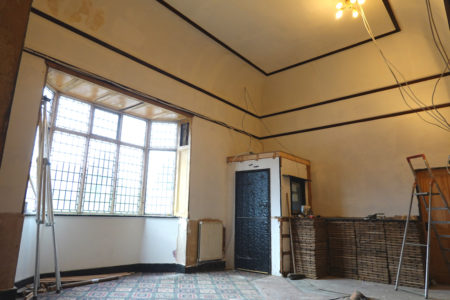
The walls are not in perfect condition.   They were thoroughly mock tudored in the 1970s and removing the mock tudor resulted in a lot of damage.    The lower 5 feet were wood panelled in the 1920s then plastered in the 1970s.   The next few feet have textured paint, then the parts that were above the false ceiling have been knocked around by electricians and plumbers.

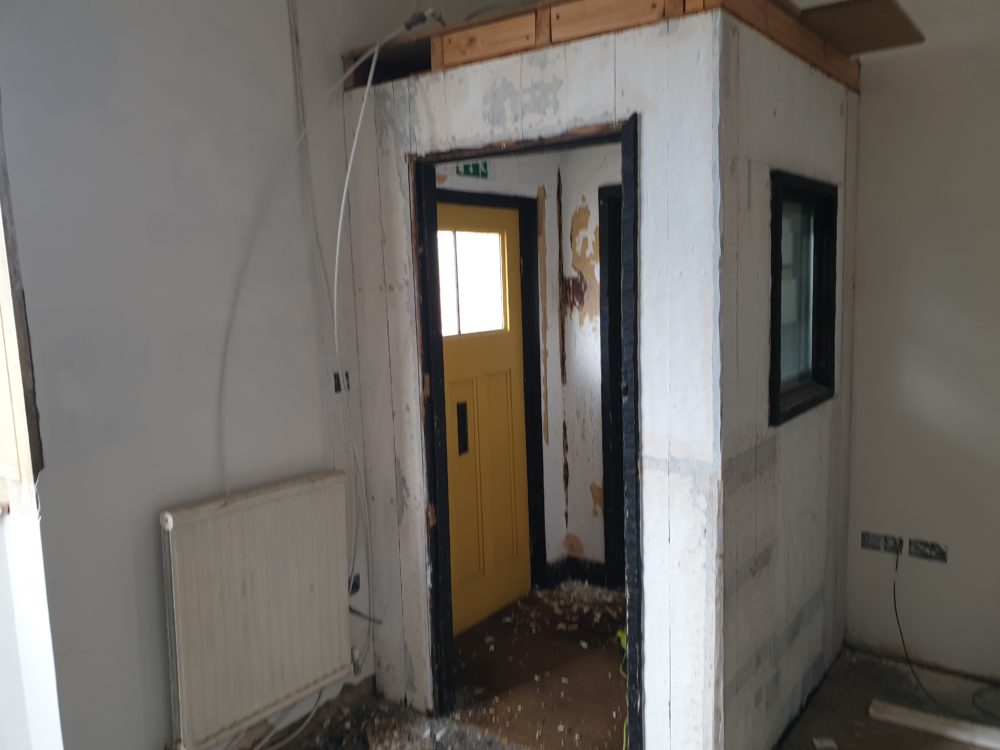
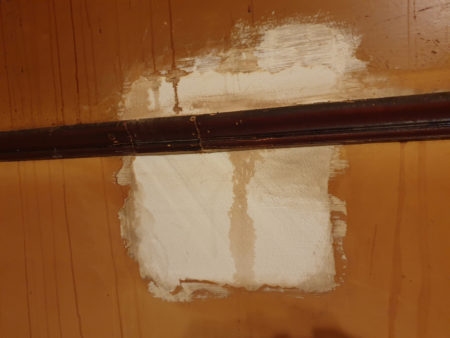
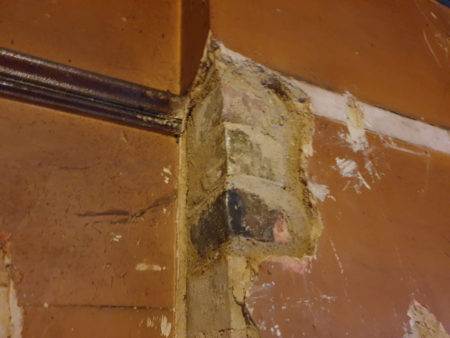
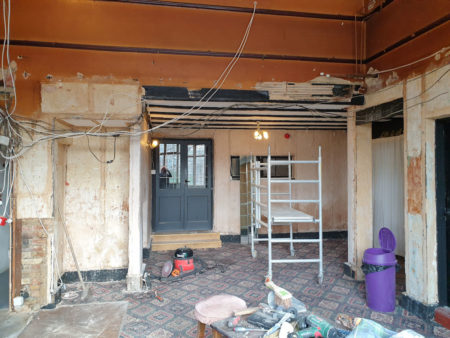
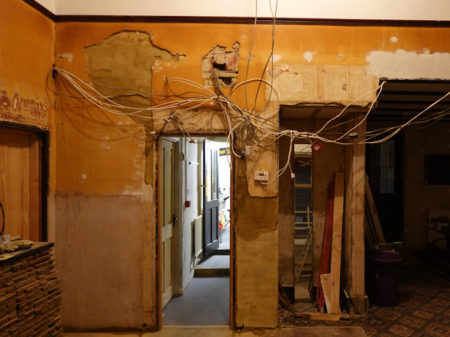
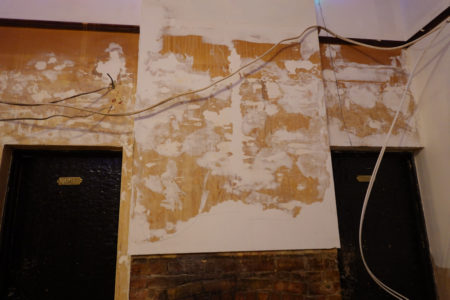
In the photo above the left of the doorway and to the right of the doorway is some basecoat plaster I’ve applied directly on brick.  It will need a second coat to get a couple of millimetres shy of surface level when I’ll switch to the lime repair plaster.

The brick was really thirsty having been inside for 100 years.  I could hold the sprayer in the same spot for some time and the water would be sucked in rather than run off.  It’s best to pre-dampen bricks so the water isn’t sucked out from the new plaster before it makes it’s bond.

base-coat

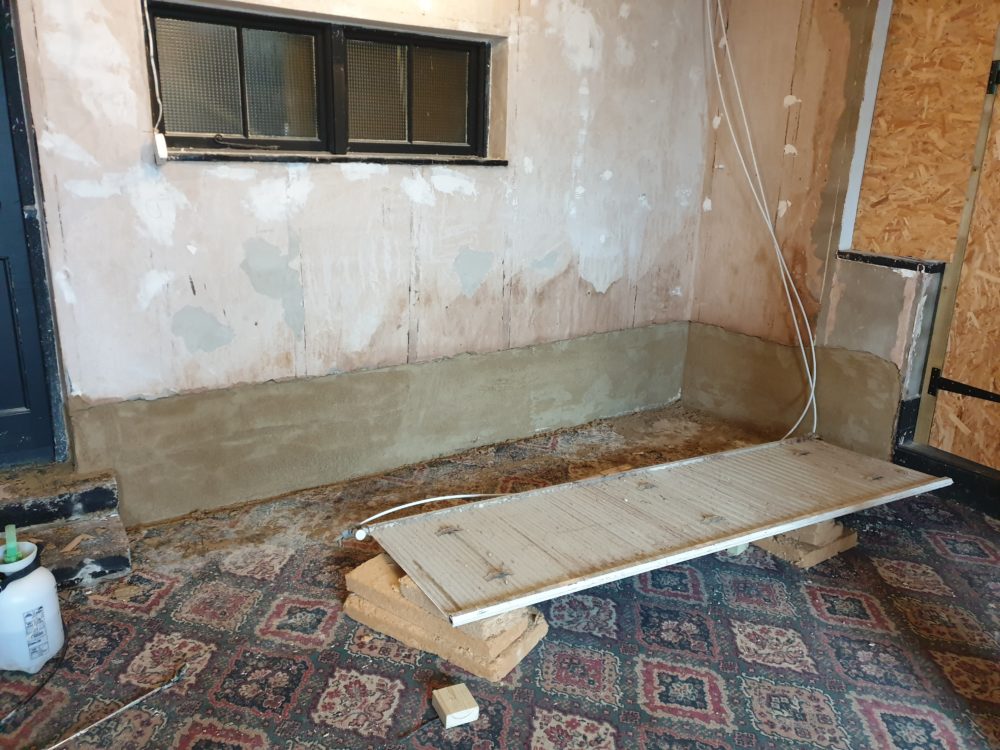
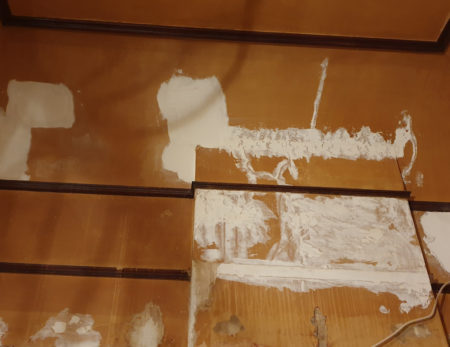
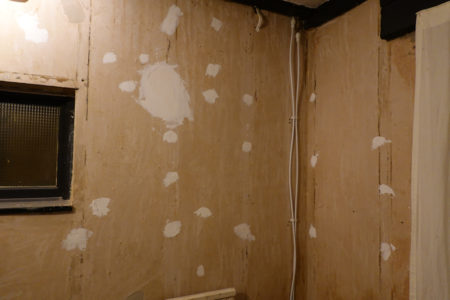
The other side of the room is a little further along.   The larger holes have been repaired using the repair plaster.  I shape the plaster using a steel rule which gets the level just below the surface.   The final coat is a filler which has the advantage of being sandable.

The original plaster on those walls is still reasonable smooth and straight so there is a chance I’ll get away with filling the many holes people have made and then then just paint over.   At worst I’ll need to use lining paper.   I don’t think I’ll need to skim

filling-walls

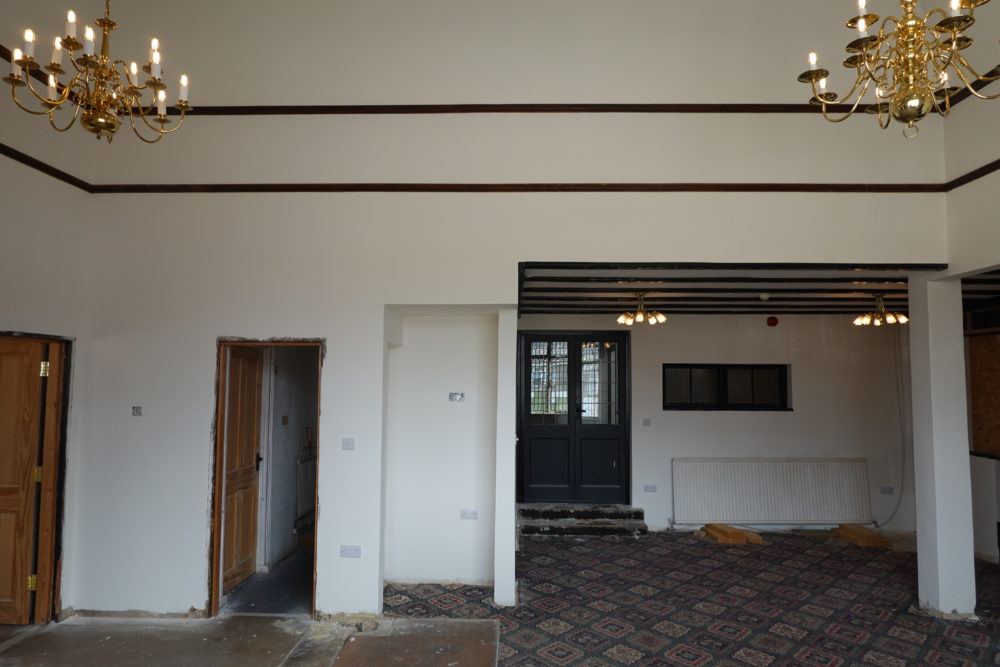
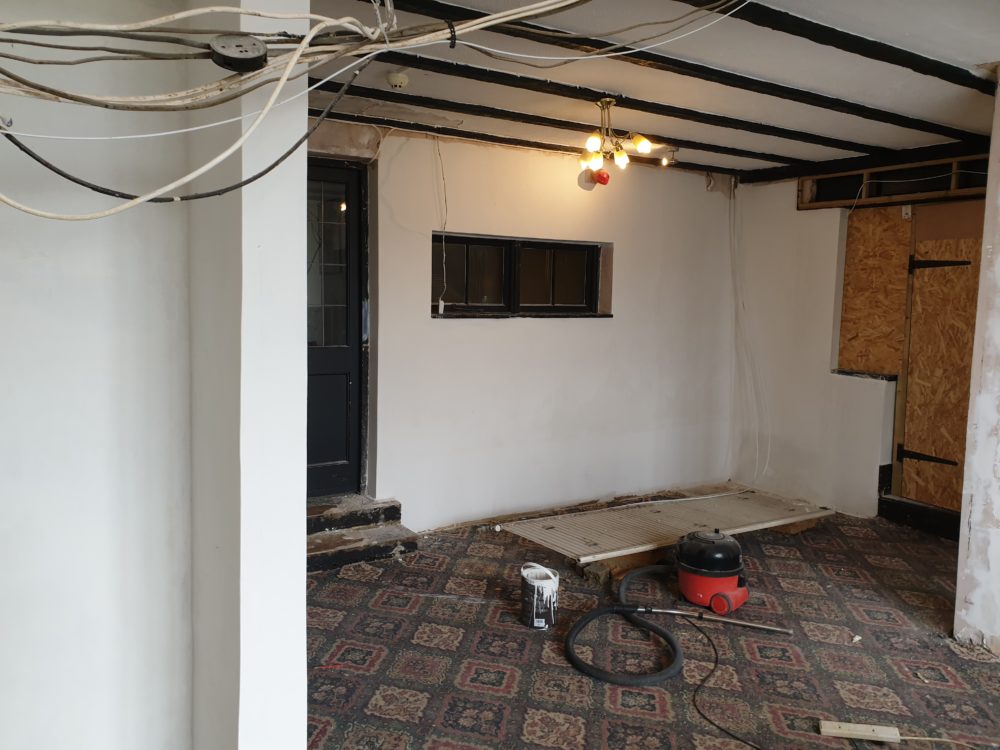
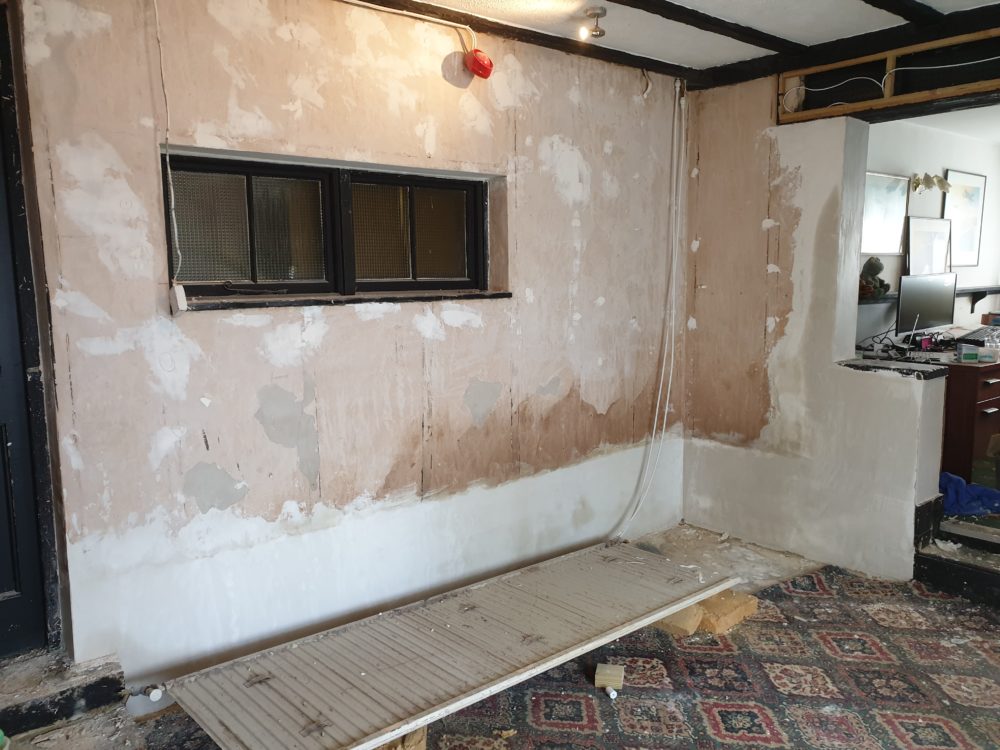
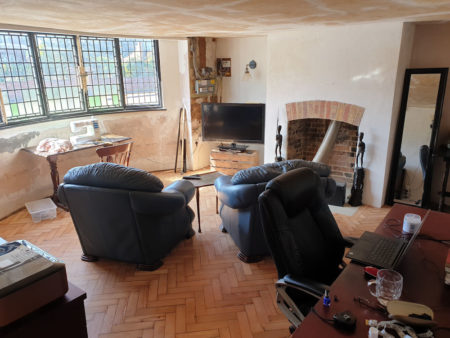
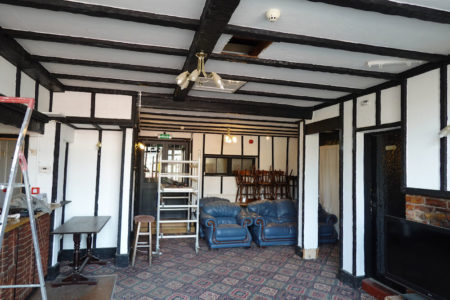
The dining area was re-plastered in the 1970s and has accumulated fewer holes – mostly just where the mock tudor was nailed on.   I’ve found filling to just above the plaster level then a quick once over with a drywall sander is a really quick way to make the walls perfect.

filler-spots

I finished filling a couple of walls and put the first coat of paint on to see how it would look.   The repairs aren’t noticeable and the walls look flat.

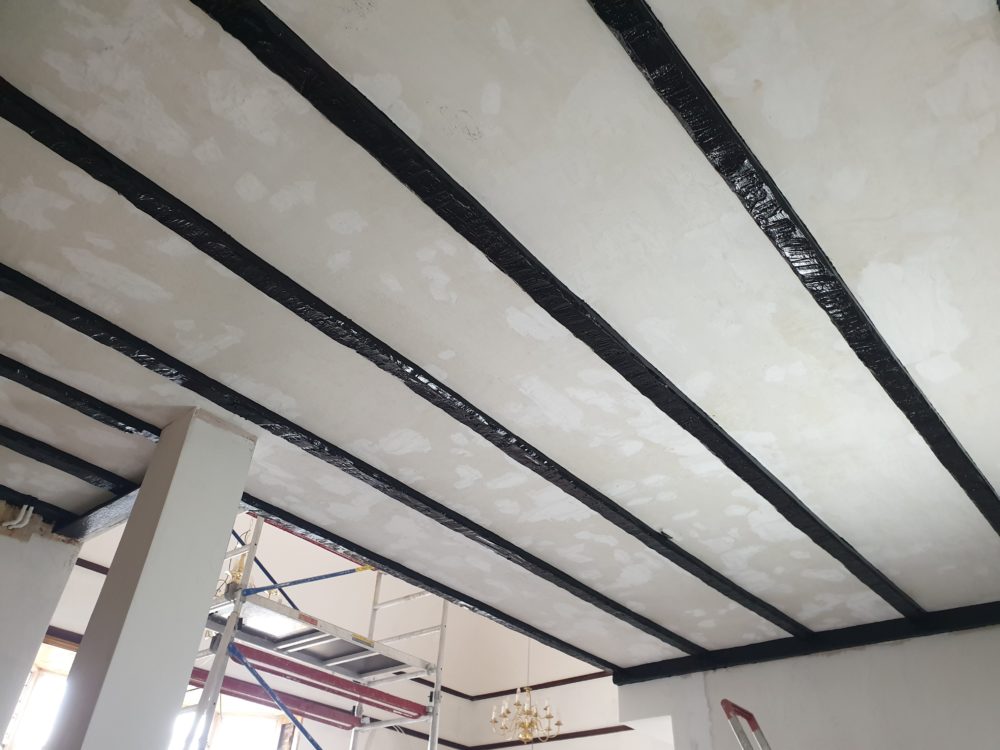
I felt it took a long time to prepare the walls,  but it was only 5 days ago that I painted the ceiling.  I think it’s just boring, and a couple of weeks plugging on with it should have all the walls finished.

walls-painted

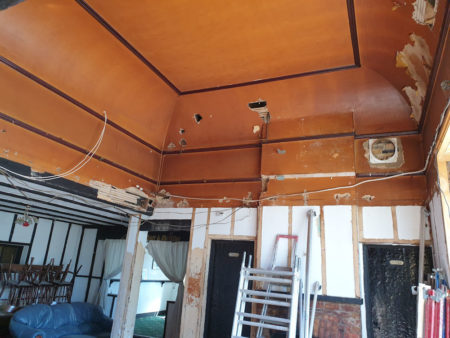
Not everything is finished.   The textured paint came off with some effort with a paint scraper after softening using Zinsser BIN wallpaper stripper.  The resulting surface looks worse than it it.

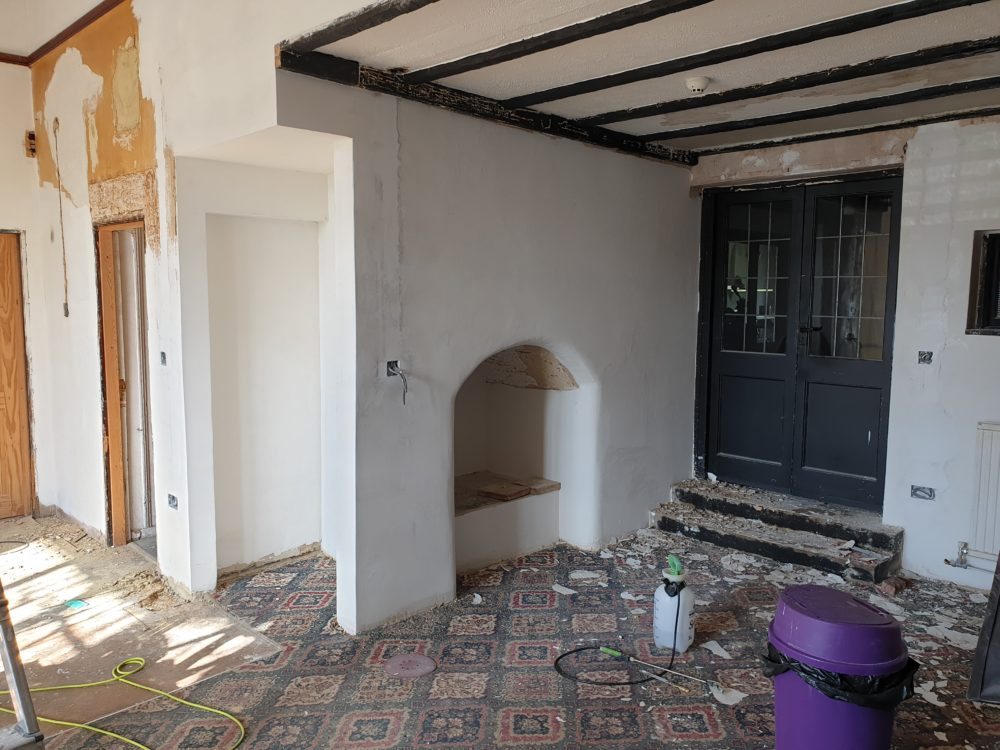
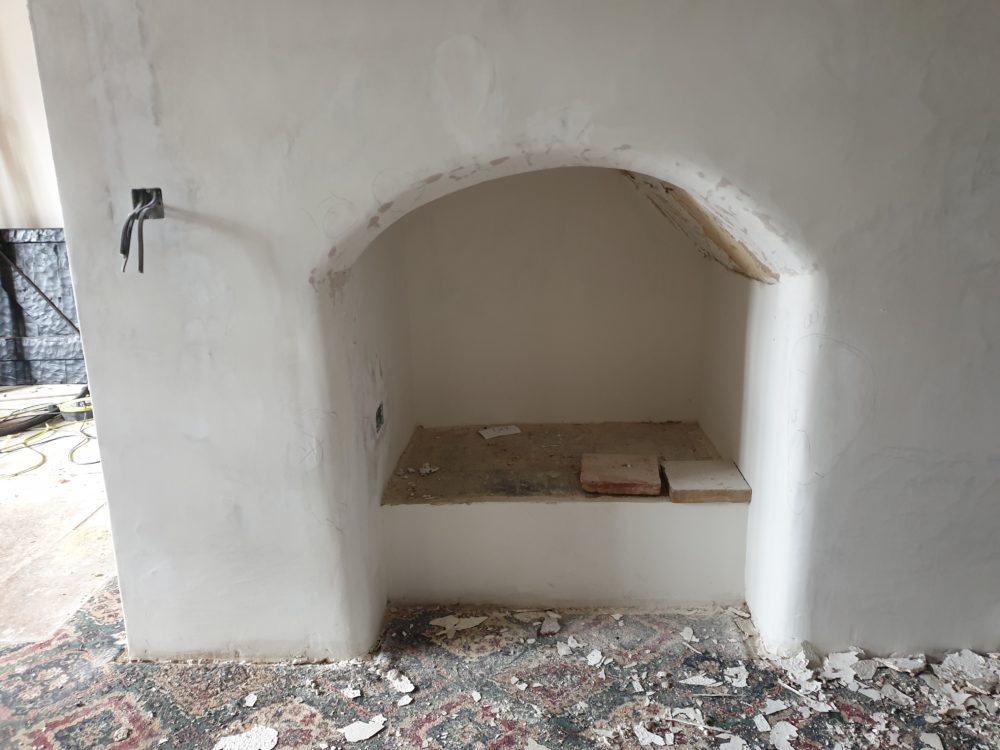
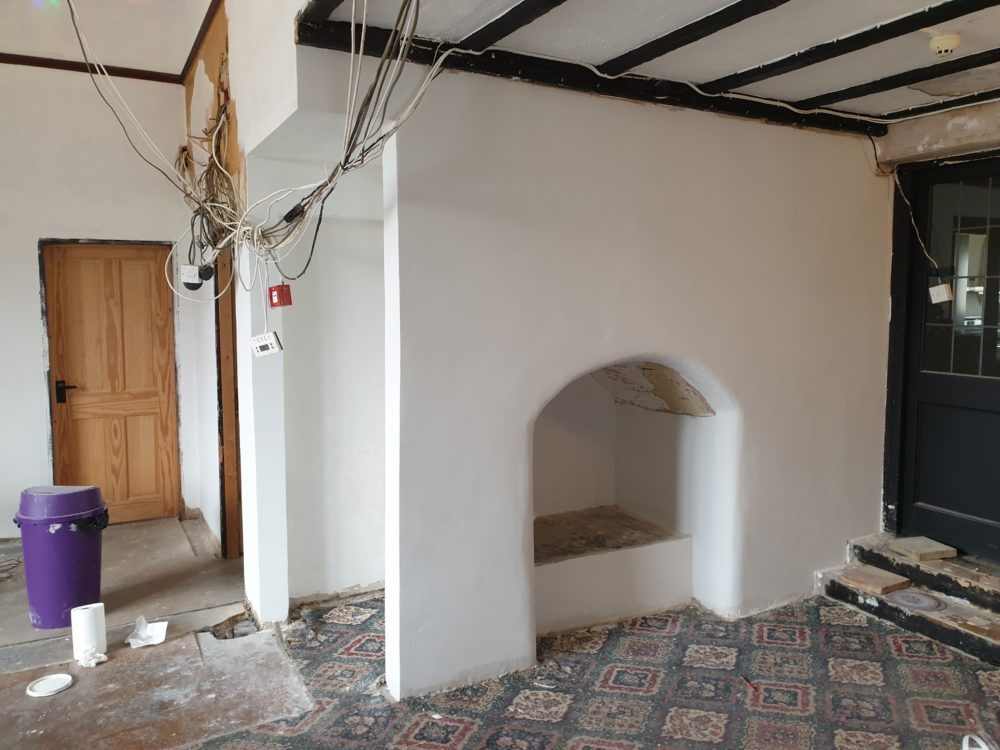
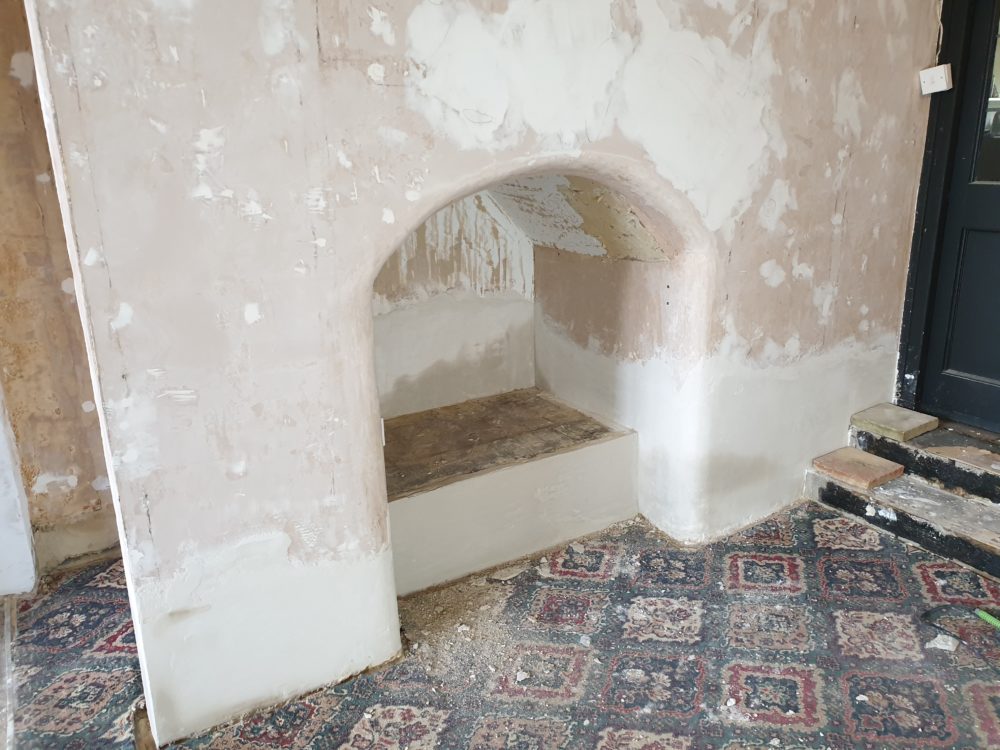
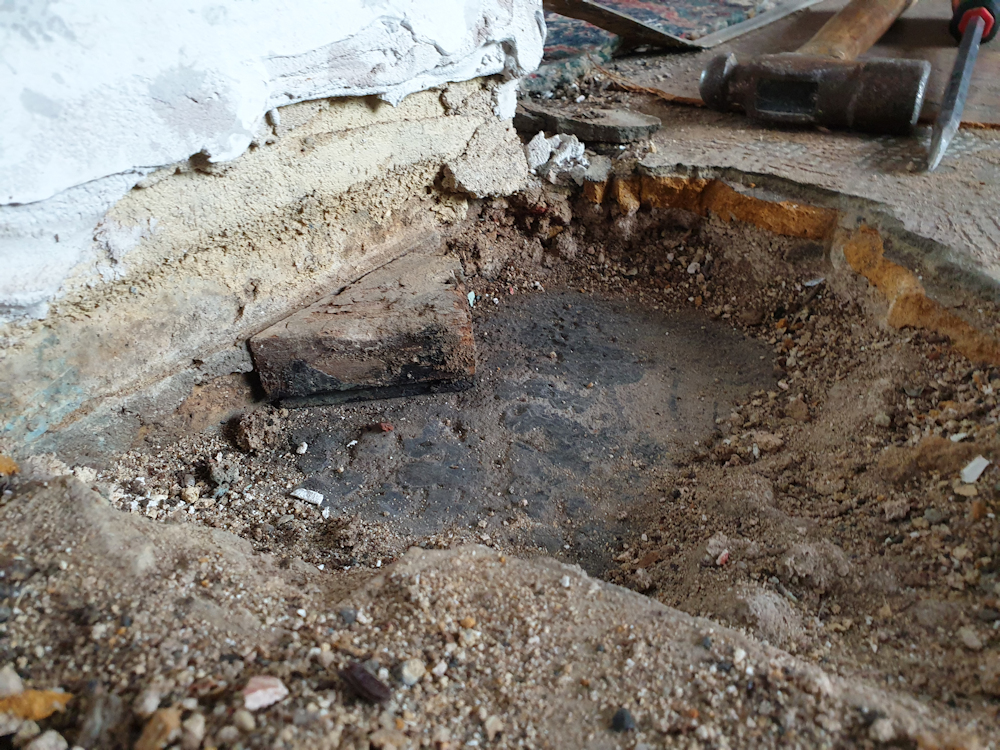
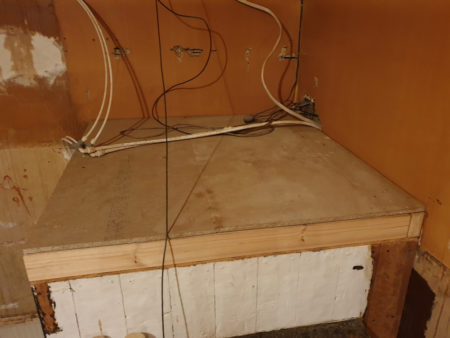
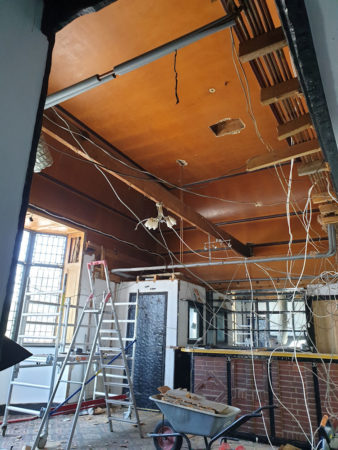
The last bits of loose plaster in the room have been knocked off the fireplace and the wooden former is in position to make an edge for the new plaster before I figure out what sort of trim or shelf I might eventually put in it’s place.

fireplace

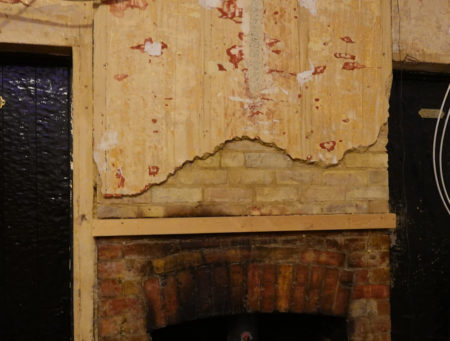
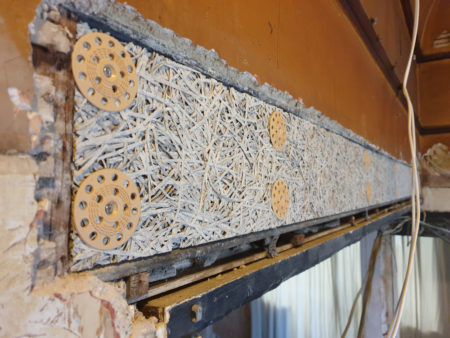
It’s a big area with more than one room and takes ages.   I’ve been scatting around the place doing bits on everything because drying times.    Here’s the chimney again after 2 coats base plaster, 2 coats repair plaster, then a bit of filler to tidy everything up.

At the time of edit I’m wondering if I can get it all finished and painted in time for my Christmas photo.  Get the fire burning and lean nonchalantly on the mantle that isn’t there yet.  One day left.  Sure to happen but the paint might still be wet.

plastered-fireplace

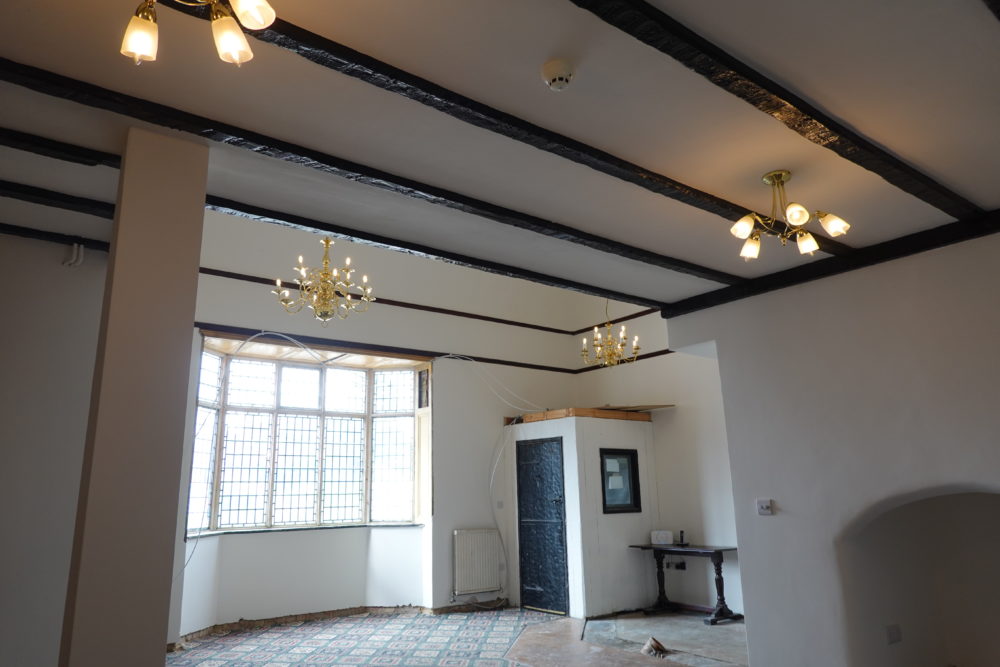
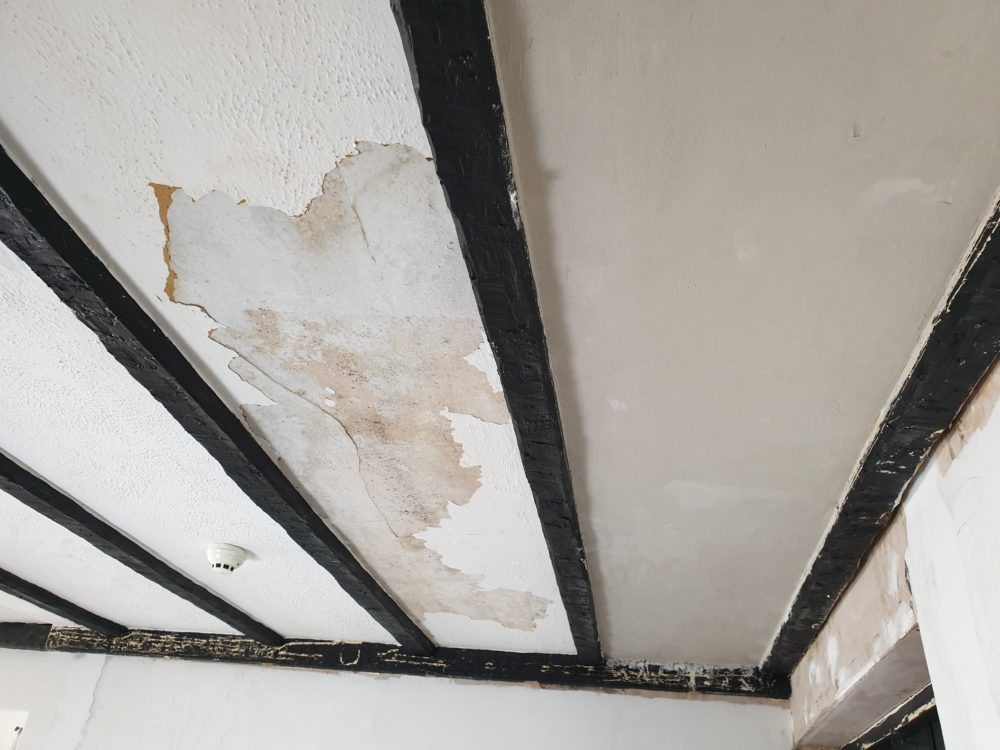
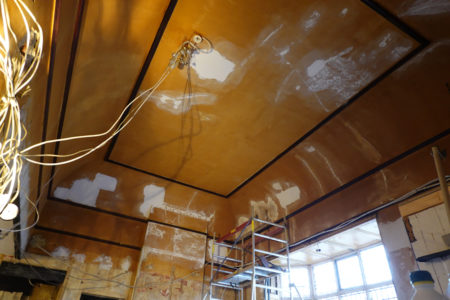
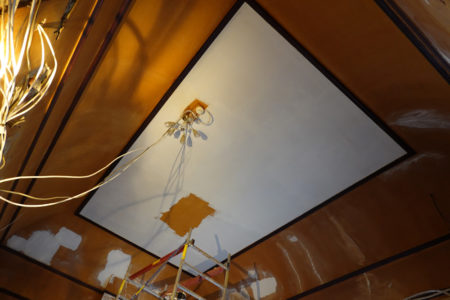
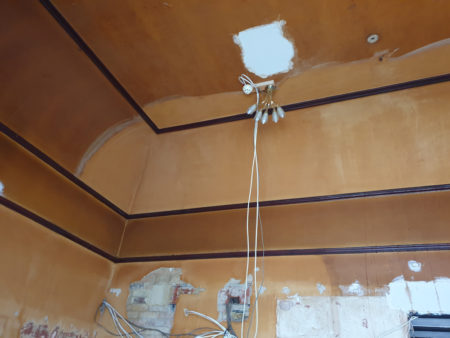
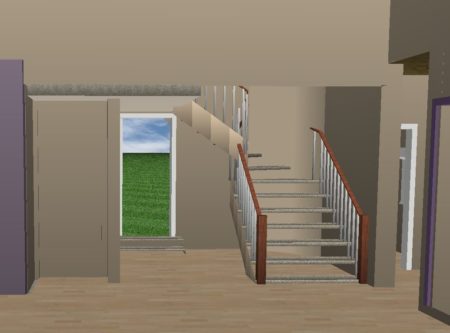
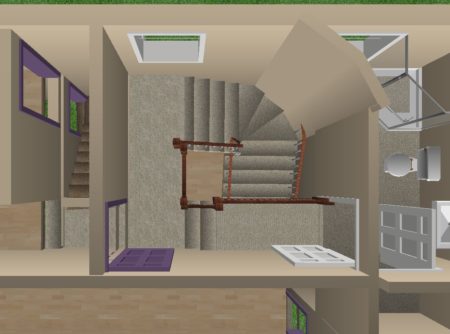
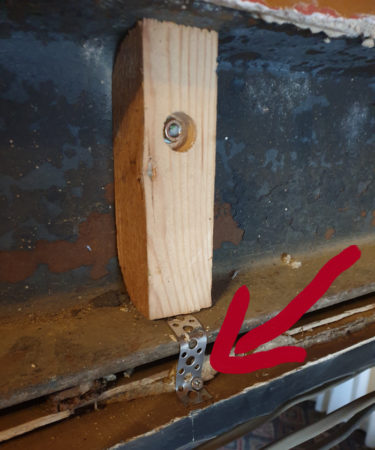
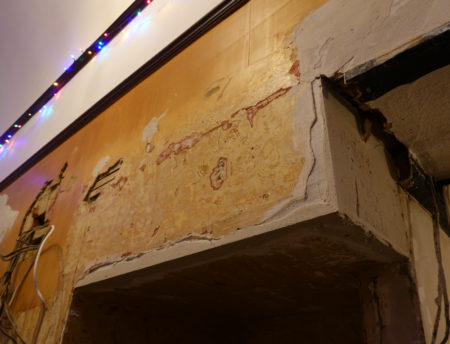
Bits of wood are excellent to use as corner formers.  Removing mock tudor had pulled the corners off the weird box in the ceiling that hides the top of the stairs.   A bit of thin ply marked with the line of the ceiling,  cut to shape and screwed to the wall was fab for quickly forming the corner.  The plaster pushed into the gaps also made the edges for the remaining plastering.

sharp-corner

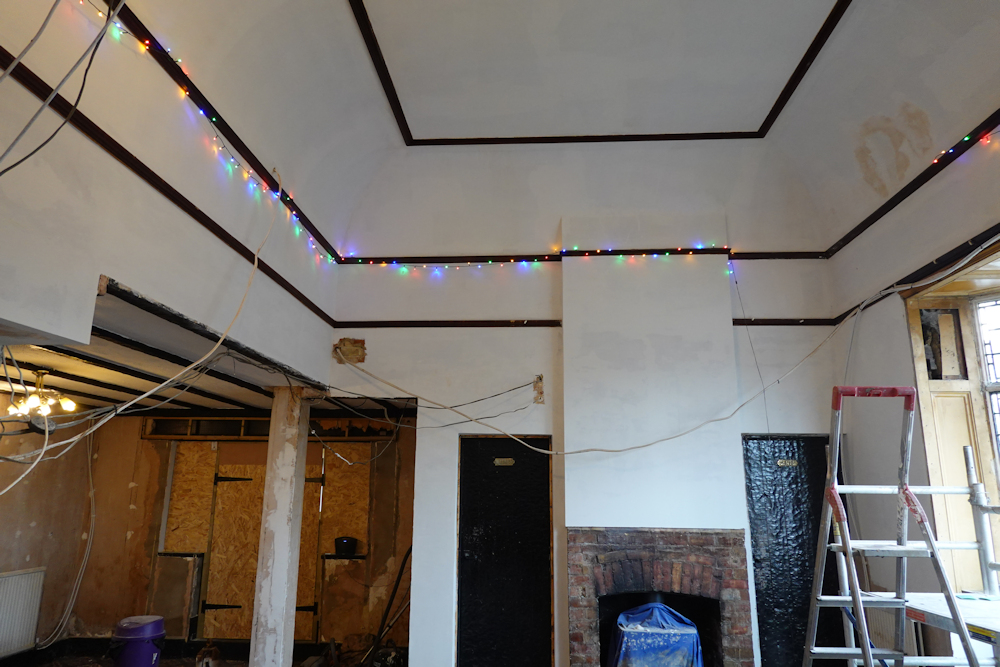
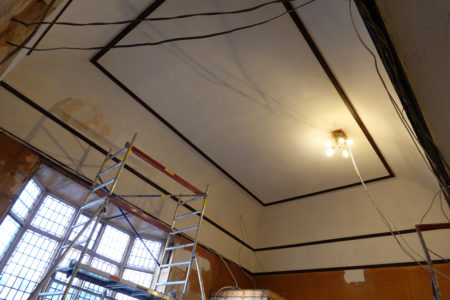
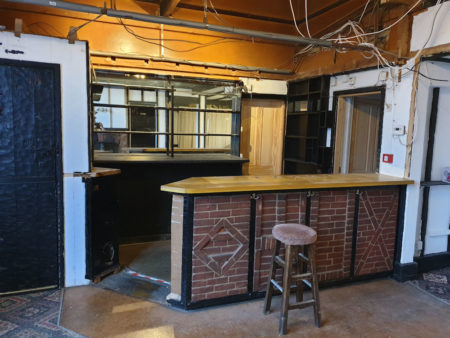
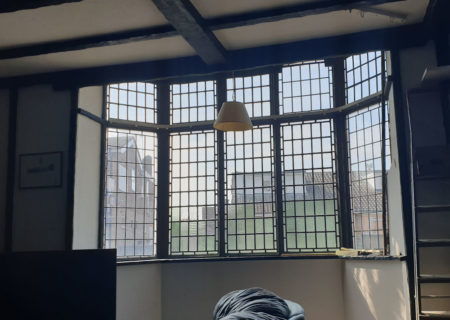
I doubt I’ll get all the walls painted for Christmas, but the lights are up!

Painting the ballroom ceiling

The ceiling ended up with quite a lot of plaster and filler in the repairs and cracks.  As the filling neared the end the thing that took the most time and effort was moving the scaffold tower around.   It’s been good exercise.

I finally measured the ceiling height – it’s about 4.5m and quite awkward to access.   That probably explains why it has only had 2 coats of paint over the last 99 years.   The first coat was a purple-red which must have been very dark.  The second was an off-white which has become brown due to tobacco smoke.

ceiling-prep

Finally a photo that isn’t completely brown.  I’ve painted the centre panel with Earthborn clay paint.   I took the photo before covering up the last little bit just to show the coverage.   Two coats should be enough for the ceiling which is handy as around 30 moves of the scaffold tower will be required for each coat on the whole ceiling.

So far the repairs aren’t noticeable through the paint.   But I have found a couple more cracks and a bit of lifting paint that I missed.   Overall it’s looking pretty good so far.

center-panel

It’s starting to look smart with the rest of the ceiling painted.   Some salts have come through from a bit of plaster that got wet before the roof was replaced.   It’s dry now so a bit of primer should block the salts.

The white paint has changed the light in the room.  It is becoming much brighter in there.

ceiling-painted

A bit of paint is quite motivating.  The plan is to repeat the process on the walls, but I’ll likely do one or two walls at a time and then paint them for a sense of achievement rather than wait for all the walls to be finished.

Plaster repairs in the ballroom ceiling

The were a lot of holes in the ballroom ceiling and they are slowly being filled with plaster.   The walls have been damaged quite extensively and will probably need a skim, but most of the brown coloured ceiling above is in good condition apart from a few holes.   The ceiling wasn’t brown originally – the colour is from a century of tobacco smoke.

Once the plaster on the ceiling is finished I’m planning the first coat of ceiling paint to brighten up the ballroom.  I’ll do the second coat when I start decorating.

plastering-progress

The walls below can’t be completely finished until the electrician has been, but I can save time later on by making them straight and getting some plaster on them.

For base coat directly on bricks I’m using a lime render similar to the one I used outside.  It goes on much more thickly and smoothly than the white lime repair plaster which is more of a skimming plaster.    I realised while applying this bit that small bit of (modern) plaster above doesn’t line up with the door jam.  Oops – will knock that off and extend the new plaster to the original a little higher.up.

I found some rotten parquet at the bottom of this bit of this wall.   I’m hoping the rest of the concrete floor in the ballroom wasn’t laid over parquet because that would be really annoying.  But it is good to find out the main room was once finished in parquet like the snug.

base-coat

For the lath I’m using St Astier R50 Ultrafine lime plaster because I panic bought a few bags before lockdown.   It’s a skimming plaster intended to go over plaster or paint or whatever is there.   It is strong, sticky, and has a chemical set so it doesn’t crack.  It’s not exactly the right stuff for base coats as it can’t be applied thickly with any neatness.

Most of the repair plaster repair is now close to the surface and just needs finishing.   This one was a fiddle as the picture rail had been cut away.    I spliced in a a bit of picture rail recovered from the chimney and the join isn’t noticeable from the ground.

base-plaster

I’ve decided to clean the ceiling using sugar soap before the final coat of plaster on the repairs.   I had thought the paint was gloss, but it seems the gloss was just the muck on top.

Applying the soap with a sponge on the ceiling overhead and scrubbing was physically exhausting and the next day was a recovery day.  I’ve been adjusting the process  – spraying and soaking the surface, letting the sugar soap soak, then just wiping off to reduce the effort and that has sped things up.

cleaning-ceiling

The entrance vestibule now has a roof.   the ceiling of the vestibule was once part of the false ceiling.   I cut the joists back but the ceiling is weak and the vestibule made the corner of the vaulted ceiling above inaccessible by scaffold tower.

I had imagined throwing a few loft boards on top would have been a minor job but it took a whole day.  The odd shape was one thing but a lot of time was spent routing joints to make the most of what I had after I found my stock of loft board wasn’t all the same thickness.

The new roof provides a good platform for painting this corner of the ceiling.

entrance-roof

There is not much plaster repair in this post because I find it really boring.  It’s day after day.   I’ve been building up repair plaster to just below surface level then doing the final skim with filler and using a great big drywall sander to get things level for paint.

It’s almost finished.   I’ve tried a bit of paint over the repairs and the repairs are not noticeable.    One day more and surely I’ll be able to at least paint the ceiling.

almost-finished-filling

Some methods to repair big holes in lime plaster

The beautiful vaulted ballroom ceiling has quite a lot of big holes caused by the false ceiling, and then by plumbers and electricians fitting things above the false ceiling.    I’ve been filling the holes to get ready for plastering.

My favourite method is to use bricks.   This is a corner of the chimney which had been cut away to install a beam that supported the false ceiling.  There is no need to be neat as the bricks will be covered.

bricks-replaced

In the middle of the ceiling there was a big square hole which seems to have been made by an electrician for some reason. It lent itself perfectly to a square of woodwool board screwed to some 2 by 2 attached to the joists.

woodwool

I later tried screwing some woodwool board behind some lath on a smaller hole but the screws didn’t hold in the woodwool so that’s a poor approach.

It doesn’t matter much as it’s only a very small hole and the plaster itself will provide enough strength to hold itself up.  For a bigger hole there would be a need to attach some actual wood behind the woodwool to provide something to screw in to.

woodwool-above-lath

The edge of the false ceiling had been cross nailed to the lath supports using very big nails.    Removing the ceiling caused a lot of damage to the lath and plaster.  On this occasion after removing the loose plaster the supports were mostly exposed so I could just replace the broken laths with new ones the same way they were installed originally.

The lath is original to the house (it mostly came off the big I beam) and I soaked it in a bath for a few hours to make it expand before fitting it.   That way it hopefully shouldn’t expand again when it is wet by the new plaster which might otherwise cause the wall to bow.

lath-replaced

I have of course been botching too.    There are some awkward holes which would need to be extended significantly to get back to the joists.

I’ve tried exposing a couple of inches of the ends of broken lath and then attaching new lath to the old lath by cross nailing using lots of stainless brad nails.   The result seems secure.  But I’ve only tried it in one place.

laths-connected-to-laths

I’m doing quite well with the ceiling and have been doing the first plaster coat as I go along.   It’s been years and I’m starting to remember how not to apply plaster.  First rule I forgot for lime plaster or anything lime is to put as little water in the mix as possible.   Of course I started on a ceiling and I made a mess.

Big bay window painted!

The weather has been too hot, too rainy or too unpredictable for weeks, but finally today I put the first coat of linseed paint on the bay window that I stripped in April.  It’s a big old thing.  It took all day, a third of a tin of paint, and there were more than 50m of edges to cut in.

It’s looking pleasingly Gothic now and it finally matches the rest of the front.

big-bay-painted

I found a photo from August 2013.   I like it better now.

big-bay-2013

Grand Staircase Ideas

Now I have a ballroom I’m thinking about a grand staircase.   Something like the one in Beauty and the Beast or Cindarella.

The staircase might fit in the old dining area.   It would turn one of the upstairs bedrooms into a shower room, but it would look fab!  I’m thinking something heavy in oak rather than the modern staircase in the renderings.

staircase-downstairs

Space is tight for a grand staircase.   But it would be a great opportunity to merge that awkward pillar into an actual wall.   I tried to avoid winders on the first landing but I’ll need them if I want to keep the outside door.

staircase-upstairs

I’m very much in the thinking phase.   It would fix a lot of problems upstairs at the cost of a bedroom.   Though it would make another bedroom more useable, add another WC, and give me a window in my shower room.  Downstairs I can position the Ladies behind the stairs and then add a new en-suite guest bedroom downstairs where the toilets were.

More much later.  At the moment I’ve decided it is a bad idea.

Plastering the big steel I beam

There is a big steel I beam in the ballroom that supports a corner of the house.   The false ceiling had been cross nailed to the wooden supports for the lath and plaster.   Removing the ceiling caused a bit of damage.

Lath was a silly idea in the first place – the span is too big.   I’ve cut the 3 original supports in the photo down to allow depth to screw some woodwool board on to support new plaster.

I-beam

There are a lot of holes in the ceiling made by plumbers. Quite often they made a few holes before they managed to get one in the right place.   The lath is still well fixed and it would be a shame to strip the plaster back to the supports to replace the missing bits of lathe.   I’m thinking of screwing woodwool board to the back of the existing laths to support repair plaster.

More soon….  or at least some time later.   I came to a problem with how the mock tudor beam at the bottom of the photo was attached.   It relied on some bits I’ve already removed from the walls.

I found it tricky and came back a few months later.   I’ve used builder’s strap to secure the decorative beam to the wooden parts bolted to the beam.  It works well.

builders-strap

Finally some woodwool board screwed onto those pieces of wood has the beam almost ready for plaster.   It just needs a bit of lath to fill in the gap below the beam..

woodwool-in-beam

Mock Tudor almost gone!

There is still a bit to do but it’s fun to look at the picture arithmetic.

Started with this:

mock-tudor

Subtracted this:

20200527_112057

Ended up with this.    Much nicer already 🙂

wallpaper-stripped

I’m planning to retain the mock tudor on the ceiling in the background but might try to soften it by removing the black paint and going back to the earlier wood finish.

Moving things around

Not a lot seems to have happened this month – that’s because I’ve been busy!   The office is now mostly cleared out and the snug is now an everything room.   I really like it and I’m surprised how much furniture I could get in there.   It never seemed that big.

The door and windows are completely stripped and just a little more prep needed before linseed paint.

snug-with-furniture

Most of the plumbing in the house has been removed, mostly so I could remove the rest of the false ceiling.    The 10 inch beam spanning the room would have been quite heavy so I propped it up on scaffold and cut it into manageable chunks.

The ceiling supports around the edges were cross nailed into the lath and plaster supports.   They didn’t come out easily and there is more plastering to be done than it looks.

The walls are being a pain too.  They seem to have been re-plastered in the 1970s with cement and gypsum.  They have textured paint, then wallpaper, gloss paint, and finally lots of emulsion.   It is very time consuming to get back to the plaster so I’m thinking either a scabbler or just knock the whole lot off and try again.   It’ll probably be a bit of both.

ballroom-ceiling

First fix electrics on that side of the house is loosely planned in a month or so.  I’m having a rest and taking a week to tidy and organise the living spaces and then should probably get busy getting ready.

Last orders at the bar please

It’s raining outside so I decided to demolish the bar.    It’s a shame as a lot of effort and craftsmanship went into that, but it’s in the middle of my dance floor and the parquet arives next week.

The bar had split the room into two corridors leaving an awkward space for the living room.    I missed the opportunity for a selfie in the photo. Too late now.  You’ll have to imagine.

bar

Removing the bar opened up and brightened the downstairs.   I found some history too.    On the right of the photo the brickwork at the end of the bar appears never to have been plastered, and the other walls have been replastered to the same level then just skimmed a little higher.  I think the room must have been wood panelled when it was built in 1920.

The dark blotch on the wall to the left indicates the location of the original entrance vestibule.  The wall also has outlines of the mouldings where they were painted around, so I have the shape of the original mouldings!   Also the colour of the original paint – a dark purple.   I had hoped to keep the current vestibule, but it is so tied in to the false ceiling I doubt it will survive the rest of the false ceiling removal.   I want to move the vestibule door to the other side too but plan to reuse the door as I think it is cool.

bar-removed

I very quickly missed the bar as it had been really useful for putting things on.   So I’ve built a new bar from solid oak bar using 52m2 of parquet flooring.   It took 3 hours just to stack the 1500 pieces so I imagine laying them might take even longer.   I was reluctant to use parquet after the 2 weeks it took to replace 6m2 in the snug, but it’s a ballroom now so it needs parquet.   I refuse to be outdone by The Palace of Versailles!

parquet-table

When it stops being rainy I’ll update the window painting post below.

Stripping the ballroom window

I painted this window myself in 2013.  6 years later the nasty horrible modern gloss paint has cracked and is peeling.   Modern gloss paint is not great for UV light so will crack and let water in.   It is also waterproof so the water can’t evaporate out again.   Modern gloss is not flexible so it first cracks at the joints where you least need water ingress.

Most of the rest of the house is finished in linseed paint and everything painted in 2015 is still perfect and well protected.  Linseed paint never needs stripping as it doesn’t crack.  It just fades (this gloss seems to have faded too) and needs toping up with another coat of linseed every 10 years or so without the need for any preparation.   Linseed oil paint is the plan for this window so I don’t need to restore it every 5 years, but for best results I need to strip the modern paint off the window..

failed-gloss-paint

It’s a big old window and I’ve been putting it off.    It’s now just about the only exterior woodwork in the house that hasn’t been stripped and repainted in Linseed paint.

Modern gloss paint is very slow to remove and the profiles are fiddly.   I reckon I’m in for 3 days stripping this window.  But the weather is really nice at the moment.   And it’s really good to chat to meighbours as they pass by my socially distancing scaffold.

Fortunately I don’t have to touch the sill as it appears to be made from cement.  It seems to be functioning OK and not causing other problems so I’m going to leave it alone – whatever wood that remains under the cement can dry to the inside.

I stripped the paint from inside too.   There was an amazing thickness of paint – maybe 2mm on the inside and 5mm in the corners, and all of it had been applied after 1979!   There is a detail photo here.    It wasn’t too bad a job and took a couple of days in total.

The weather forecast isn’t so good next week so I’ll make a start on the secondary glazing before finishing stripping the outside.

inside-stripped

It rained all week on and off.    I demolished the bar and then realised the front door could be lifted off it’s hinges and replaced whenever it rained so I decided to strip that too.    It is the original 1920(ish) front door.  The red bit in the middle is a panel that was replaced with plywood maybe around 1990 when the burgundy paint was applied.   The door started off white, went brown, then black, then green, burgundy, then a darker green.   I notice it hasn’t been yellow yet.

The door has survived remarkably well.  Even the very worn weatherboard at the bottom of the door is the original.   The door was re-mounted to hinge at the other side at some point, and the wear on the weatherboard suggests this was perhaps 1/3 of the way into it’s life, so maybe 1950s. A number of hinge arrangements were tried before they settled on the current one.

A few of the mouldings have been replaced and some of them don’t work very well so I’ll need to make some new mouldings that work better with the old ones before painting.   The stained glass has been lost.    Later I’ll do something completely original with that.

stripped-door

It’s a big window and taking a long time to strip.    I had a lovely day in the sunshine talking to neighbours as they walked past.    I haven’t finished stripping the window yet so I can have a lovely day tomorrow too.

Human contact has brightened my mood and I’m thinking about reinstating openers on the end bay windows so I can chat to neighbours who pass by when I’m doing the parquet floor.

stripping-top-window

Exposing the 1920s Ballroom Ceiling

I love mock tudor as much as the next person, but I think sometimes it can be taken a little too far.

mock-tudor

Above the ceiling in the foreground is a well preserved 1920s vaulted ceiling and I’ve been careful to avoid running any services in there just in case I wanted to expose it again.    Exposing the original 1920s ceiling (as well as finding a slightly different balance for the mock tudor) is my plan for the next couple of weeks.

I’ve realised it will be a super project to keep me sane during the lockdown.

laicey-legs

I’ve been unpicking the ceiling bit by bit.  It has been easy as the ceiling is nailed together and I have a crowbar and a big hammer.  With the boarding gone it is easy to see what is structural and in what order everything comes apart.

I had been a bit worried about the big beams which are made from 2 lengths of 6×2 pine nailed together so are quite heavy.    Chopping them in half then lowering them on rope worked really well and was safer than it looks in the photo!    Better to have no help as I wasn’t worrying about where anyone else was standing so could concentrate on me.

removing-beam

The main ceiling construction was nailed outwards at each end.    I found the most convenient method of removing the joists was cutting through one end with a reciprocating saw, then crowbar the joists from the central support.   Once those nails got to the end of their travel the joists started a slow and gentle fall to the gound with very little assistance and by the time they got to the ground they had extracted the nails at the other end by themselves.

Some bits will have to stay in place for now to support pipes and lighting.    Normally I have a tidy at the end of the day but removing the ceiling was exhausting so I’ll tidy tomorrow.

celing-removed

It is very dark in there now.    I think the ceiling was once white but hasn’t been painted since 1920.   Pub tobacco smoke has caused it to darken.   A huge chandelier or two will hopefully brighten it up a bit.

I’ve had a sweep up and will get on with something else until I can get plumbers and electricians around to let me finish the ceiling.   I’m turning my attention to considering what sort of floor would be nice in a ballroom.   Of course the first photos that popped up were the Palace of Versailles and that was good inspiration.   I’m thinking more parquet.

Uncovering panelling around the big bay window

I’ve been putting off doing anything with the bay window in the main room, mostly because it is very big and will take ages.  The other reason is I’m trying to avoid taking another room out of action until some others are more finished.  The room was double height from the 1920s to the late 1970s when a false ceiling and mock tudor was applied inside.

The void above the ceiling can be seen here:   http://www.the-salutation.co.uk/blog/domed-lath-ceiling/  You can probably see where I’m going with this and with modern insulation and a scaffold tower for decorating it will look spectacular.

big-bay

But I don’t want to start on the main room before I’ve finished some of the other rooms.   I just want to secondary glaze the window as it was really cold in there last winter.

I’ve started off having a peek behind some of the mock Tudor and look what I’ve found – 1920s panelling!   This is going to be fun.

panelling

A bit of destruction later and it turns out the panelling extends above the window too. It has survived in remarkably good condition.   A couple of panels have been removed for access in the past, but it should be possible to make new panels and mouldings and restore the panelling.

You can see the scale of the window when there is someone in front of it on a scaffold tower.    The whole room is oversized.

wood-panelling

A false ceiling was largely supported by a bit of wood bolted to the 17C timber frame.   The holes in the top of the panelling provided access for that and I can’t fit new panels until I remove the false ceiling.

The paint on the inside of the window was very thick and was getting in the way of my secondary glazing prototyping.   Removing the paint will take a couple of days, but the mouldings underneath are pretty.

paint-removal

See Further progress on the window.